3D printing is incredibly rewarding when it works, and incredibly frustrating when it doesn’t. Beginners and experienced users alike run into the same recurring failures: prints that won’t stick, layers that drift sideways, surfaces that look like spaghetti, parts that warp off the bed. The good news is that almost every one of these failures has a known cause and a fixable solution.
This complete 3D printing troubleshooting guide walks through the most common problems, what causes them, and exactly how to fix them, step by step.
Quick Troubleshooting Table: Problem ? Cause ? Solution
Use this as a quick reference, then dive into each failure mode below.
Why Do My 3D Prints Keep Failing?
The honest answer: 90% of print failures trace back to one of three root causes:
Calibration that has drifted, bed levelling, e-steps, flow rate
Wrong settings for the filament, temperature, speed, retraction
Mechanical wear or contamination, clogged nozzle, dusty linear rails, dry filament gone wet
Diagnosing well means asking: what changed since the printer last worked? That single question solves most problems.
1. Bed Adhesion Issues
Problem: The print does not stick to the build plate. It lifts mid-print or refuses to start cleanly.
Cause: Dirty bed, uneven levelling, incorrect first-layer height, or a build surface that has lost its adhesion (PEI, glass, magnetic plates all wear).
Solution:
Clean the bed thoroughly with 91%+ isopropyl alcohol before printing
Re-level using the printer’s auto-level routine, or manually with a paper test
Tune the Z-offset until the first layer is slightly squished, not glassy thin, not standing tall
Slow down first-layer speed to 20–30 mm/s
Print a brim or raft for tall, narrow parts
Bed adhesion is the foundation. Get this right and most prints succeed.
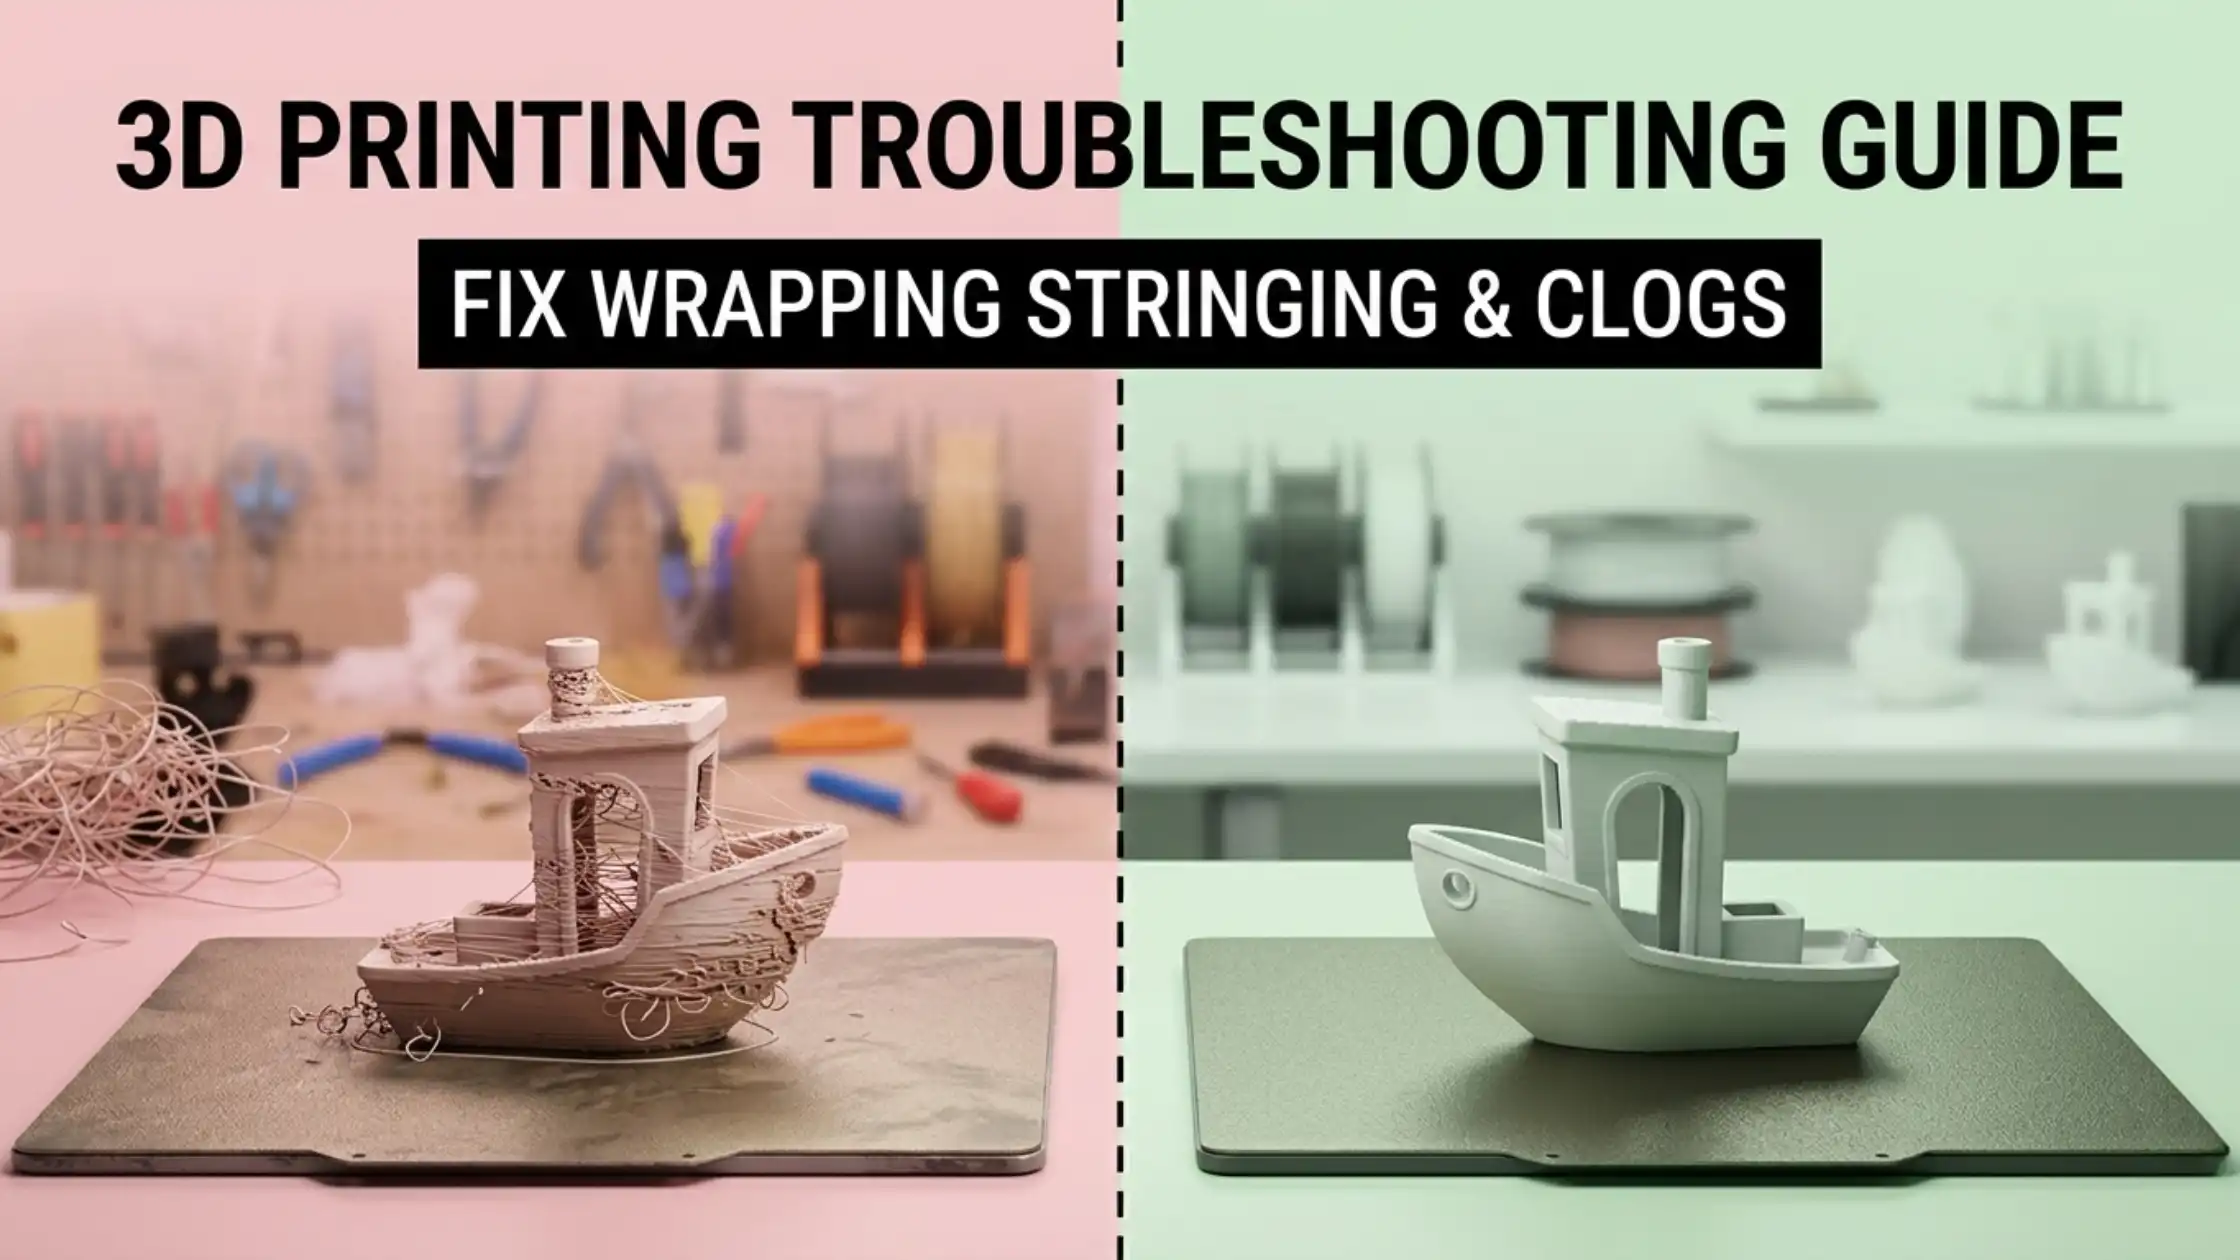
2. Stringing in 3D Prints
Problem: Thin strings of plastic appear between separated parts of the print.
Cause: Incorrect retraction settings and/or nozzle temperature too high for the filament.
Solution:
Drop nozzle temperature by 5–10 °C and re-test
Increase retraction distance (4–6 mm for Bowden tubes, 0.8–2 mm for direct drive)
Increase retraction speed slightly (40–60 mm/s)
Enable combing in the slicer to reduce travel distance
Run a temperature tower and retraction tower to nail the exact values for your filament
Stringing is one of the easiest issues to fix once you’ve calibrated retraction for your specific filament-printer combination.
3. Warping in 3D Printing
Problem: The corners of the print lift away from the bed as it cools.
Cause: Uneven cooling, especially common with ABS, ASA, and large PLA prints.
Solution:
Use a heated bed at the correct temperature (60–70 °C for PLA, 100–110 °C for ABS)
Enable an enclosure for ABS, PETG, and nylon prints
Add a brim (8–10 mm) or raft for added grip
Slow down the fan during the first 5–10 layers
Clean and prep the bed properly
Warping is usually solved by addressing the cooling profile, not the bed.
4. Nozzle Clogging and Under-Extrusion
Problem: Filament doesn’t extrude properly, prints look weak or have missing layers.
Cause: Partial nozzle clog, low flow rate, filament feeder slipping, or moist filament.
Solution:
Run a cold pull (or “atomic pull”) to clear the nozzle
Verify filament diameter (1.75 mm should measure 1.70–1.80 mm)
Increase nozzle temperature by 5 °C
Re-check the extruder gear for grub-screw slip
Dry filament in a filament dryer at 50 °C for 4–8 hours if it has absorbed moisture
If clogs recur, replace the nozzle entirely, they’re cheap and wear out.
5. Over-Extrusion
Problem: Excess plastic creates blobs, rough surfaces, and dimensional errors.
Cause: Flow rate set too high, or extruder e-steps not calibrated.
Solution:
Calibrate e-steps using a 100 mm extrusion test
Reduce flow rate (extrusion multiplier) by 2–5%
Verify filament diameter measurement in slicer
Reduce print temperature slightly to firm extrusion
Over-extrusion is harder to spot than under-extrusion but just as damaging to print quality.
6. Layer Shifting
Problem: Layers appear offset midway through the print, ruining vertical alignment.
Cause: Loose belts, excessive print speed/acceleration, or stepper driver issues.
Solution:
Tighten X and Y belts, they should be firm without being over-tensioned
Check pulleys for grub-screw slip
Reduce print speed by 20–30%
Reduce acceleration in slicer or printer firmware
Inspect stepper drivers, if they overheat, layer shifts follow
A printer that suddenly starts layer-shifting after months of stable printing is almost always a belt or pulley issue.
7. 3D Printer Not Printing Properly
Problem: The printer behaves erratically, pauses mid-print, or refuses to start.
Cause: Firmware bugs, corrupted G-code files, USB issues, or hardware fault.
Solution:
Update to the latest firmware (and the matching slicer profile)
Re-slice the model from scratch and try a different SD card
Check all wiring, especially the heater cartridge and thermistor
Restart the printer fully (power cycle)
Reset to factory settings if recent changes caused issues
If the problem persists after these steps, contact your seller’s technical support. 3idea provides after-sales support and technical troubleshooting for every printer we ship, and submit a service request at https://www.3idea.in/support.
Best Settings to Avoid 3D Printing Failures
A general settings starting point for most common filaments:
PLA: 200–215 °C nozzle, 60 °C bed, 60 mm/s
PETG: 230–245 °C nozzle, 80 °C bed, 50 mm/s
ABS: 230–250 °C nozzle, 100–110 °C bed (with enclosure), 50 mm/s
TPU: 220–235 °C nozzle, 50 °C bed, 20–30 mm/s
Tune from these starting points using temperature towers and retraction tests. Every printer-filament combination has its own sweet spot.
Tools Needed for 3D Printer Maintenance
Essential maintenance kit:
Set of 0.4 mm cleaning needles
Hex key set (1.5–6 mm)
Replacement nozzles (0.4 mm, plus 0.6 mm for fast prints and 0.2 mm for fine detail)
Replacement PTFE tubing
Filament cutters
Digital callipers
Bed-level test paper
Spare belts and grub-screws
A well-stocked maintenance drawer keeps small problems from becoming days of downtime.
Best Filaments for Fewer Print Failures
Filament quality dramatically affects success rate. Look for:
Tight diameter tolerance (±0.02 mm or better)
Consistent colouring and roundness
Properly sealed and dry packaging
Reliable brands, Bambu Lab, eSUN, and 3idea’s in-house filament range all deliver consistent results
Store filament in dry boxes with desiccant. Moist filament is the leading cause of stringing, weak layers, and surface defects.
How to Calibrate a 3D Printer Properly
A complete calibration sequence:
Bed levelling. Manual mesh or auto-level. Run a single-layer first-layer test square.
Z-offset. Tune until first-layer extrusion looks slightly squished.
E-steps calibration. Confirm 100 mm commanded actually extrudes 100 mm of filament.
Flow rate. Print a single-wall calibration cube and measure wall thickness.
Temperature tower. Find the cleanest temperature for your filament.
Retraction tower. Find the cleanest retraction for your printer + filament combo.
Acceleration / pressure-advance tuning for advanced users.
Run this sequence once per filament change or every few months. It is the single highest-leverage time investment a 3D printing user can make.
Beginner Tips for Successful 3D Printing
A short list of habits that prevent most failures:
Start with the printer manufacturer’s recommended settings, never tune blind
Change only one parameter at a time when troubleshooting
Monitor the first 5–10 layers of every important print
Keep a printing log, what worked, what didn’t, with which settings
Treat the first failure of any new filament as a calibration opportunity, not a loss
The difference between a frustrated beginner and a confident user is usually just disciplined testing.
When to Seek Expert Help
You can fix most problems at home. But seek expert help when:
Hardware components (mainboard, hotend, heated bed) are misbehaving electrically
Firmware-level issues persist after a clean re-flash
The printer is under warranty and the issue might void it
You’ve spent more than a few hours debugging without progress
3idea Technology offers India-based after-sales support, warranty service, and technical troubleshooting for all 3D printers and accessories we ship. Submit a support request at https://www.3idea.in/support.
Conclusion
3D printing is a discipline of patience and small adjustments. The failures look intimidating at first but follow a small set of predictable patterns, bed adhesion, retraction, cooling, calibration drift, and mechanical wear.
This 3D printing troubleshooting guide gives you the playbook for each. Apply the fixes systematically, build the habit of calibration, and within a few weeks you’ll have shifted from constant troubleshooting to consistently successful prints.
Save this guide. The next time something fails, and something always eventually does, you’ll know exactly where to start.