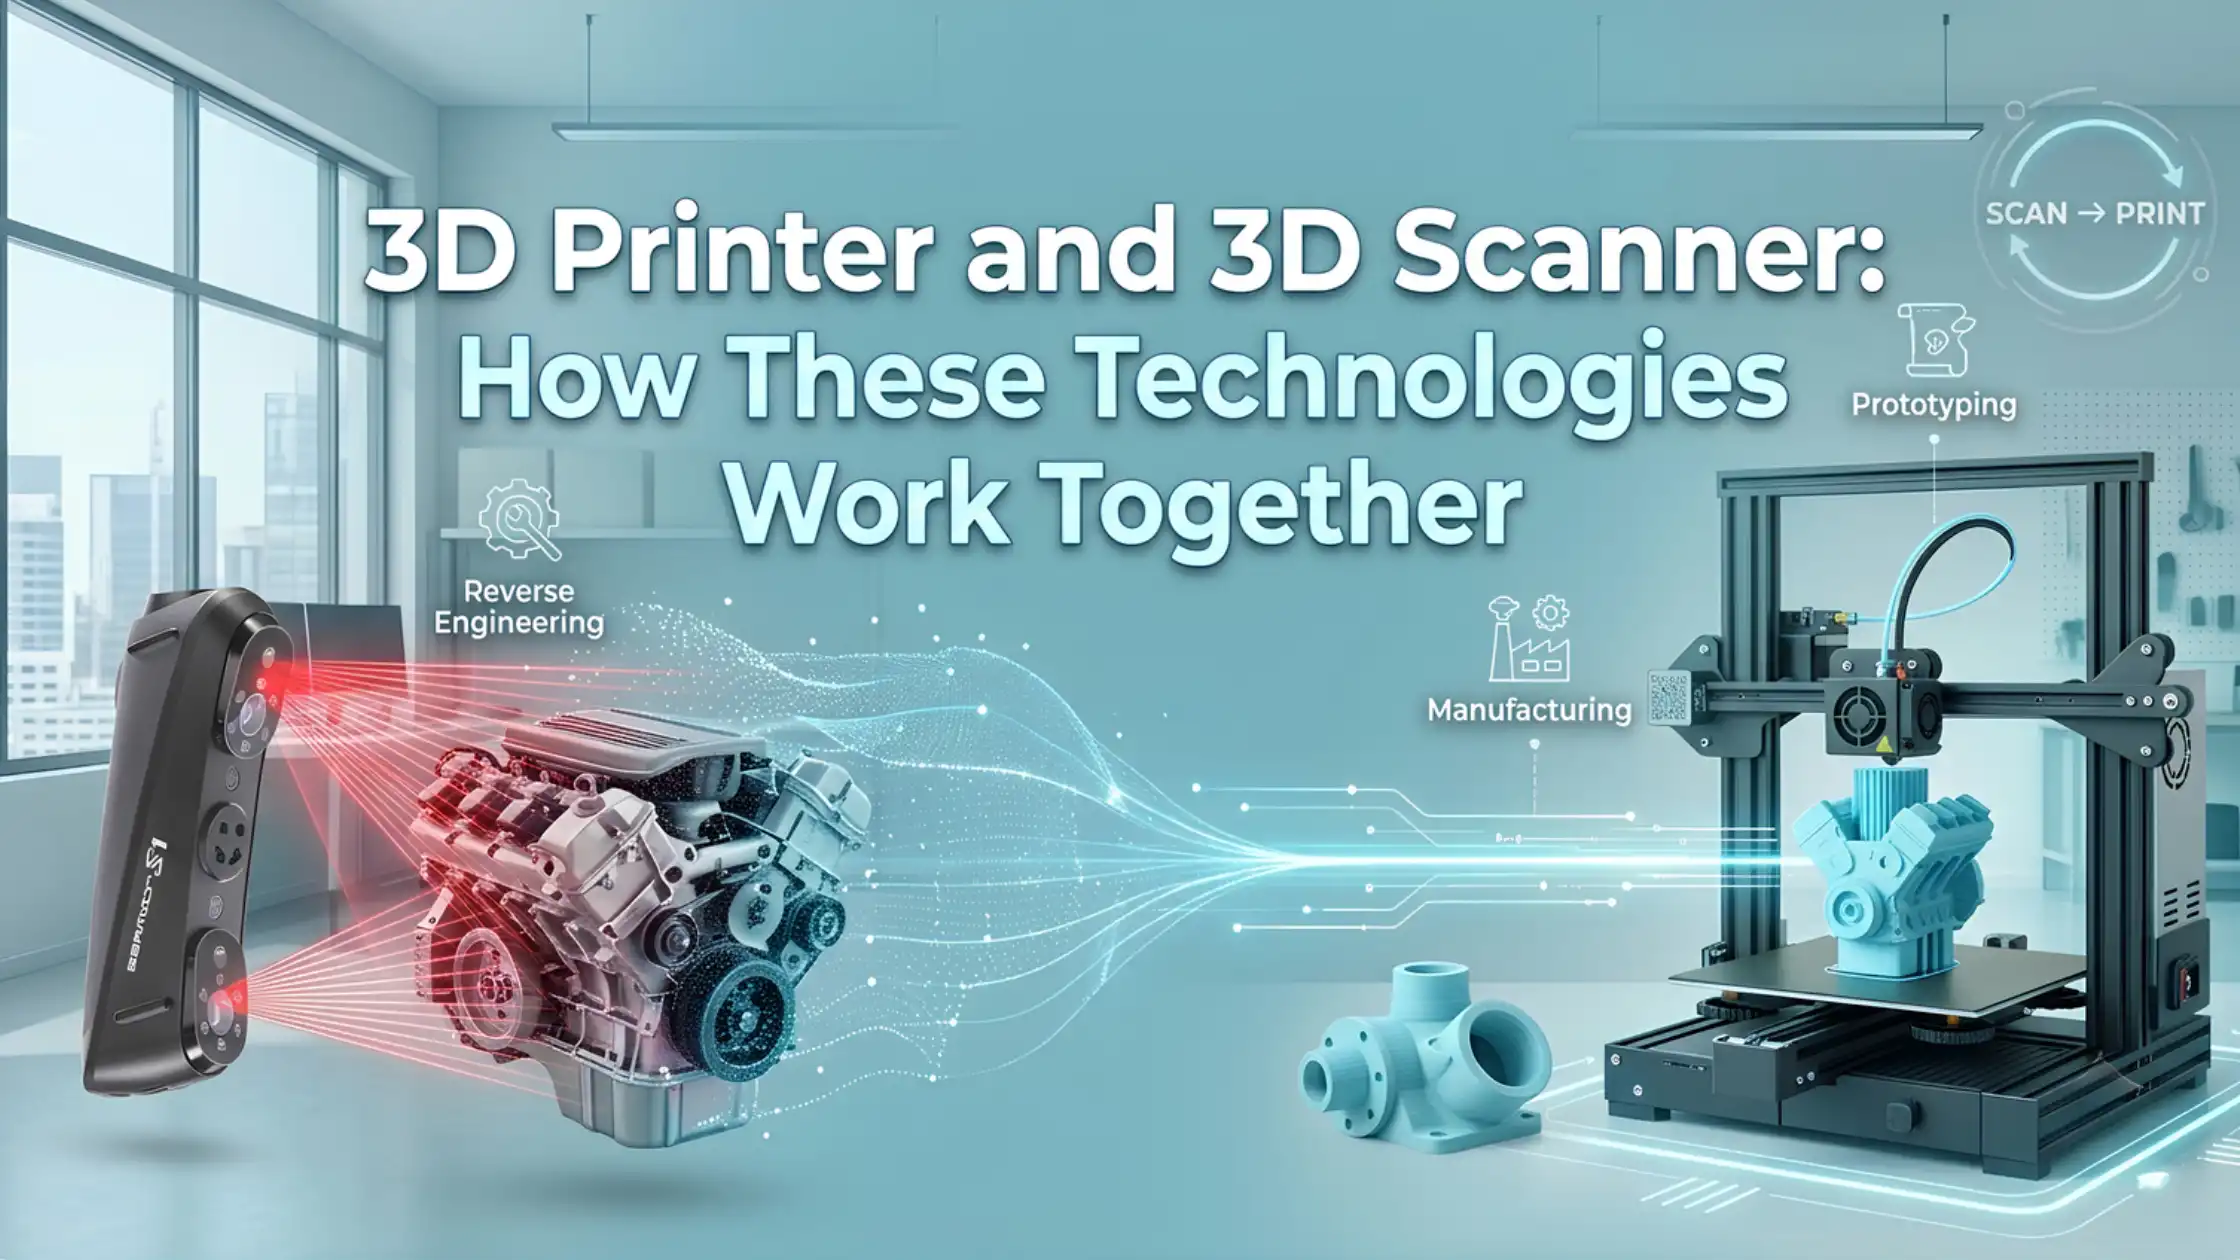
A 3D scanner and a 3D printer perform almost opposite jobs. A scanner captures a physical object's geometry and turns it into digital data, while a 3D printer takes digital information and turns it back into a physical part.When you combine both technologies, however, they create a powerful workflow.You can scan an existing component, process the captured data, modify the design and then manufacture a new version with a 3D printer. As a result, this combination can support reverse engineering, prototyping, replacement parts, product development, customisation and small-batch manufacturing.In simple terms:3D Scanner = Physical ? Digital3D Printer = Digital ? PhysicalTogether, they create a complete scan-to-print workflow.What Does a 3D Scanner Do?A 3D scanner captures the shape and, depending on the scanner and scanning mode, surface information of a physical object.Unlike a conventional camera, a 3D scanner records spatial information to create a digital representation of the object's geometry.Handheld and portable scanners can use technologies such as laser scanning, structured light or infrared-based scanning. During the process, the scanner collects data from different areas of the object and combines that information into a point cloud or mesh.However, a scan is not automatically a perfect CAD model.The captured data may require alignment, mesh cleanup, hole filling or other processing before you can use it for design or manufacturing. For engineering applications, you may also need to reconstruct or modify the geometry in CAD software.Therefore, scanner accuracy, object surface, tracking, scan coverage and post-processing all influence the final result.What Does a 3D Printer Do?A 3D printer performs the reverse part of the workflow.Instead of capturing a physical object, it starts with a digital 3D model. For FDM printing, the model is usually imported into slicing software, where the software converts the geometry into printable layers and generates the required G-code.The printer then heats the filament and deposits it layer by layer according to those instructions.The basic process looks like this:Digital Model ? Slicer ? G-code ? Filament ? Printed PartBuild volume, nozzle temperature, material compatibility, layer height, print speed and dimensional accuracy can all affect the final result.Consequently, the quality of the digital model and the capability of the printer both matter.How Do a 3D Scanner and 3D Printer Work Together?The real advantage appears when you connect both workflows.A typical process looks like this:Start With a Physical Object:- You begin with an existing component, product, prototype or part that you want to reproduce or modify.Scan the Object:- The 3D scanner captures the object's geometry and creates digital scan data.Process the Scan:- The raw data may contain unwanted points, gaps or alignment issues. Therefore, you clean and process the scan to create a usable mesh.Modify or Reverse-Engineer the Model:- Next, you can resize, repair or redesign the model. For engineering applications, you may reconstruct suitable CAD geometry from the scan.Prepare the Model for Printing:- Once the design is ready, export it in a suitable format such as STL or 3MF and import it into slicing software.3D Print the Part:- The FDM printer converts the digital model into a physical object layer by layer.Inspect and Iterate:- Finally, inspect the printed part. If something needs improvement, modify the model and print it again.This creates a useful cycle:Scan ? Modify ? Print ? Inspect ? ImproveThat iterative process makes 3D scanning and 3D printing particularly useful for development and engineering workflows.The Complete 3D Scan-to-Print WorkflowThe complete process can be visualised as:Not every project requires every step.For example, a simple decorative object might only need scanning, basic mesh cleanup and printing. On the other hand, a replacement component may require dimensional correction before printing.Similarly, a reverse-engineering project may involve scan alignment, CAD reconstruction, design modification and multiple prototype iterations.Therefore, the software and processing requirements depend heavily on the intended application.Where Are 3D Scanning and 3D Printing Used Together?The combination has applications across several industries and workflows.Reverse Engineering:- You can capture an existing component and use the resulting digital geometry as a starting point for recreation or redesign. This becomes especially useful when original CAD files are unavailable.Replacement Parts:- If a replacement component is difficult to source, scanning an existing part can provide a digital reference for creating a new version. However, the scan still needs to be checked for dimensional accuracy before manufacturing the replacement.Product Development:- Design teams can scan existing products or physical prototypes and use the captured geometry as a reference for new designs. As a result, designers can move between physical testing and digital modification more efficiently.Prototyping:- A physical prototype can be scanned, modified digitally and printed again. This makes it easier to test several design iterations without rebuilding every version from scratch.Custom Parts:- Scanning can also help create components that need to fit around an existing object, surface or assembly.Manufacturing and Inspection:- Manufacturers can use 3D scanning for digitisation, inspection, design verification and small-batch production workflows. The same scan-to-print approach can also help businesses preserve digital records of physical components for future reference.What Happens Between Scanning and 3D Printing?A common misconception is that a scanner simply produces a file that you can immediately send to a 3D printer.In reality, there is usually a processing stage in between.The workflow may involve:It is also important to understand the difference between a mesh and CAD model.A mesh represents the captured surface using many small polygons. CAD geometry, on the other hand, provides editable design geometry that is more suitable for precise engineering modifications.Therefore, a simple model may only need mesh cleanup, while a reverse-engineering project may require additional CAD reconstruction.What Should You Look for in a 3D Scanner and 3D Printer?The right equipment depends on what you want to accomplish.When Choosing a 3D ScannerConsider:Scanning accuracyResolutionObject size rangeTracking methodScanning speedSurface compatibilityPortabilityOutput formatsSoftware compatibilityFor professional workflows, also consider how easily the scanner handles complex geometry, difficult surfaces and larger objects.When Choosing an FDM 3D PrinterConsider:Build volumeDimensional accuracyMaterial compatibilityNozzle temperaturePrint speedAutomationReliabilityEnclosure or chamber requirementsMulti-material capabilityMost importantly, match the printer to the type of parts you expect to produce from your scanned models.3Idea 3D Scanners and Printers for Scan-to-Print WorkflowsFor users building a complete scan-to-print setup, 3Idea offers options across different scanning and FDM printing requirements.For scanning, the lineup includes RaptorX, Sermoon S1, Raptor, Ferret SE and Otter Lite, covering different requirements from portable scanning to more demanding professional workflows.For printing, options such as the Snapmaker U1, Bambu Lab X2D Combo, Bambu Lab P2S Combo and Anycubic Kobra X can complement scanned-model workflows with different combinations of speed, automation, multi-material capability and advanced FDM features.Rather than choosing a scanner or printer based only on specifications, consider the complete workflow. For example, a reverse-engineering application may prioritise scanning accuracy and software capability, while a prototyping workflow may place greater importance on printer reliability, build volume and material compatibility.Is a 3D Scanner and 3D Printer Combination Worth It?A 3D scanner and 3D printer combination can be highly valuable when you regularly need to capture physical objects, modify designs, reproduce components, create prototypes or digitise existing parts.It is particularly useful for engineering, product development, reverse engineering and small-batch manufacturing.However, not everyone needs both technologies. If you only print existing digital models occasionally, a 3D printer may be enough.The combination becomes more valuable when your workflow repeatedly moves between physical objects and digital designs.Frequently Asked QuestionsQ. Can a 3D scanner work with a 3D printer?Ans:- Yes, scanned data can be processed into a printable model and then manufactured using a compatible 3D printer.Q. Can you 3D print an object after scanning it?Ans:- Yes, but the scan may require alignment, mesh cleanup, repairs or design modifications before printing.Q. What is the 3D scan-to-print process?Ans:- It generally involves scanning, processing the mesh, editing or reconstructing the model, slicing and 3D printing.Q. Does a 3D scanner create an STL file?Ans:- Many 3D scanners and their software support STL output, although available formats depend on the scanner and software.Q. Do you need CAD software after 3D scanning?Ans:- Not always; simple models may only need mesh processing, while reverse engineering often benefits from CAD software.Q. What is 3D scanning used for in manufacturing?Ans:- Common uses include reverse engineering, inspection, product development, digitisation, prototyping and replacement-part development.Q. Can any 3D printer print a scanned model?Ans:- The model must be suitable for the printer's build volume, technology, materials and slicing requirements.Q. What is the difference between 3D scanning and 3D printing?Ans:- 3D scanning converts a physical object into digital data, while 3D printing converts a digital model into a physical object.ConclusionA 3D printer and 3D scanner work best as complementary technologies. The scanner brings physical objects into the digital environment, while the printer turns digital designs back into physical parts.When combined, they create a practical workflow for reverse engineering, prototyping, replacement parts, product development and small-batch manufacturing.The key is to look beyond the individual machine and consider the complete process: scan accurately, process the data, modify the model where required, and print it with the right technology and material.Explore 3D Scanners and 3D Printers at 3IdeaExplore our range of handheld and portable 3D scanners for scanning, reverse engineering, inspection and product development.Explore our range of FDM 3D printers for prototyping, functional parts, custom components and small-batch production.For specific scan-to-print applications, explore products such as RaptorX, Sermoon S1, Raptor, Ferret SE, Otter Lite, Snapmaker U1, Bambu Lab X2D Combo, Bambu Lab P2S Combo and Anycubic Kobra X.Ready to optimize your setup? Explore our full collection of Printer and Scanners on 3Idea Web, or download the 3Idea app on Android and iOS to order on the go.
Blogs
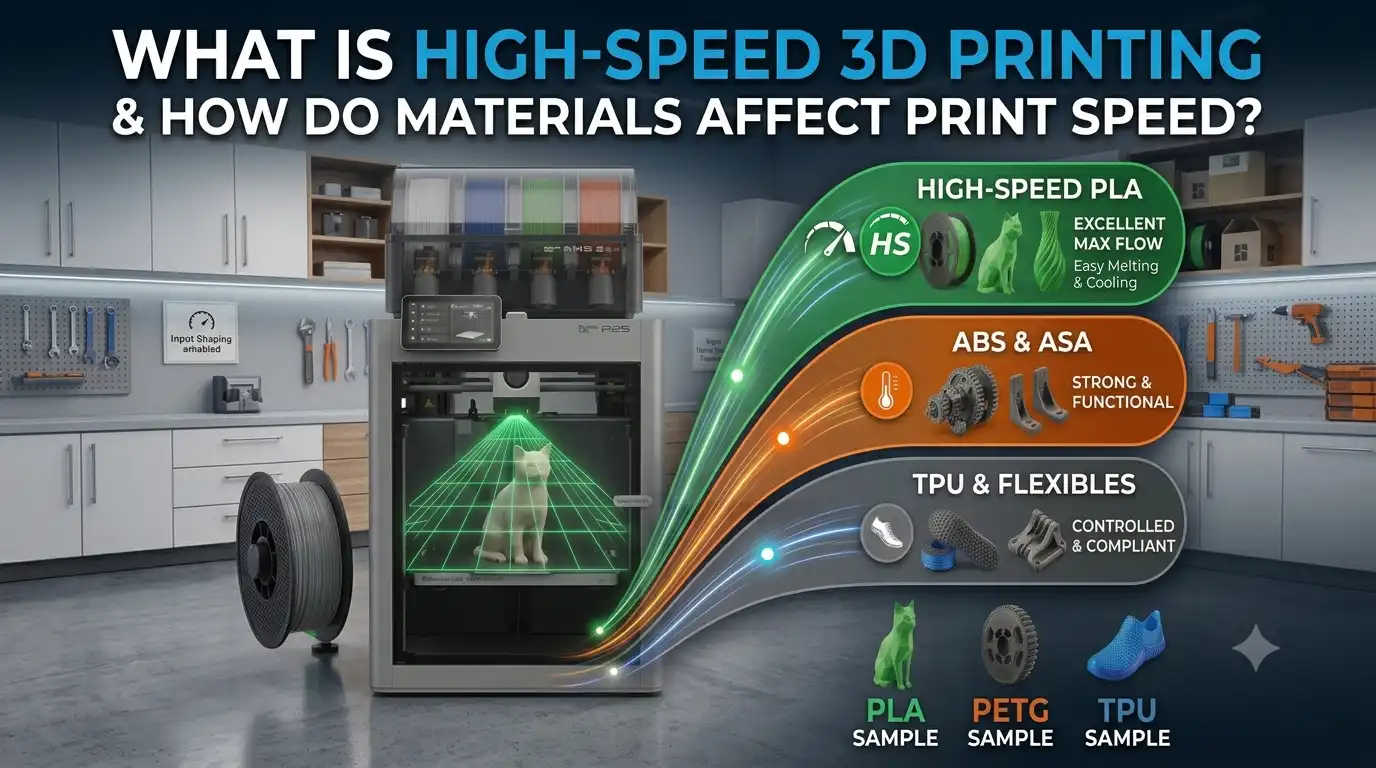
A 3D printer advertised at 500 or 600 mm/s does not necessarily print every model at that speed.In reality, high-speed 3D printing depends on much more than the maximum speed shown in a printer's specifications. The motion system, hotend, extruder, filament, temperature, cooling and print settings all need to work together.Moreover, different materials behave differently during extrusion. PLA can usually handle rapid printing more easily, while PETG, ABS, ASA and TPU may require more careful control.So, before increasing your speed settings, it is important to understand what actually limits printing speed and how your choice of filament affects the result.What Is High-Speed 3D Printing?High-speed 3D printing refers to FDM printing at significantly higher movement and extrusion rates than traditional printing workflows.However, maximum movement speed and actual printing speed are not the same thing. A printer might reach 500 or 600 mm/s during certain movements, but a typical model may spend much of its time at lower speeds because of acceleration, geometry and extrusion requirements.One of the most important concepts here is volumetric flow.Simply put, the faster you move the print head, the more material the hotend needs to melt and push through the nozzle. This relationship becomes even more demanding when you use thicker layers or wider extrusion lines.Therefore, a printer can move extremely fast, but if the hotend cannot melt and extrude enough filament, increasing the speed will eventually cause under-extrusion and poor print quality.What Determines 3D Printing Speed?Several factors determine how quickly an FDM printer can produce a usable part.Motion System:- A rigid frame and capable motion system help a printer handle rapid movements and acceleration. Modern CoreXY designs, for example, can support fast movement while maintaining good mechanical stability.Extrusion System:- The extruder and hotend must maintain consistent filament flow at higher speeds. A high-flow hotend becomes particularly important when the printer demands large amounts of molten material.Volumetric Flow:- Volumetric flow is one of the biggest limitations in high-speed printing. It describes how much material the hotend can melt and extrude over a given period. Consequently, simply increasing the mm/s value does not guarantee faster printing.Nozzle Size:- A larger nozzle can move more material because it allows wider extrusion paths. However, it can also reduce fine detail, so nozzle size should match the application.Acceleration:- A printer may advertise a very high maximum speed, but small models often do not provide enough distance for the print head to reach that speed. As a result, acceleration can have a major impact on real-world print times.Cooling:- Higher speeds give each layer less time to cool before the next layer arrives. Therefore, effective part cooling becomes increasingly important, particularly with materials that need rapid solidification.How Do FAffect 3D Printing Speed?The filament you use can significantly change how quickly you can print while maintaining acceptable quality.MaterialHigh-Speed PotentialMain ConsiderationPLAHighEasy melting and coolingHigh-Speed PLAVery HighDesigned for higher extrusion ratesPETGModerate–HighTemperature and flow controlHigh-Speed PETGHighFormulated for faster extrusionABS/ASAModerate–HighThermal control and coolingTPULowerFlexible filament is harder to push quicklyPLA:- PLA is generally one of the easiest materials for fast FDM printing. It melts readily and can cool relatively quickly, which makes it well suited to high-speed applications. For everyday prototypes, models and general-purpose parts, PLA is often a practical starting point.High-Speed PLA:- High-speed PLA is designed with faster extrusion in mind. Its formulation can help maintain consistent flow at higher rates, making it particularly suitable for modern high-speed FDM printers. However, you should still follow the filament manufacturer's recommended temperature and flow limits.PETG:- PETG offers a useful balance between strength and ease of printing. Nevertheless, pushing it too quickly can affect surface quality, stringing and extrusion consistency. High-speed PETG can improve this balance because it is formulated for higher extrusion rates.ABS and ASA:- ABS and ASA can support relatively fast printing, but speed is only one part of the equation. These materials are more sensitive to temperature and cooling conditions. Therefore, a controlled thermal environment can become important, particularly for larger parts where warping and layer adhesion are concerns.TPU:- TPU behaves differently from rigid filaments because it is flexible. The material can compress or buckle within the extrusion path when pushed too aggressively. As a result, TPU generally requires more conservative speeds, depending on the specific filament and printer combination.Why Is High-Speed Filament Different?High-speed filament is not simply regular filament with a higher speed setting.Instead, the material needs to maintain consistent extrusion at higher flow rates. Its melt behaviour, thermal characteristics, dimensional consistency and recommended temperature range all influence performance.This creates an important distinction:A printer may be capable of moving at 600 mm/s, but the filament still needs to flow consistently at the required rate.That is why printer capability and filament capability should always be considered together.Can Any 3D Printer Print at High Speed?No. A basic printer cannot necessarily achieve reliable high-speed printing simply by increasing its speed settings.A high-speed FDM setup generally benefits from:A rigid frameA capable motion systemHigh accelerationA high-flow hotendA suitable extrusion systemEffective coolingInput shapingPressure advance and flow calibrationAutomatic bed levellingAppropriate material profilesFor example, the Snapmaker U1 is a strong example of a printer designed around fast, multi-material FDM printing. It offers up to 500 mm/s toolhead speed, high acceleration and a high-flow extrusion system, making it relevant when both speed and material flexibility matter.The Anycubic Kobra X is another suitable example for high-speed FDM and multicolor printing, with a high maximum movement speed, 300°C nozzle capability and compatibility with materials including PLA, PETG, TPU and selected engineering-oriented filaments.Meanwhile, the Bambu Lab P2S Combo demonstrates how modern high-speed printing is about more than raw movement speed. Automation, monitoring, filament management and reliable print workflows can make fast printing much more practical.How to Choose Materials for High-Speed 3D PrintingChoosing the right filament starts with the part you want to produce.For maximum everyday speed: PLA or high-speed PLA is usually the easiest choice.For a balance of strength and speed: PETG or high-speed PETG can be a better option.For heat and UV-resistant applications: ABS or ASA can work well when the printer provides suitable thermal control.For flexible parts: TPU is suitable, but you will generally need to reduce the speed compared with rigid materials.Most importantly, do not blindly copy the maximum speed listed for your printer. Instead, check the filament manufacturer's recommended temperature, speed and flow range and adjust your settings accordingly.Also, keep your filament dry. Moisture can affect extrusion consistency and print quality, particularly when printing at demanding speeds.Does Higher Print Speed Reduce Print Quality?It can.When you push a printer beyond the practical limits of its extrusion and motion systems, you may notice:Under-extrusionRinging or ghostingPoor layer adhesionInconsistent wallsPoor overhangsReduced surface qualityMechanical instabilityTherefore, the goal of high-speed 3D printing should not simply be to use the highest possible mm/s setting.Instead, the goal is to achieve the shortest practical print time while maintaining the level of quality your application requires.That balance is what makes a high-speed printer genuinely useful.Which High-Speed 3D Printer Features Should You Look For?If speed is an important buying factor, look beyond the headline maximum speed.Prioritize features such as:High-flow hotendStrong extrusion systemHigh accelerationRigid motion systemEffective coolingInput shapingPressure advance or flow calibrationAutomatic bed levellingHigh-temperature nozzleOptimized material profilesEnclosure or chamber control for engineering materialsThe Bambu Lab P2S Combo, for example, combines high-speed FDM printing with automated features and material management. This approach shows why a good high-speed printer should improve the entire workflow rather than simply move the print head faster.Which Material Is Best for High-Speed 3D Printing?PLA and high-speed PLA: Best for everyday fast printing.PETG and high-speed PETG: Best when you want a stronger balance between speed and functional performance.ABS and ASA: Better suited to engineering applications when appropriate thermal control is available.TPU: Useful for flexible applications, but generally requires lower speeds.Ultimately, the best material depends on the part you are printing, not just the speed you want to achieve.ConclusionHigh-speed 3D printing is not simply about selecting the highest number in a printer's specifications. The printer, hotend, extrusion system, filament, temperature and cooling must work together. PLA and high-speed PLA are generally easiest for rapid printing, while PETG, ABS, ASA and TPU require more careful control. Choosing the right combination can reduce print time without unnecessarily sacrificing quality.Ready to optimize your setup? Explore our full collection of high-speed filaments on 3Idea Web, or download the 3Idea app on Android and iOS to order on the go. Frequently Asked QuestionsQ. What is high-speed 3D printing?Ans:- High-speed 3D printing uses higher movement and extrusion rates while maintaining acceptable print quality through suitable hardware, materials and settings.Q. Which filament is best for high-speed 3D printing?Ans:- PLA and high-speed PLA are generally the easiest choices for rapid FDM printing, while high-speed PETG offers a stronger functional alternative.Q. Can PLA be printed at high speed?Ans:- Yes, PLA is generally well suited to high-speed printing when the printer, hotend, cooling and filament support the required extrusion rate.Q. Does PETG print slower than PLA?Ans:- PETG can be printed quickly, but it often needs more careful temperature, flow and cooling control than PLA.Q. Why does filament affect 3D printing speed?Ans:- Different filaments have different melting, flow, cooling and extrusion characteristics, which determine how quickly they can be printed reliably.Q. Can TPU be used for high-speed 3D printing?Ans:- TPU can be printed quickly on suitable systems, but its flexibility generally makes it more challenging to extrude at very high speeds.Q. Does higher print speed reduce print quality?Ans:- Excessive speed can cause under-extrusion, ringing, poor layer adhesion and surface defects when the printer or material cannot maintain the required performance.Q. Is a 600 mm/s 3D printer always faster?Ans:- No. Maximum movement speed does not represent the printer's real-world print speed because acceleration, geometry, volumetric flow and material limitations also matter.
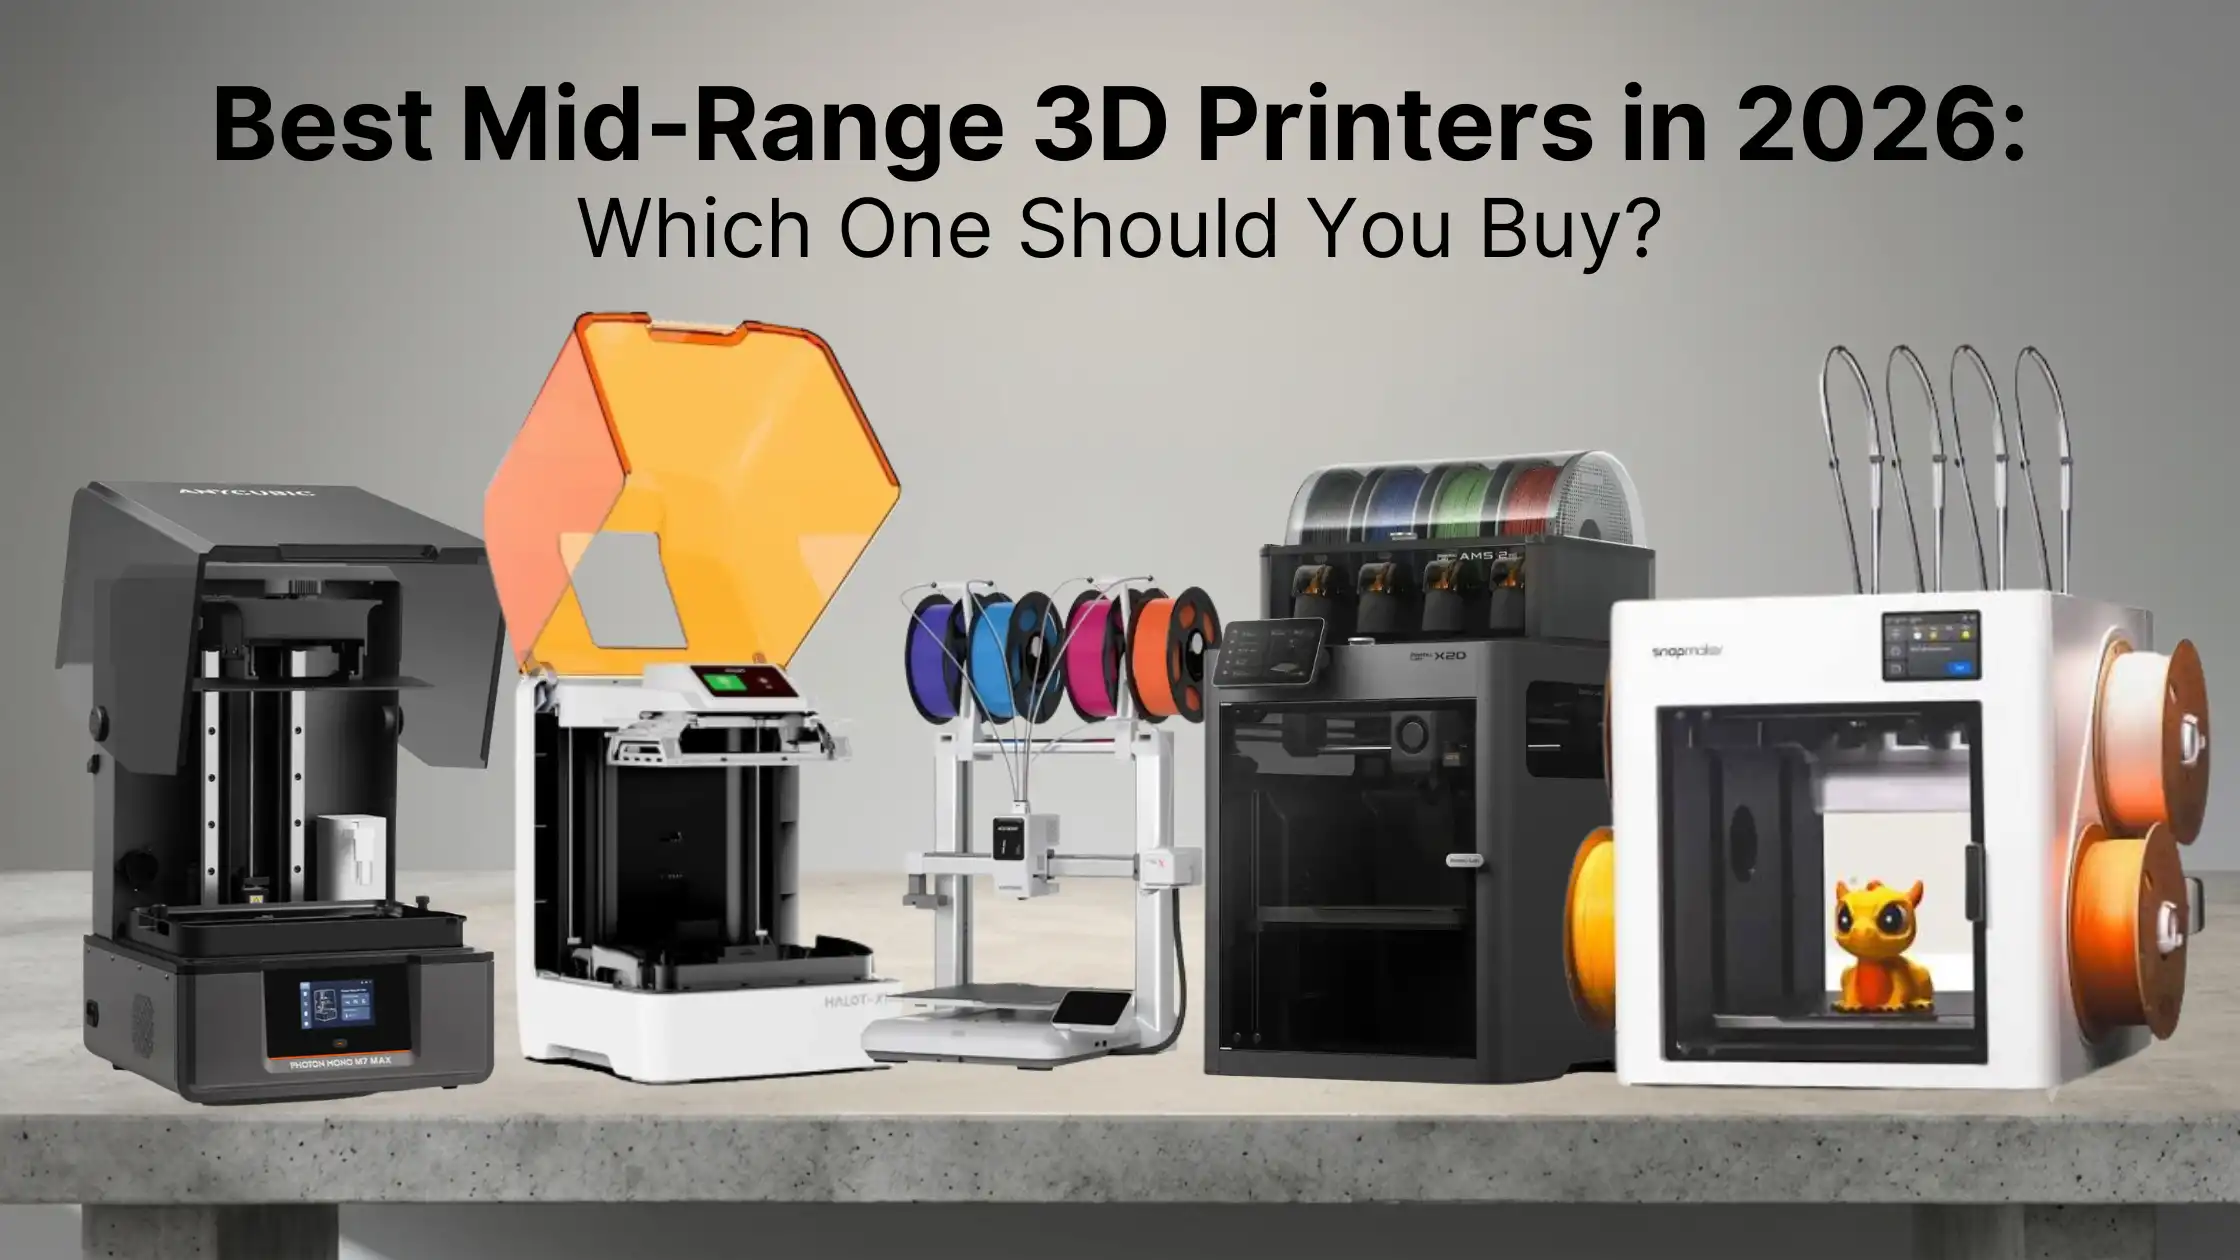
Choosing a 3D printer becomes more complicated once you move beyond basic entry-level machines. You may want faster printing, better reliability, more automation or greater material flexibility, but a professional or industrial system may be more than you actually need.That is where a mid-range 3D printer makes sense.However, the best mid-range 3D printer is not simply the one with the highest specifications. Instead, it should offer the right combination of performance, features and workflow for your actual needs.In this guide, we compare selected FDM and resin 3D printers to help you make that decision.What Makes a 3D Printer Mid-Range?There is no single specification or fixed price that defines a mid-range 3D printer. Instead, it generally sits between basic entry-level machines and professional or industrial systems.An entry-level printer may focus on basic printing and essential features. A mid-range model, on the other hand, typically adds better speed, automation, build volume, reliability or material flexibility.Professional and industrial machines usually move further into specialized materials, larger production capacity or advanced manufacturing workflows.Therefore, think of the categories this way:CategoryMain FocusEntry-levelBasic printingMid-rangeSpeed, automation and flexibilityProfessional/industrialProduction and specialized applicationsThis approach also makes it easier to compare FDM and resin printers without relying purely on price.What Should You Look for in a Mid-Range 3D Printer?Before choosing a machine, consider how you actually plan to use it.Build volume: Make sure the print area accommodates the parts you expect to produce.Print speed: Look beyond maximum advertised speed and consider how quickly the printer can complete your actual workflow.Material compatibility: Check whether the printer supports the materials you need today and may need later.Automation: Features such as automatic leveling, calibration, detection and monitoring can make regular printing easier.Reliability: A fast printer provides little value if frequent failures interrupt your work.Future requirements: Finally, consider what you may print six months or a year from now rather than buying only for today's projects.Best Mid-Range FDM 3D PrintersFDM remains a practical choice for functional parts, prototypes, larger models and a wide range of filament-based applications. The following models stand out for different types of users.Anycubic Kobra XBest for: Multicolor FDM printingThe Anycubic Kobra X is a strong option for users who want a capable FDM printer with multicolor functionality. It offers a 260 × 260 × 260 mm build volume, automatic leveling and a high-speed workflow.More importantly, its multicolor capability makes it attractive for users who want to create visually complex models or explore more flexible printing workflows.Therefore, consider the Kobra X if multicolor printing is an important part of your buying decision.Bambu Lab P2S ComboBest for: Automated everyday printingThe Bambu Lab P2S Combo focuses on a convenient and automated printing experience. It provides a 256 × 256 × 256 mm build volume and combines features such as AI error detection, live monitoring and AMS 2 Pro support.As a result, it can suit users who want to spend less time managing the printing process and more time working on their models.For regular prototyping and general-purpose printing, its workflow-focused design makes it a strong mid-range option.Snapmaker U1Best for: Multi-toolhead flexibilityThe Snapmaker U1 takes a different approach by using multiple toolheads. It provides a 270 × 270 × 270 mm build volume and includes four toolheads, giving users greater flexibility when working with different materials or colors.This makes it particularly interesting for users who want more than a conventional single-toolhead workflow.So, if flexibility is more important to you than simply chasing maximum print speed, the U1 deserves consideration.Bambu Lab X2D ComboBest for: Advanced FDM applicationsThe Bambu Lab X2D Combo moves toward the more advanced end of the mid-range segment. Its dual-nozzle architecture and heated chamber capability give it greater flexibility for demanding FDM workflows.Consequently, it can make sense for users who have already outgrown basic FDM printing and need more advanced capabilities for their projects.Best Mid-Range Resin 3D PrintersFDM is not always the right technology. If fine details, surface quality and highly detailed models are your priority, resin printing can be a better fit.Creality HALOT-X1Best for: High-detail resin printingThe Creality HALOT-X1 is designed around detailed resin printing and ease of use. Its 16K mono LCD and fine pixel size make it suitable for users who prioritize detail.It is therefore worth considering for detailed models where surface quality and fine features matter more than the broader material flexibility typically associated with FDM.Anycubic Photon Mono M7 MaxBest for: Larger resin printsThe Anycubic Photon Mono M7 Max takes a different approach by offering a substantially larger resin build area.This makes it useful for users who want the detail associated with resin printing but also need to produce larger models.Therefore, if build size is one of your biggest limitations with smaller resin printers, this model is worth evaluating.FDM vs Resin: Which Should You Choose?The right technology depends on what you want to make.If You NeedConsiderFunctional prototypesFDMLarger partsFDMBroad filament optionsFDMFine detailsResinMiniatures and detailed modelsResinSmooth visual surfacesResinEngineering-focused partsFDMHighly detailed visual modelsResinIn simple terms, choose FDM when versatility, larger parts and functional applications matter most. Choose resin when fine detail and surface quality are your priorities.Which Mid-Range 3D Printer Is Right for You?There is no single winner for every buyer.Choose the Anycubic Kobra X if multicolor FDM printing is your priority.Choose the Bambu Lab P2S Combo if you want an automated everyday workflow.Choose the Snapmaker U1 if you want multi-toolhead flexibility.Choose the Bambu Lab X2D Combo if you need more advanced dual-nozzle and heated-chamber capabilities.Choose the Creality HALOT-X1 if detailed resin printing is your main requirement.Choose the Anycubic Photon Mono M7 Max if you need a larger resin build area.This approach is more useful than simply declaring one printer the “best” because your ideal machine depends on your workflow.Is a Mid-Range 3D Printer Worth Buying?Yes, especially if you have started to outgrow the limitations of an entry-level printer.An upgrade can make sense when you need greater speed, larger prints, more materials, better reliability or additional automation.However, if you only print occasionally and mainly use basic PLA, an entry-level printer may still meet your requirements.Ultimately, buy for the workflow you actually need rather than paying for features you will rarely use.FAQsQ. What is considered a mid-range 3D printer?Ans:- A mid-range 3D printer generally sits between entry-level and professional systems, offering more speed, automation, build volume or material capability.Q. Which is the best mid-range 3D printer?Ans:- The best option depends on whether you prioritize multicolor printing, automation, build volume, advanced FDM features or detailed resin printing.Q. Are mid-range 3D printers good for beginners?Ans:- Yes, particularly for beginners who expect to print regularly and want more capability than a basic entry-level printer.Q. Is FDM better than resin?Ans:- Neither is universally better; FDM suits larger functional parts while resin excels at detailed models and fine surface quality.Q. Is a mid-range 3D printer suitable for small businesses?Ans:- Yes, many mid-range FDM printers can support prototyping, custom parts, fixtures and small-batch production.Q. Should I upgrade from an entry-level 3D printer?Ans:- Consider upgrading when your current printer limits your build size, speed, material options, reliability or workflow.ConclusionA mid-range 3D printer can provide a useful balance between accessible printing and advanced capability. However, the right choice depends on your materials, print size, production frequency and workflow.Instead of choosing purely by specifications, identify the features that solve your current limitations while giving you enough room to grow.Explore mid-range FDM and resin 3D printers at 3Idea for your business requirements.Shop on the App: https://play.google.com/store/apps/details?id=com.threeidea&pcampaignid=web_sharehttps://apps.apple.com/in/app/3idea/id6762472249
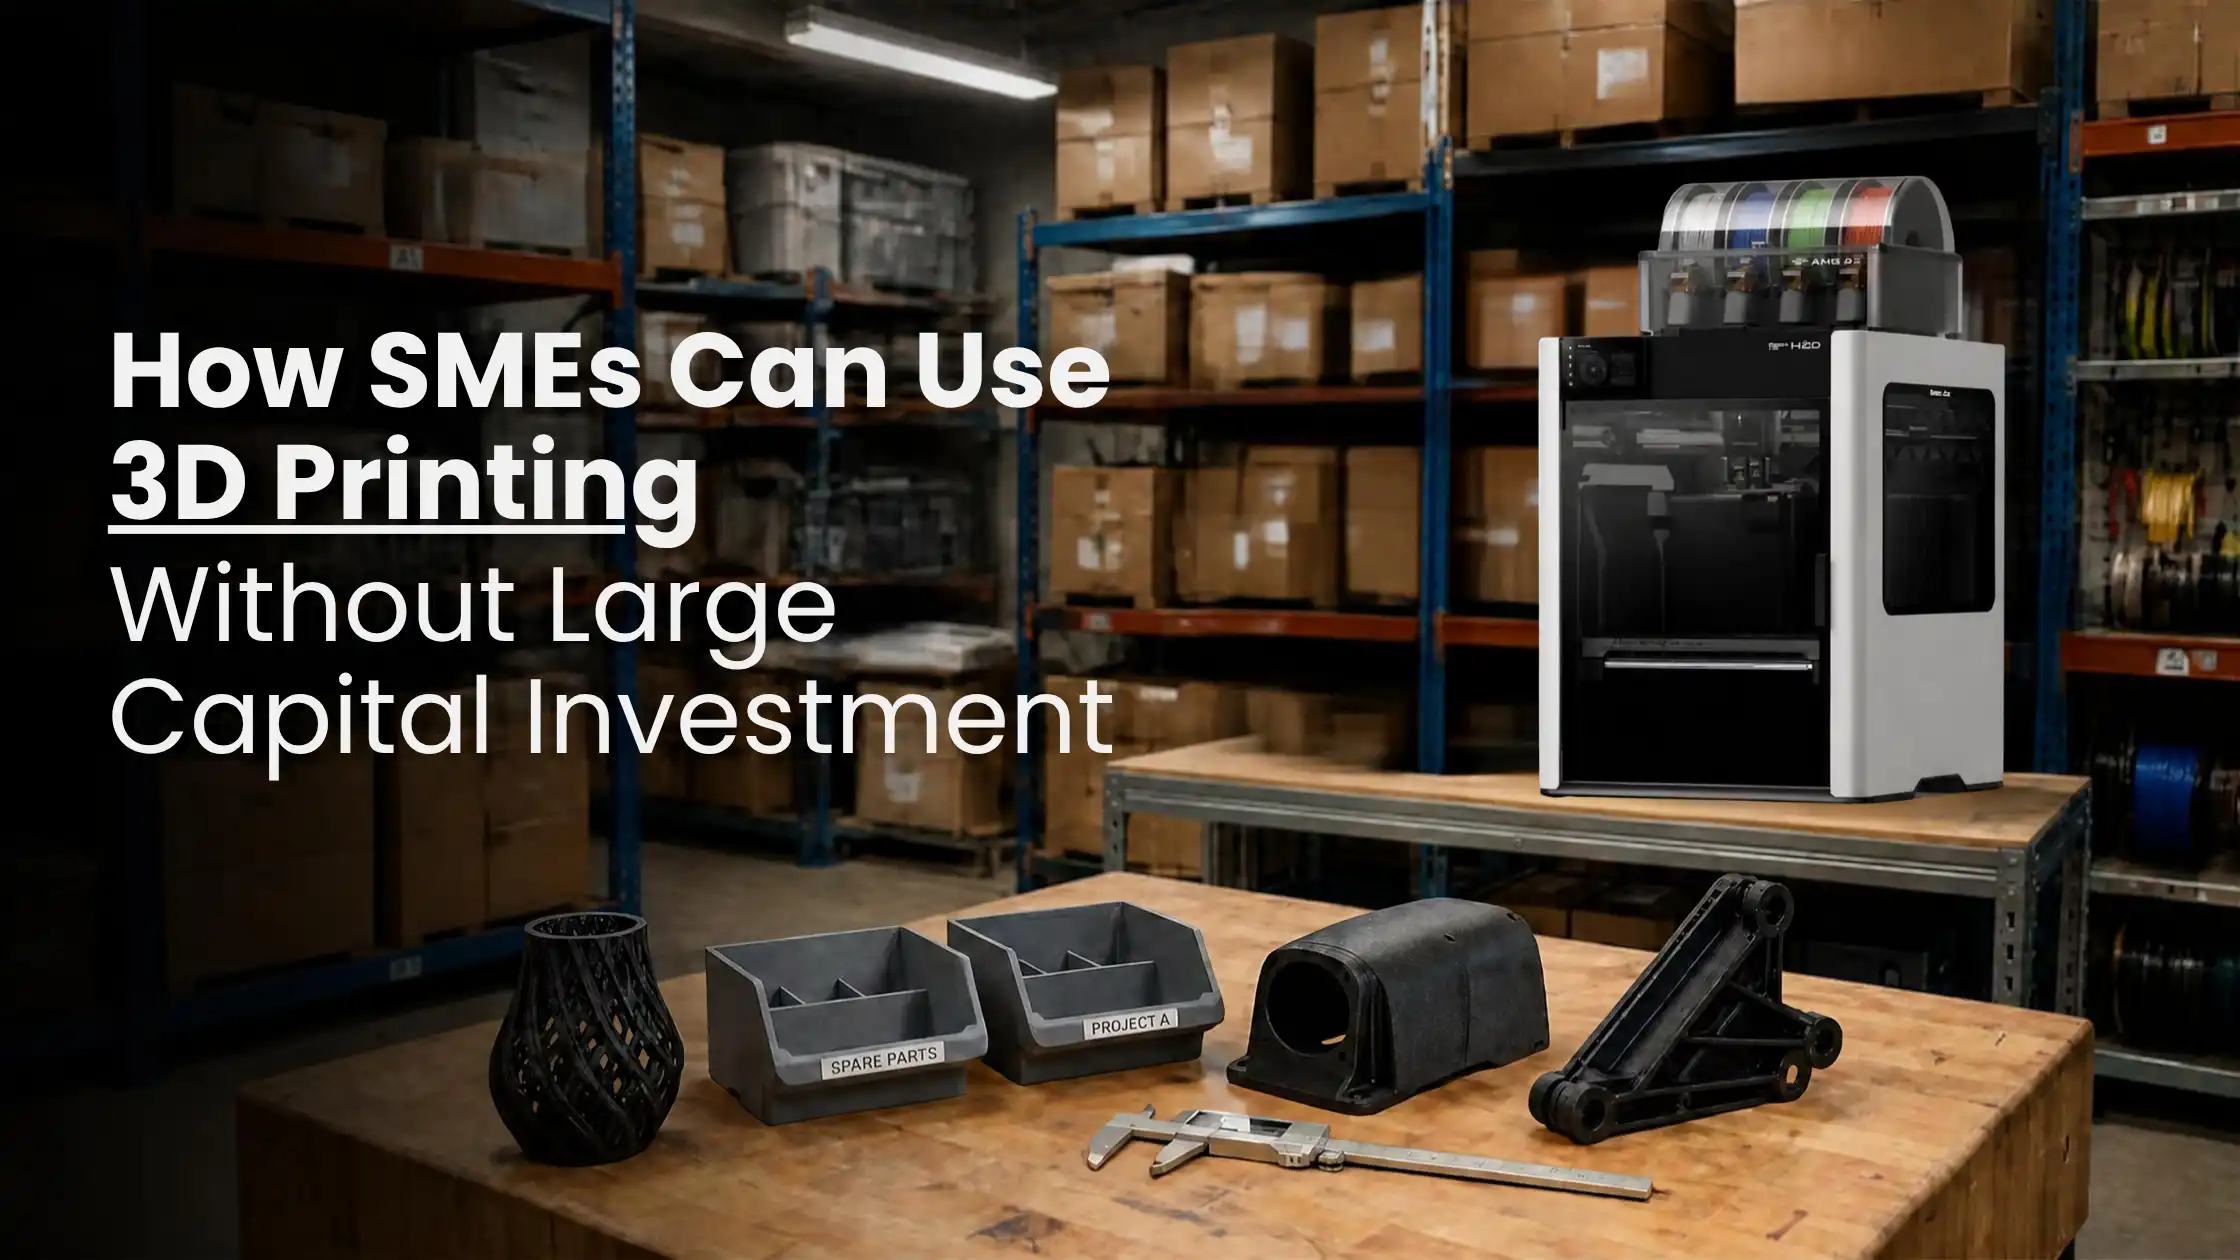
Small and medium-sized businesses often face a difficult manufacturing equation. Prototypes can become expensive, custom tooling may require significant upfront costs, and outsourcing can add both lead time and minimum-order constraints.However, businesses do not always need to invest in a large manufacturing setup to benefit from 3D printing.3D printing for SMEs can provide a practical way to bring selected prototyping, tooling, product development and low-volume production tasks in-house. Instead of replacing existing manufacturing processes, businesses can start with specific applications, measure the results and expand only when the investment makes sense.Why 3D Printing Makes Sense for SMEsFor many SMEs, the biggest advantage is not simply the ability to manufacture a part. It is the flexibility to produce the right part at the right time.First, a business can start with a suitable FDM 3D printer instead of building an entire manufacturing cell. This keeps the initial commitment more manageable.Second, 3D printing can speed up prototyping. Teams can follow a simple cycle:Design ? Print ? Test ? Modify ? Print AgainAs a result, engineers and product teams can test ideas without waiting for every prototype to come from an external manufacturer.Moreover, businesses can reduce their dependence on outsourcing for suitable low-volume jobs. They can also produce certain components on demand instead of maintaining large inventories.The goal, however, is not to replace every conventional manufacturing process. Instead, SMEs should identify where 3D printing provides a practical economic and operational advantage.Where SMEs Can Use 3D PrintingThe best way to evaluate 3D printing for small businesses is to look at specific applications.1. PrototypingRapid prototyping is one of the most accessible applications.Businesses can use 3D printing to create:Concept modelsFunctional prototypesFit-check partsProduct samplesDesign iterationsFor example, an engineering team can print an enclosure, test the fit of its components and modify the design before moving to final manufacturing.This approach can shorten design cycles and help teams identify problems earlier.2. Jigs and FixturesManufacturing SMEs can also use 3D printing to create custom production aids.These can include:Assembly fixturesDrilling guidesPositioning toolsInspection aidsCustom holdersBecause these items are often produced in relatively small quantities, 3D printing can be useful when conventional tooling would require more time or setup.Furthermore, businesses can modify these tools whenever their production requirements change.3. Replacement and Spare PartsSome businesses regularly deal with low-volume replacement components.Instead of keeping every possible part in inventory, a company may be able to produce selected non-critical components when required.This can support an on-demand manufacturing approach and potentially reduce inventory requirements.However, not every replacement part is suitable for 3D printing. Components involving safety, regulatory requirements or critical mechanical loads should be evaluated carefully and manufactured using an appropriate, validated process.4. Small-Batch and Custom Production3D printing can also support low-volume manufacturing.This is particularly useful for:Customized productsLimited-run componentsPersonalized partsProduct samplesSmall production batchesRather than committing to a large production quantity before demand is established, businesses can produce smaller quantities and adjust their designs or volumes based on actual requirements.5. Product DevelopmentEngineering and product-development teams can use printed parts to evaluate form, fit and ergonomics.They can also test basic assembly concepts and identify design issues before moving to more expensive production methods.Therefore, 3D printing can become part of the product-development workflow rather than being used only as a standalone manufacturing process.How SMEs Can Adopt 3D Printing Without a Large InvestmentThe most practical approach is to start small.Start With One PrinterInstead of immediately purchasing several machines, identify the application that creates the most frequent or expensive bottleneck.Then choose a printer around that requirement.For example, an SME focused mainly on prototypes may have different requirements from a manufacturer producing functional fixtures every week.Start With FDMFor many general-purpose applications, FDM 3D printing provides an accessible starting point.It can support prototypes, fixtures, tooling, enclosures and various functional components, depending on the printer and material selected.Resin 3D printing can also be considered when fine details or specific surface characteristics are more important than the larger functional parts commonly produced with FDM.Outsource Before BuyingIf a business only needs 3D printing occasionally, buying a machine may not be the first step.Instead, the business can initially outsource suitable jobs and track the frequency, cost and turnaround time.Once demand becomes regular, the company can compare those numbers with the complete cost of producing the parts internally.A simple progression is:Outsource ? Measure Demand ? Calculate Costs ? Bring Suitable Work In-HouseScale Based on UtilizationFinally, businesses should scale according to actual demand.Rather than buying additional printers simply because the company is growing, consider factors such as print demand, turnaround requirements and machine utilization.This approach helps keep equipment investment connected to actual business requirements.Where 3D Printing Can Reduce CostsThe potential savings depend heavily on the application. However, several areas are worth evaluating:Cost AreaPotential BenefitPrototypingFaster design iterationsOutsourcingProduce suitable parts internallyToolingLower-cost custom jigs and fixturesInventoryProduce selected parts on demandSmall batchesAvoid large minimum quantitiesProduct developmentShorter prototype cyclesImportantly, 3D printing ROI is not simply the printer price compared with the price of one part.Businesses should consider the complete in-house cost:Material + Machine Time + Labour + Maintenance + Electricity + Failed PrintsThen compare that figure with the actual alternative cost, such as outsourcing, conventional tooling or purchasing the component.This provides a more realistic picture of potential cost savings.Choosing the Right 3D Printer for an SMEThe right machine depends on the application rather than simply the printer's specifications.Before investing, evaluate:Build volumeRequired materialsPrint speedReliabilityAutomationEase of operationMaintenance requirementsPart qualityExpected future workloadTechnical supportFor example, the Creality Ender-3 V3 SE can be considered when an SME is exploring basic FDM prototyping and internal production.The Anycubic Kobra X can be relevant for businesses looking for a more capable FDM platform as their applications expand.For businesses interested in a more automated workflow and multi-material or multicolor capabilities, the Bambu Lab P2S Combo can be evaluated.Similarly, the Snapmaker U1 can be considered by SMEs looking for a more advanced workflow and greater production flexibility.The key is to match the machine to the actual workload instead of buying more capacity than the business currently needs.A Practical 3D Printing Adoption Strategy for SMEsA simple four-step approach can make adoption easier:Step 1 — Identify:- Find parts or processes that are repetitive, expensive, slow to source or frequently modified.Step 2 — Test:- Print a small number of prototypes, fixtures or suitable components.Step 3 — Measure:- Compare cost, lead time, material usage, labour, machine utilization and failure rate.Step 4 — Scale:- Increase equipment or production capacity only when the results justify the additional investment.In short:Identify ? Test ? Measure ? ScaleThis approach allows SMEs to explore 3D printing without committing to a large investment from the beginning.ConclusionSMEs do not need to make a large manufacturing investment to start benefiting from 3D printing. By beginning with targeted applications such as prototyping, tooling, replacement parts and low-volume production, businesses can test the technology, measure its value and scale their setup as demand grows.Explore FDM 3D printers at 3Idea for your business requirements.Shop on the App: https://play.google.com/store/apps/details?id=com.threeidea&pcampaignid=web_sharehttps://apps.apple.com/in/app/3idea/id6762472249 FAQsQ. Is 3D printing cost-effective for SMEs?Ans:- It can be cost-effective for applications such as prototyping, tooling, replacement parts and low-volume production, depending on the alternative manufacturing cost.Q. Do SMEs need an industrial 3D printer?Ans:- Not necessarily. The appropriate printer depends on part size, material, production volume and required performance.Q. Can 3D printing reduce manufacturing costs?Ans:- It can reduce certain prototyping, tooling, outsourcing and small-batch production costs, although actual savings depend on the application.Q. Is FDM suitable for small businesses?Ans:- FDM can suit many SME applications, including prototypes, fixtures, tooling, enclosures and functional components.Q. Should a business buy or outsource 3D printing?Ans:- Businesses with occasional requirements can consider outsourcing initially, while frequent users can evaluate the economics of bringing suitable work in-house.Q. How can an SME calculate 3D printing ROI?Ans:- Compare the complete in-house cost per part, including material, machine time, labour and maintenance, with the cost of the alternative manufacturing method.
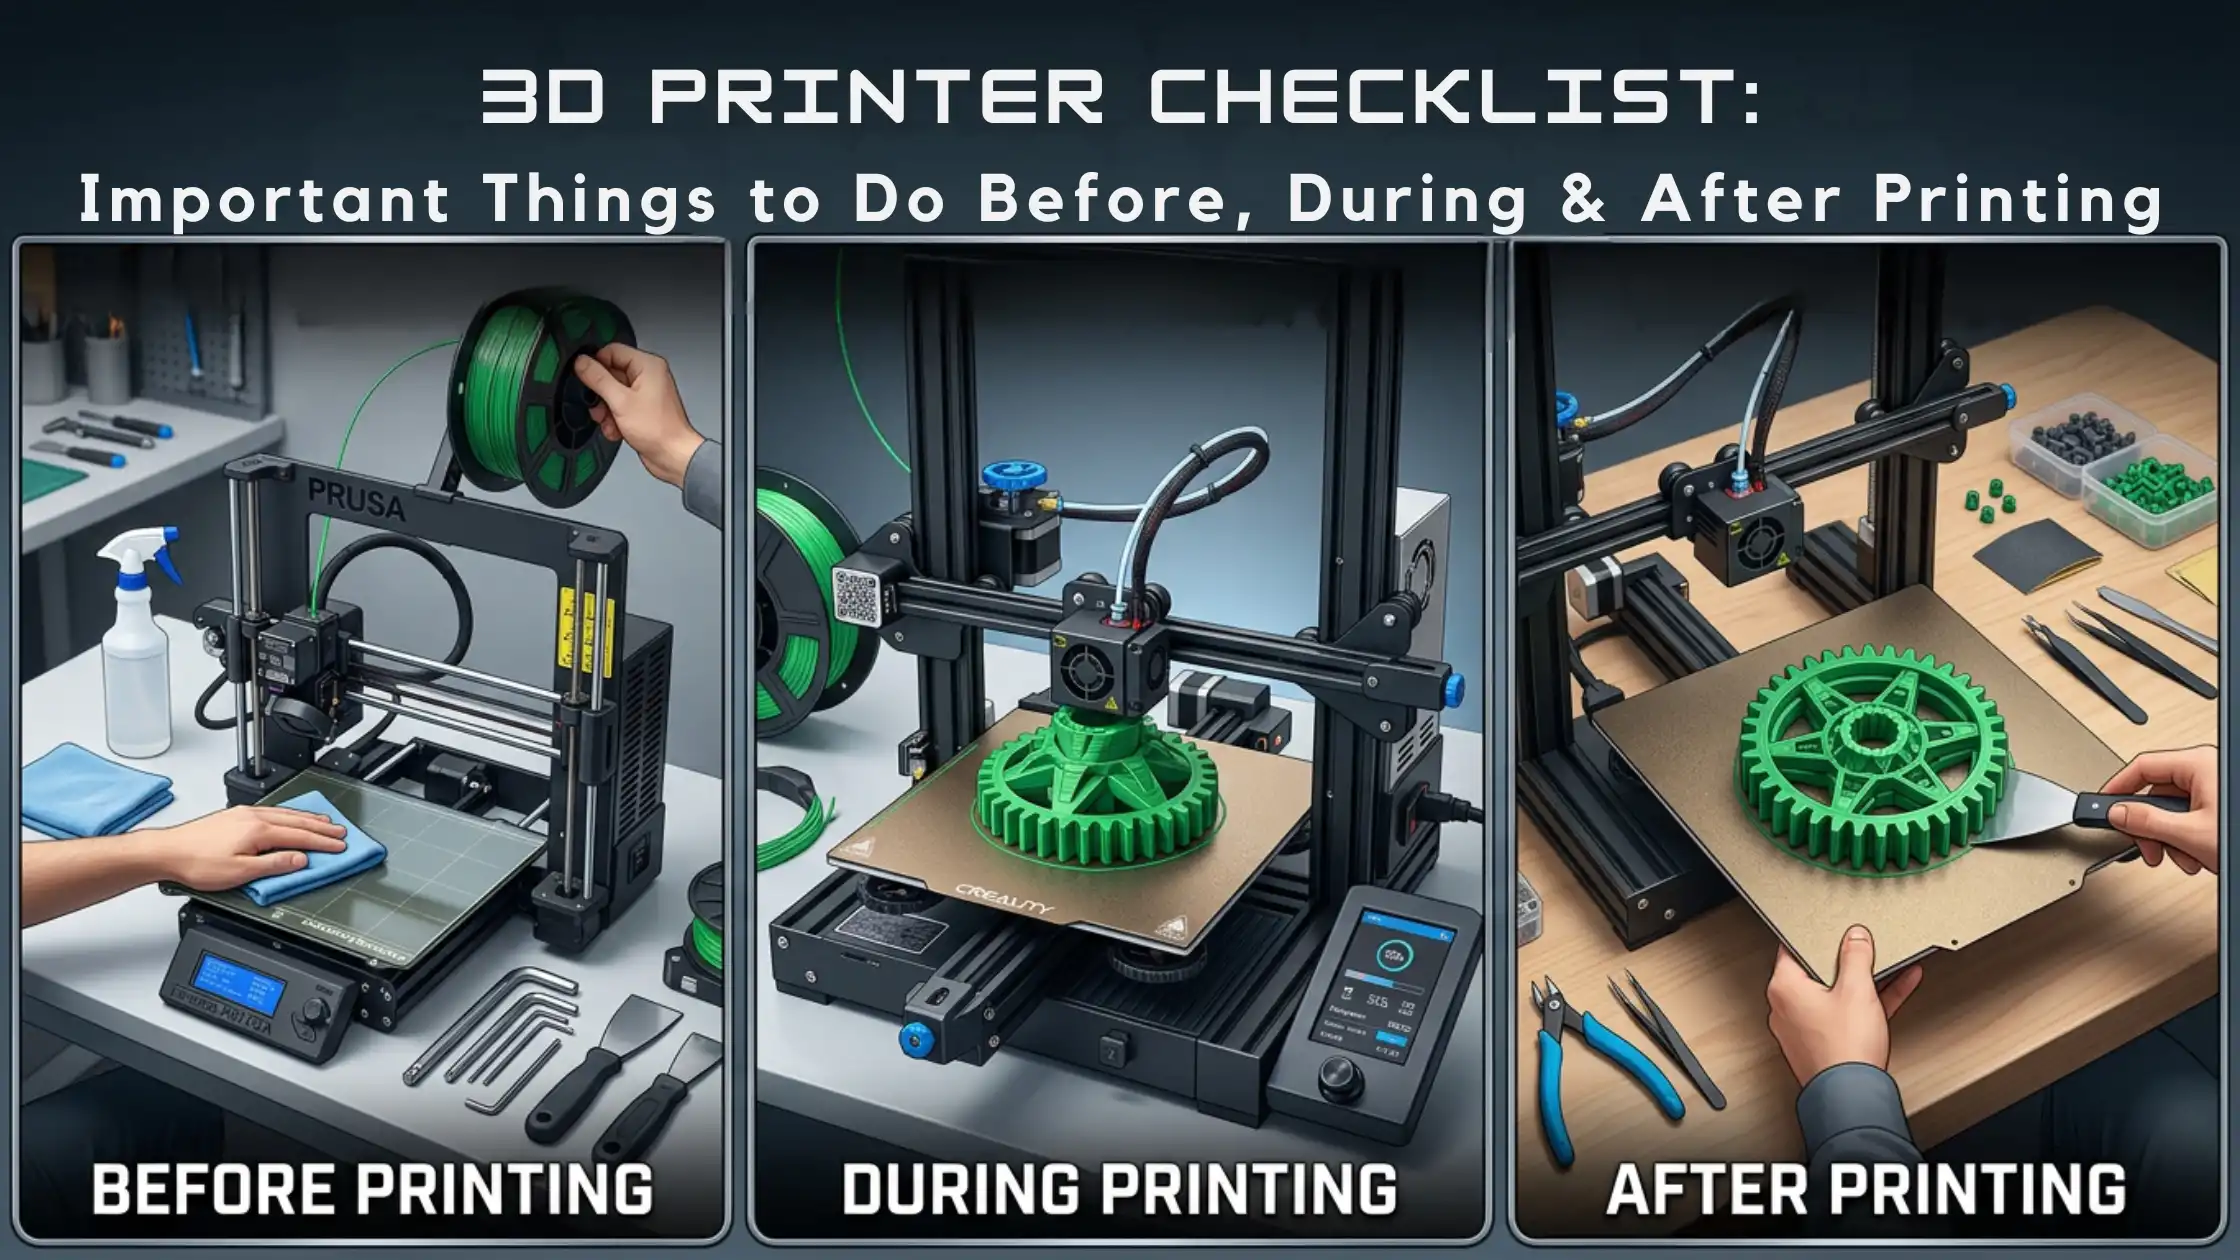
A successful 3D print doesn't begin when you press Start.Before the printer starts moving, several small checks can determine whether your print succeeds or fails. Is the build plate clean? Is the filament suitable and dry? Is the nozzle clear? Are the slicer settings correct? Is the first layer going to stick properly? Moreover, once the print starts, you still need to watch for problems such as warping, stringing, layer shifts or inconsistent extrusion. That is why a simple 3D printer checklist can make everyday FDM printing more reliable. Instead of troubleshooting after several hours of wasted filament, you can catch many problems early.This guide covers the important things to check before, during and after 3D printing, along with safety, maintenance and troubleshooting tips.Quick 3D Printer ChecklistBefore PrintingCheck the printer conditionClean the build plateCheck the nozzleLoad the correct filamentCheck filament conditionVerify print and bed temperaturesCheck bed leveling or Z offsetConfirm slicer settingsCheck model orientation and supportsConfirm material and print timeMake sure the build plate is installed correctlyDuring PrintingWatch the first layerCheck layer adhesionLook for unusual soundsCheck extrusion consistencyMonitor temperatureWatch for warping, stringing or layer shiftsKeep the print area safeMonitor long prints when necessaryAfter PrintingAllow the printer and build plate to coolRemove the print carefullyInspect the finished modelRemove supportsClean the build plateCheck the nozzle and extruderStore filament properlyNote any problems for the next printBefore You Start 3D Printing1. Check Your 3D PrinterFirst, take a quick look at the printer before starting a job. Check the nozzle, extruder, build plate, belts, fans, cables and filament path.You do not need to disassemble the printer every time. Instead, inspect it and address anything that looks unusual.Inspect first; repair only when something actually requires attention.2. Clean the Build PlateNext, check the print surface. Dust, fingerprints and leftover filament can affect first-layer adhesion.Therefore, clean the build plate using the method recommended for your specific print surface. A clean and properly prepared bed gives the first layer a better chance of adhering consistently.3. Check the FilamentFilament preparation is another important part of your 3D printer setup checklist.Before printing, confirm that you have:The correct materialThe correct filament diameterEnough filament for the jobA properly loaded filament pathA suitable spoolFilament that has been stored correctlyAlso, pay attention to moisture. Moist filament can contribute to popping or crackling, inconsistent extrusion, stringing and rough surfaces.4. Confirm the Nozzle and MaterialYour nozzle size, material, temperature, layer height and print speed work together.For example, switching from PLA to PETG or ABS may require different temperature and cooling settings. Therefore, always verify that your filament profile matches the material you are actually using.5. Check Bed Leveling and Z OffsetThe first layer plays a major role in print success. If the nozzle sits too far from the bed, the filament may not adhere properly. On the other hand, if it sits too close, extrusion can become excessively compressed. Even when your printer has automatic bed leveling, you should still watch the first layer and confirm that it looks correct.6. Check Your Slicer SettingsBefore sending the G-code to the printer, review your slicer settings.Pay particular attention to:Printer profileFilament profileNozzle sizeLayer heightInfillWall countSupportsTemperaturePrint speedCoolingBuild plate adhesionAdditionally, check the estimated print time and material usage. This becomes especially important for long prints.7. Check Model Orientation and SupportsModel orientation affects more than appearance. It can influence strength, surface quality, support requirements, print time and material consumption.So, before printing, ask yourself whether the current orientation makes sense for the part. Likewise, check whether supports are actually necessary and whether they are positioned around the model's overhangs and difficult areas.What to Check During 3D PrintingWatch the First Layer: The first layer is one of the most useful checkpoints in your 3D printing checklist. A good first layer should show consistent extrusion, proper adhesion and even lines without obvious gaps. If you notice corners lifting, gaps between lines, excessive squishing or the nozzle dragging through the material, stop and investigate before allowing a long print to continue.Watch for Warping: Warping occurs when parts of the print lift away from the build plate. Possible causes include poor adhesion, unsuitable temperatures, cooling, material characteristics or drafts around the printer. Therefore, check the printer environment as well as your slicer settings instead of changing only one setting immediately.Look for Stringing: Thin strands of filament between printed areas are commonly known as stringing. Temperature, retraction, filament moisture and travel settings can all contribute. So, check the complete setup before making adjustments.Watch for Layer Shifts: A sudden horizontal displacement in the print can indicate mechanical or motion-related problems. Check for possible obstructions, loose belts, collisions, excessive speed or acceleration, and other mechanical issues.Listen for Unusual Sounds: Clicking, grinding, repeated knocking or skipping sounds should not simply be ignored. If the printer suddenly sounds different, pause when appropriate and inspect the machine before continuing.3D Printer Safety ChecklistSafety should remain part of every print routine.Keep your hands away from the hot nozzle and heated bed, and keep clothing or objects away from moving components.Also, inspect cables and connectors for visible damage. Pay attention to unusual smells or signs of overheating.Furthermore, ventilation matters, particularly when printing materials that can produce noticeable odors or emissions. If your printer has an enclosure, continue following the manufacturer's safety instructions.Finally, do not assume that every print is automatically safe to leave unattended. Understand your printer, material and environment, and follow the manufacturer's recommendations.What to Do After Your 3D Print FinishesOnce the print is complete, your checklist is not finished.First, allow the printer and build plate to cool as appropriate. Then remove the print carefully instead of forcing a model that remains firmly attached.Next, inspect the finished part for:WarpingStringingLayer adhesionSurface qualityDimensional issuesMissing featuresSupport marksAfter that, remove supports, brims or rafts where necessary. Finally, clean the build plate and prepare the printer for the next job.3D Printer Maintenance ChecklistRegular maintenance can help you identify problems before they affect print quality.After Every Print or As NeededClean the build plateRemove filament residueCheck the nozzlePeriodicallyCheck beltsInspect screwsCheck fansInspect the extruderClean relevant moving componentsLubricate components when recommended by the manufacturerWhen Print Quality ChangesIf your prints suddenly look different, check the nozzle, filament, first layer and mechanical components. Also, revisit your slicer settings before assuming that the printer itself has failed.Common 3D Printing Problems and What to CheckProblemWhat to CheckFirst layer not stickingBuild plate, Z offset, bed temperature and surfaceWarpingAdhesion, temperature, cooling and draftsStringingTemperature, retraction and filament moistureUnder-extrusionNozzle, filament path, extruder and filamentLayer shiftingBelts, collisions, speed/acceleration and mechanicsRough surfaceTemperature, extrusion, cooling and layer settingsSpaghetti printFirst layer, adhesion, model and supportsNo extrusionFilament path, nozzle and extruderWeak printMaterial, temperature, walls, infill and layer adhesionThis troubleshooting approach is useful because it helps you identify the likely source of a problem instead of changing multiple settings at once.Choosing an FDM 3D Printer That Makes Printing EasierModern FDM printers can simplify parts of the preparation and printing process through features such as automatic calibration, bed leveling, monitoring, filament management and multi-color workflows. For example, 3Idea's current range includes models such as the Creality Ender-3 V3 SE, Anycubic Kobra Neo, Anycubic Kobra X, Snapmaker U1, Bambu Lab P2S Combo and Bambu Lab X2D Combo. These can be considered based on the user's required workflow, automation needs and printing applications. However, the right printer depends on your requirements. Beginners may prioritize simple setup, while hobbyists may focus on material flexibility and print quality. Similarly, businesses and print farms may place greater importance on repeatability, maintenance and consistent workflows.A Simple Routine to Reduce 3D Print FailuresWhen you are unsure what to check before a print, remember this five-step routine:Printer ? Filament ? Slicer ? First Layer ? MonitorFirst, prepare the printer. Then, verify the filament. Next, review the slicer settings. After that, watch the first layer carefully. Finally, monitor the print when necessary.This simple routine can prevent many avoidable problems and make your 3D printer checklist easier to follow every time.3D Printer Checklist You Can SaveBEFORE PRINTING? Printer checked? Build plate clean? Correct and dry filament loaded? Nozzle checked? Bed leveling/Z offset checked? Slicer profile checked? Supports checked? Enough material available? Print area clearDURING PRINTING? First layer checked? Adhesion confirmed? No unusual sounds? Extrusion consistent? No warping or stringing? Long print monitored when necessaryAFTER PRINTING? Printer and bed cooled? Print removed safely? Print inspected? Supports removed? Build plate cleaned? Filament stored properly? Printer ready for the next jobConclusionA good 3D printer checklist does not need to be complicated. Instead, it should help you build a repeatable routine.Before printing, prepare the printer, build plate, filament and slicer. During printing, focus on the first layer, adhesion, extrusion and print behavior. After printing, inspect, clean and maintain the machine.Most importantly, use the checklist consistently. Over time, these small checks can make your FDM workflow more predictable, reduce avoidable failures and help you get better results from your 3D printer.If you are looking for an FDM printer that fits your workflow, you can explore the range of 3D printers available at 3Idea Technology and compare models based on your printing requirements, experience level and intended application.Explore 3D Printres: https://www.3idea.in/category/3d-printers Shop on the App: https://play.google.com/store/apps/details?id=com.threeidea&pcampaignid=web_sharehttps://apps.apple.com/in/app/3idea/id6762472249 Frequently Asked QuestionsQ. What should I check before starting a 3D print?Ans. Check the build plate, nozzle, filament, bed leveling, slicer settings, supports, temperatures and printer condition.Q. What should I check while my 3D printer is printing?Ans. Watch the first layer, adhesion, extrusion, temperature and any unusual sounds or movement.Q. What should I do after a 3D print finishes?Ans. Allow the printer to cool, remove the model carefully, inspect the print, clean the build plate and store the filament properly.Q. Why is my first layer not sticking?Ans. Check the build plate, Z offset, bed temperature and print-surface condition.Q. Why does my 3D print keep failing?Ans. Check the printer, filament, slicer settings, first-layer adhesion and mechanical condition before changing multiple settings.Q. How often should I maintain my 3D printer?Ans. Perform basic checks regularly and carry out deeper maintenance according to printer usage and the manufacturer's recommendations.Q. How should I store 3D printer filament?Ans. Store filament in a suitable dry environment and protect moisture-sensitive materials from humidity.Q. Should I monitor my 3D printer while printing?Ans. Long or unfamiliar prints should be monitored appropriately, while users should always follow the printer and material manufacturer's safety guidance.Q. What is the most important part of a 3D printer checklist?Ans. The first layer is one of the most important checkpoints because it can reveal adhesion and setup problems before a long print progresses.Q. Can a 3D printer checklist help reduce failed prints?Ans. Yes. Checking the printer, filament, slicer, first layer and print environment can help identify common causes of print failure early.
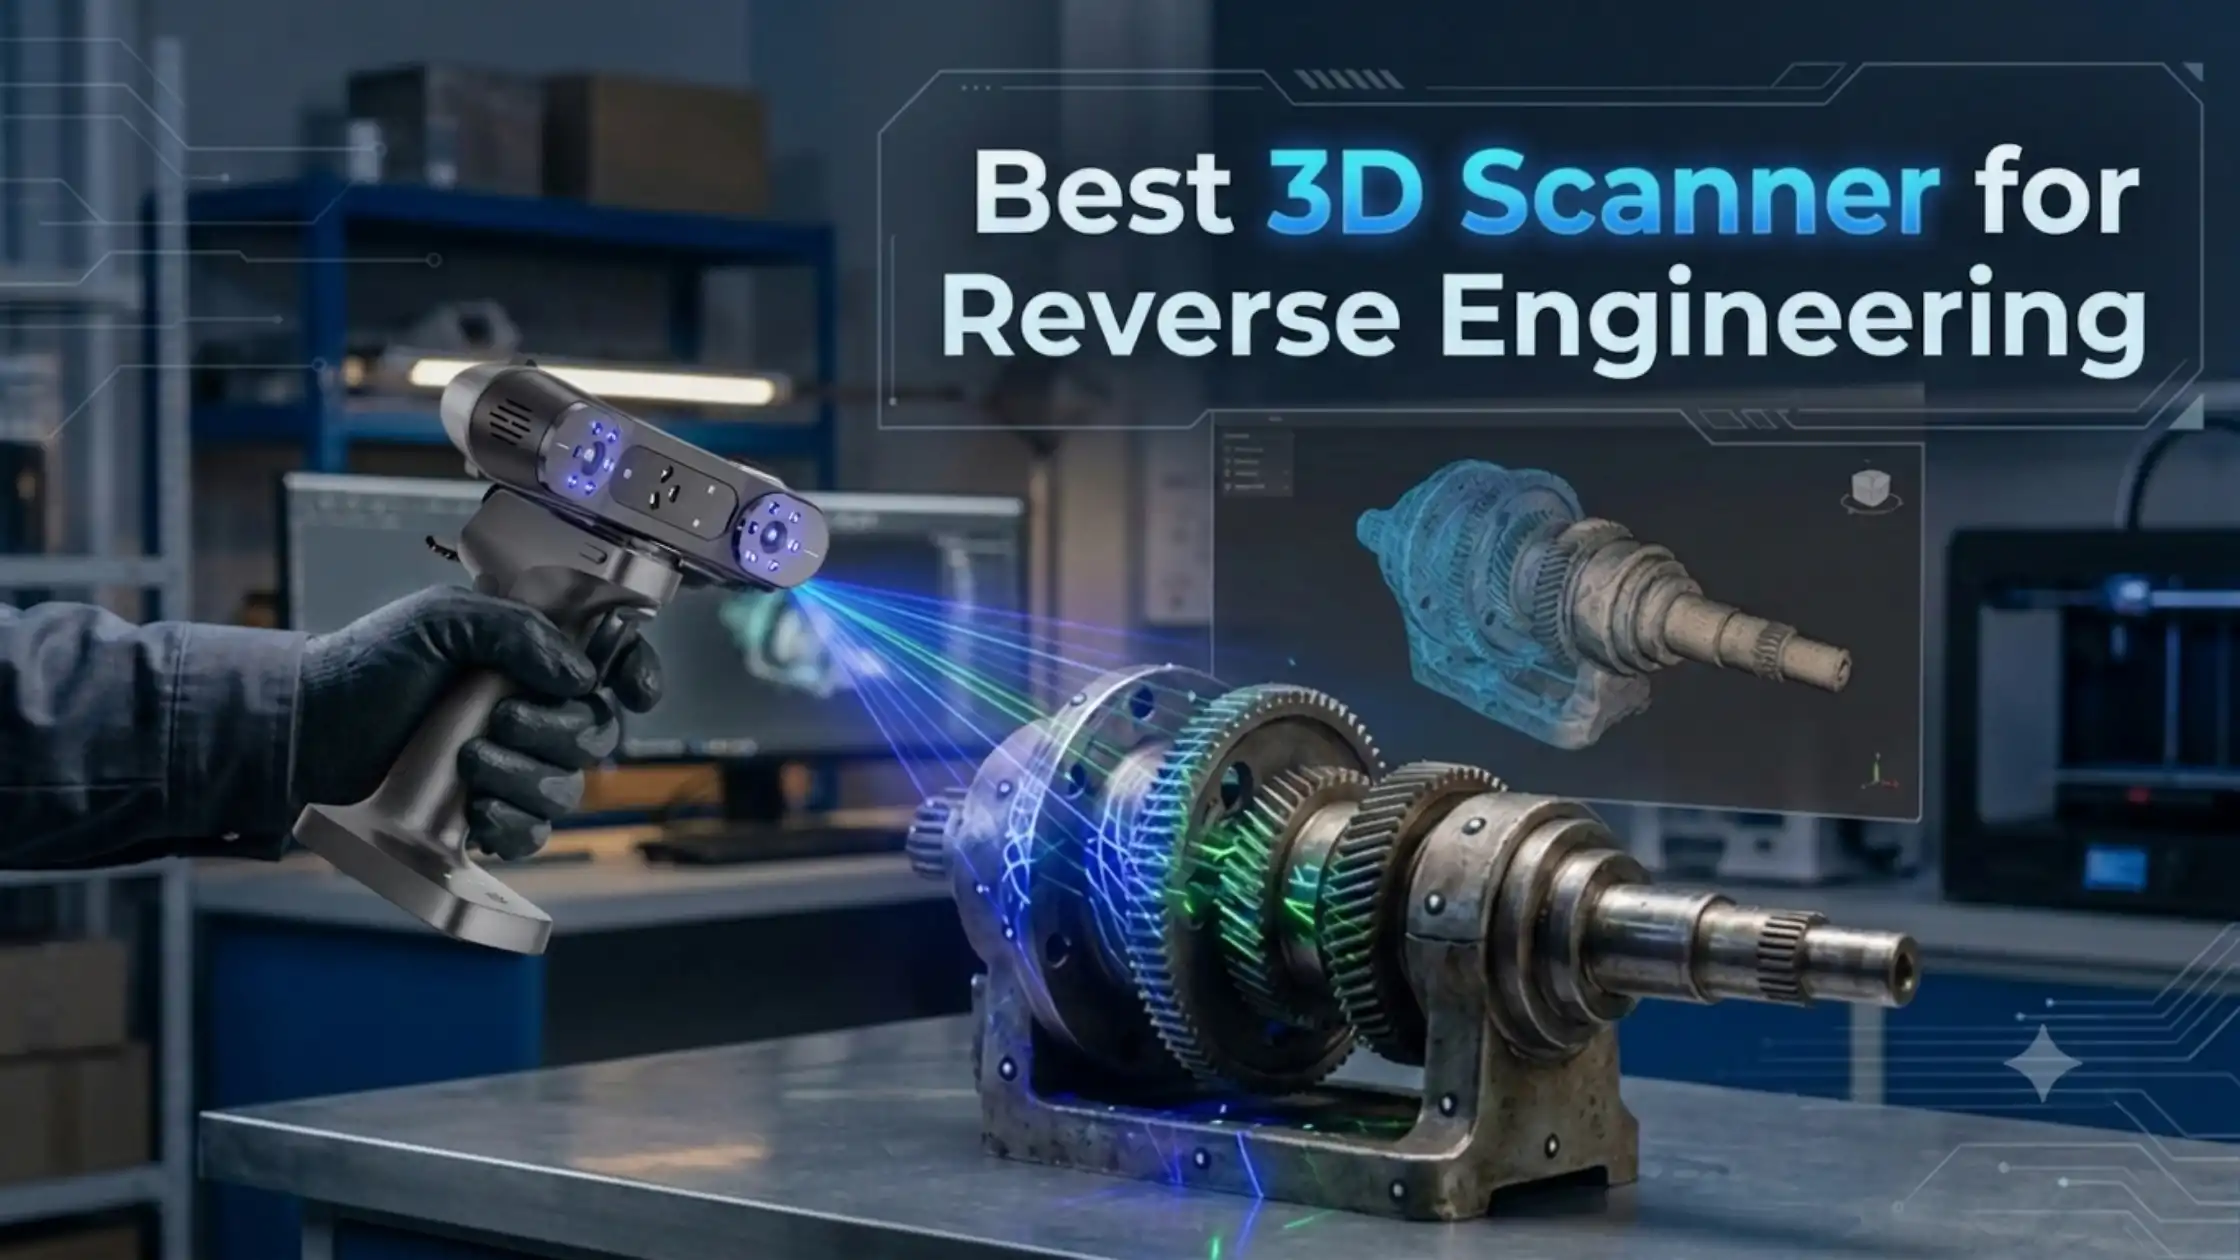
Reverse engineering often starts with a simple problem: you have a physical component, but you do not have a usable CAD file.Creating that component again can be difficult when it contains curves, holes, recesses, complex surfaces or small details. However, 3D scanning can make the physical-to-digital process much easier.A 3D scanner captures the geometry of an existing component and creates digital scan data. You can then process this data, create a mesh and use it as a foundation for CAD reconstruction.However, not every scanner suits reverse engineering.For this application, accuracy, resolution, tracking, scanning range and surface compatibility all matter. Therefore, choosing the right scanner requires more than looking at one specification.Among the available options, the Creality RaptorX 3D Scanner stands out for demanding and varied reverse-engineering workflows because it combines multiple scanning technologies, high accuracy and a broad object-size range.What Makes a 3D Scanner Good for Reverse Engineering?Before choosing a scanner, it helps to understand what actually matters.1. AccuracyAccuracy tells you how closely the captured measurements represent the physical object. For reverse engineering, this matters because even small dimensional differences can affect how a recreated component fits or functions. Therefore, look for a scanner that provides the level of accuracy your application requires.2. ResolutionAccuracy and resolution are not the same. Accuracy relates to how close the measurement is to the real object. Resolution relates to how finely the scanner captures surface details. For example, a component may require accurate overall dimensions while also containing small grooves, edges or other fine features. As a result, you should consider both specifications instead of focusing on accuracy alone.3. Tracking PerformanceTracking determines how well the scanner follows the object while you move around it. Depending on the scanner, tracking can use geometry, markers, texture or a combination of methods. Good tracking becomes especially important when you scan large or complex components. It can help maintain alignment as you move around the object.4. Scanning RangeObject size also plays an important role. A scanner designed for small mechanical components may not provide the same workflow for a large automotive component. Therefore, check the scanner's supported scanning range before making a purchase.5. Complex Geometry and Difficult SurfacesReverse engineering frequently involves parts with holes, grooves, recessed areas, curved surfaces and narrow sections. Surface characteristics matter too. Black, dark, reflective or metallic components can create additional scanning challenges. For this reason, check how the scanner handles the specific surfaces and geometries you work with.How Does 3D Scanning Fit Into Reverse Engineering?A 3D scanner is one part of a larger reverse-engineering workflow.The typical process looks like this:Physical Part ? 3D Scan ? Point Cloud ? Mesh ? Data Cleanup ? CAD Reconstruction ? Validation ? ManufacturingFirst, you scan the physical component.Next, the scanner generates digital scan data. Software then processes this information into a point cloud and mesh.After that, you clean and align the scan data. Finally, you use suitable CAD or reverse-engineering software to reconstruct the component.This distinction is important because a 3D scanner does not automatically turn every physical object into a fully editable CAD model. Instead, the scanner provides the digital geometry that supports the scan-to-CAD process.Best 3D Scanners for Reverse EngineeringDifferent projects need different capabilities. So, instead of treating one scanner as suitable for every situation, consider what each model is designed to do.Creality RaptorX — For Demanding Reverse Engineering WorkflowsThe Creality RaptorX 3D Scanner is designed for users who need flexibility across different reverse-engineering applications. It combines 34 cross blue laser lines, 7 parallel blue laser lines and NIR structured light. It also offers 0.02 mm + 0.06 mm/m volumetric accuracy, scanning speeds of up to 1.02 million points per second, wireless scanning and a 5–4000 mm object range.This combination matters because reverse-engineering projects can vary significantly. One project may involve a detailed mechanical component. Another may involve a much larger automotive or industrial part. Therefore, a scanner that supports different scanning modes and object sizes can fit a wider range of workflows.Creality Sermoon S1:- For Complex and Recessed GeometryThe Creality Sermoon S1 offers a different strength. It combines blue laser scanning with NIR structured light and supports a 5–4000 mm scanning range. Its specifications include 0.02 mm volumetric accuracy + 0.08 mm/m and scanning speeds of up to 90 FPS. It also focuses on challenging geometry such as deep holes, narrow gaps and recessed areas. Consequently, it can be a suitable consideration when these features are common in your reverse-engineering projects.Creality Raptor:- For Precision-Focused Laser ScanningThe Creality Raptor focuses on high-precision blue-laser scanning. The listed specifications include 7 blue parallel laser lines, accuracy of up to 0.02 mm, scanning speeds of up to 60 FPS and a 5–2000 mm object range. This makes it a consideration for users who want a more focused precision-scanning workflow for industrial components.3DMakerpro Toucan Standard:- For Flexible ScanningThe 3DMakerpro Toucan Standard takes a flexible, all-in-one approach. It uses blue laser structured light and offers up to 0.03 mm accuracy in small mode, with different resolution and field-of-view options. It also supports feature, marker and global-marker tracking. Therefore, it can suit users who need flexibility across different object sizes and scanning situations.Creality CR-Scan Otter Lite:- For Portable ScanningThe Creality CR-Scan Otter Lite focuses more on portability and general-purpose scanning. Its listed features include up to 0.05 mm accuracy, a 20–2000 mm object range, up to 30 FPS, wireless scanning and multiple alignment methods. As a result, it can work well for users who value portability and versatility rather than focusing solely on demanding reverse-engineering precision.CR-Scan Ferret SE:- For Entry-Level ScanningThe Creality CR-Scan Ferret SE is positioned toward beginners, hobbyists and less demanding digitization applications. Its listed specifications include 0.1 mm accuracy, anti-shake tracking and 24-bit full-color scanning. Therefore, it can be considered when your requirements are more focused on basic digitization, 3D printing and general scanning.RaptorX vs Sermoon S1 vs RaptorFor serious reverse-engineering users, these three scanners deserve closer attention.Therefore, your application should guide the decision rather than choosing purely from a specification sheet.Can a 3D Scanner Create a CAD Model?Not directly. A scanner creates scan data, rather than automatically producing a finished editable CAD model.The process usually involves:Scan ? Point Cloud ? Mesh ? Cleanup ? Surface or Feature Reconstruction ? CADYou may then use CAD or reverse-engineering software to create the final editable model. This workflow makes 3D scanning particularly useful when you need to recreate an existing component for design, prototyping or manufacturing.Where Can 3D Scanners Be Used for Reverse Engineering?3D scanning can support several engineering and manufacturing applications, including:Mechanical component digitizationAutomotive component scanningReplacement and spare-part developmentProduct developmentPrototypingTooling and fixturesQuality inspectionDimensional inspectionManufacturingLegacy component digitization3D printingFor example, a manufacturer can scan an existing component and use the resulting geometry as a starting point for reconstruction.Similarly, a product designer can digitize an existing physical part before modifying its design.How to Choose a 3D Scanner for Reverse EngineeringBefore purchasing a scanner, check these factors:Object size — Make sure the scanner covers your typical components.Required accuracy — Match accuracy to your engineering requirements.Resolution — Check whether it can capture the details you need.Surface characteristics — Consider black, metallic and reflective surfaces.Geometry — Check performance around holes, grooves and recessed areas.Scanning speed — Faster capture can improve large-part workflows.Tracking — Review geometry, marker and texture tracking options.Software compatibility — Confirm compatibility with your existing workflow.Output formats — Check support for formats such as STL, OBJ and PLY.Portability — Consider whether you need a wired or wireless workflow.Post-processing — Understand the software required after scanning.Future applications — Choose a scanner that can support your upcoming projects.Which 3D Scanner Should You Choose?There is no single scanner that fits every reverse-engineering project. If you need a versatile scanner for demanding reverse-engineering workflows, RaptorX is a strong option to consider.If deep holes and recessed geometry are central to your work, Sermoon S1 offers capabilities specifically suited to those features. If you need precision-focused blue-laser scanning, Raptor provides another option.Meanwhile, Toucan Standard suits users looking for a flexible all-in-one workflow, while Otter Lite focuses on portability and general-purpose scanning. For beginners and less demanding applications, Ferret SE provides an entry-level route into 3D scanning.Ultimately, the best 3D scanner for reverse engineering depends on your part size, accuracy requirements, geometry, surface type, tracking needs and scan-to-CAD workflow.If your projects vary from detailed mechanical components to larger industrial parts, the hybrid capabilities and broad scanning range of the Creality RaptorX make it a particularly relevant option to explore.You can explore and buy these 3D scanners from 3Idea Technology, with options available through the 3Idea website and mobile app. Browse the range, compare models and choose the scanner that best fits your application and workflow.Explore 3D Scanners: https://www.3idea.in/category/3d-scanner Shop on the App: https://play.google.com/store/apps/details?id=com.threeidea&pcampaignid=web_sharehttps://apps.apple.com/in/app/3idea/id6762472249 Frequently Asked QuestionsQ. What is the best 3D scanner for reverse engineering?Ans: The best 3D scanner depends on accuracy, object size, geometry, surface type and your scan-to-CAD workflow. Creality RaptorX would be best for demanding reverse engineering workflowsQ. Can a 3D scanner be used for reverse engineering?Ans: Yes, a 3D scanner can capture an existing component and provide digital data for reverse-engineering workflows.Q. How accurate does a 3D scanner need to be for reverse engineering?Ans: The required accuracy depends on the component, dimensional tolerances and final application.Q. What is the difference between 3D scanning and reverse engineering?Ans: 3D scanning captures physical geometry, while reverse engineering uses that data to reconstruct or develop a digital model.Q. Can a 3D scanner create a CAD model?Ans: A scanner creates scan data; additional processing and CAD reconstruction are normally required to create an editable CAD model.Q. What is the best 3D scanner for automotive reverse engineering?Ans: The choice depends on vehicle-part size, geometry, surface characteristics, accuracy and scanning range.Q. Can 3D scanners scan black and reflective objects?Ans: Some scanners are designed to handle difficult black or metallic surfaces, although results can still depend on the object and scanning conditions.Q. Is RaptorX good for reverse engineering?Ans: RaptorX is designed for demanding workflows and combines blue-laser and NIR scanning with a broad object-size range.Q. What is the difference between RaptorX and Sermoon S1?Ans: RaptorX emphasizes versatile hybrid scanning, while Sermoon S1 places particular emphasis on deep holes, narrow gaps and recessed geometry.Q. Which 3D scanner is best for mechanical parts?Ans: The appropriate scanner depends on the mechanical part's size, detail level, surface and required dimensional accuracy.Q. Can a 3D scanner be used for quality inspection?Ans: Yes, scan data can support dimensional inspection and comparison workflows when paired with suitable processing or inspection software.Q. What software is needed after 3D scanning?Ans: Depending on the workflow, you may need software for point-cloud processing, mesh processing, reverse engineering, inspection and CAD reconstruction.
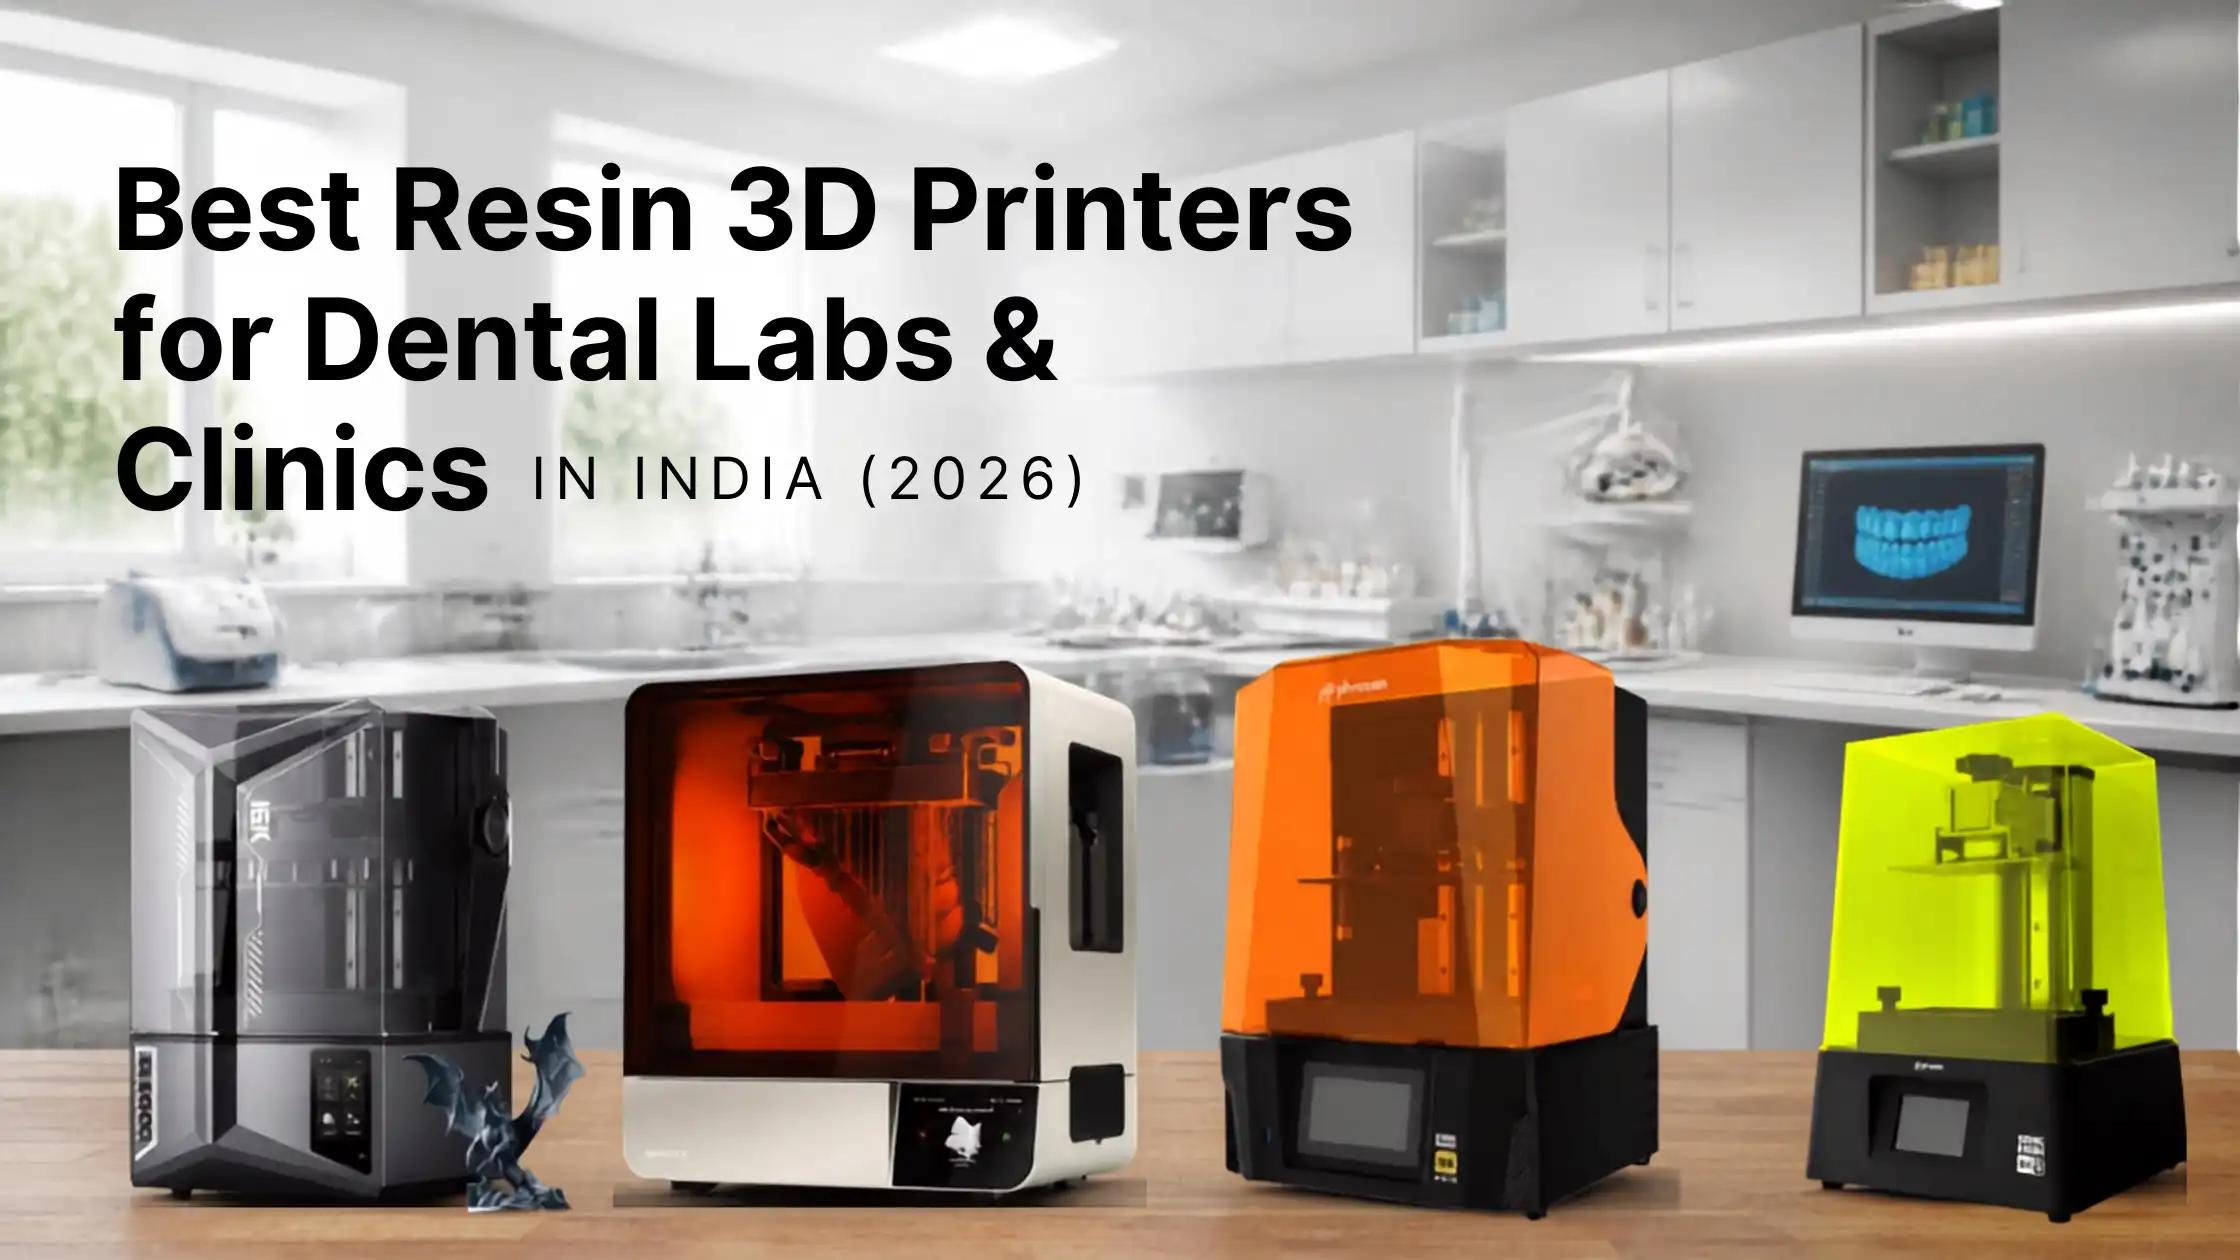
Digital dentistry has transformed how clinics and dental laboratories create models, surgical guides, splints, aligner models and other dental components. However, choosing the right dental resin 3D printer is not simply about picking the printer with the highest resolution.Instead, you need to consider accuracy, repeatability, print speed, build volume, resin compatibility, workflow and post-processing requirements. Therefore, in this guide, we compare some of the best resin 3D printers for dental labs and clinics in India in 2026 to help you choose the right option for your workflow.What Should You Look for in a Dental Resin 3D Printer?Before comparing individual printers, consider the factors that directly affect your dental workflow.Accuracy and Repeatability: Dental applications require consistent dimensions and fine details. Therefore, look for a printer that can deliver reliable results across repeated print runs, not just a good result on a single print.Resolution and Surface Detail: Higher resolution can help reproduce small details and create smoother surfaces. However, resolution alone does not determine print quality. Calibration, optics, resin and printing settings also play an important role.Build Volume and Speed: If you run a dental laboratory, build volume and throughput become especially important. A larger build area allows you to produce more models in a single batch, while faster printing can reduce turnaround times.Resin and Workflow Compatibility: Finally, check whether the printer supports the materials required for your applications. Model printing, surgical guides, splints and other dental applications may require different resins and validated workflows.Best Resin 3D Printers for Dental Labs & Clinics1. Formlabs Form 4B – Best for Dental ClinicsThe Formlabs Form 4B is designed specifically around dental workflows, making it a strong choice for clinics that want a professional, streamlined resin printing solution.It supports a broad range of dental applications, including dental models, surgical guides, clear aligner models, splints, dentures and restorative workflows. Moreover, its integrated ecosystem simplifies the process from preparing a digital file to printing and post-processing.Best for: Dental clinics and professional dental practices that prioritize workflow, reliability and application-specific materials.2. Formlabs Form 4BL – Best for High-Volume Dental LabsFor laboratories handling larger production volumes, the Formlabs Form 4BL is the stronger option. It focuses on high-throughput dental production and allows labs to produce larger batches efficiently.As a result, it makes more sense for laboratories producing numerous dental or orthodontic models throughout the day. Furthermore, its production-focused workflow can help reduce manual intervention and improve consistency.Best for: High-volume dental laboratories and production environments.3. ELEGOO Saturn 4 Ultra 16K – Best High-Resolution Value OptionThe ELEGOO Saturn 4 Ultra 16K brings extremely high-resolution MSLA printing to users who prioritize fine detail.It features a 16K monochrome LCD, 14 × 19 ?m XY resolution, auto-leveling, resin heating and a large build volume. Additionally, its tilt-release technology and AI camera features can make the overall printing process more convenient.However, dental users should always verify that the selected resin is appropriate for their intended application.Best for: Users looking for high-resolution resin printing and flexible production capabilities.4. Phrozen Sonic Mighty Revo – Best Large-Format OptionThe Phrozen Sonic Mighty Revo combines high resolution with a larger printing area. It offers 14K resolution, 16.8 × 24.8 ?m XY resolution and a 22.3 × 12.6 × 23.5 cm build volume.Consequently, it can suit users who want to produce multiple detailed models in larger batches. Its high printing speed, automatic leveling and resin heating further support production-oriented workflows.Best for: Dental labs and users who need high-resolution printing with greater production capacity.5. Phrozen Sonic Mini 8K S – Best Compact High-Resolution OptionIf workspace is limited, the Phrozen Sonic Mini 8K S provides a compact alternative. With 8K resolution and 22 ?m XY resolution, it can produce detailed prints while taking up less space.Therefore, it can be a practical option for smaller clinics, dental professionals and users who do not require a large production platform.Best for: Compact dental setups and smaller-scale high-detail printing.Dental 3D Printer ComparisonPrinterBest ForKey StrengthFormlabs Form 4BDental clinicsDental-focused workflowFormlabs Form 4BLDental laboratoriesHigh-volume productionELEGOO Saturn 4 Ultra 16KLabs & clinicsHigh-resolution printingPhrozen Sonic Mighty RevoProduction workflowsLarge-format printingPhrozen Sonic Mini 8K SCompact setupsHigh detail in a smaller footprintWhich Dental 3D Printer Is Best for Your Use Case?The right printer ultimately depends on your workflow.For dental clinics: Formlabs Form 4B is a strong choice for an integrated dental workflow.For high-volume dental labs: Formlabs Form 4BL is better suited to production-focused environments.For high-resolution printing: ELEGOO Saturn 4 Ultra 16K offers a strong combination of detail and flexibility.For larger production batches: Phrozen Sonic Mighty Revo provides a larger printing platform.For compact setups: Phrozen Sonic Mini 8K S is a practical high-resolution option.What Can You 3D Print for Dental Applications?Depending on the printer, resin and validated workflow, dental 3D printing can support applications such as:Dental and diagnostic modelsOrthodontic modelsClear aligner modelsSurgical guidesOcclusal splintsCustom impression traysDenture workflowsRestorative modelsCasting and pressing patternsImportantly, not every resin printer or resin is suitable for every clinical application. Always select materials according to their intended use and applicable requirements.How Does a Dental 3D Printing Workflow Work?A typical digital dental workflow follows these steps:Intraoral Scan ? CAD Design ? STL File ? Slicing ? Resin Printing ? Washing ? Support Removal ? Curing ? FinishingThis workflow connects digital dentistry with physical production and can significantly improve turnaround times when properly implemented.What Resin Should You Use for Dental 3D Printing?The required resin depends on the application. Model resins are commonly used for diagnostic and orthodontic models, while specialized materials may be required for surgical guides, splints, dentures or other applications.Therefore, don't choose a resin based only on printer compatibility. Instead, verify that the material is intended and validated for the specific application you plan to produce.How to Choose Between Formlabs, ELEGOO and Phrozen?Choose Formlabs if you prioritize a dental-focused ecosystem, application-specific materials and an integrated workflow.Choose ELEGOO if high resolution and an advanced MSLA platform are your primary priorities.Choose Phrozen if you want high-resolution printing with options for larger-format or compact production.Ultimately, the best dental 3D printer depends on your application, material requirements, accuracy, production volume, workflow and total cost of ownership.What is the difference between a dental 3D printer and a regular resin 3D printer?Dental 3D printing solutions can offer application-specific materials, validated workflows, specialized software and features designed around professional dental production. A general-purpose resin printer may not provide the same level of material validation or clinical workflow support.ConclusionThere is no single best dental resin 3D printer for every user. Instead, choose according to your specific requirements.Form 4B is a strong choice for clinics, while Form 4BL is better suited to high-volume dental laboratories. Meanwhile, the ELEGOO Saturn 4 Ultra 16K offers high-resolution MSLA printing, and the Phrozen Sonic Mighty Revo provides a larger production platform. For smaller setups, the Phrozen Sonic Mini 8K S offers detailed printing in a compact format.Before making your decision, evaluate the complete workflow—not just the resolution printed on the specification sheet. A printer that matches your applications, materials and production volume will deliver far more value in the long run.Frequently Asked QuestionsQ. What is the best resin 3D printer for dental labs?Ans:- For high-volume dental laboratory production, the Formlabs Form 4BL is a strong option. However, the ideal printer depends on production volume, applications, materials and workflow requirements.Q. What is the best 3D printer for a dental clinic?Ans:- The Formlabs Form 4B is a strong choice for dental clinics because it is designed around professional dental workflows and supports a broad range of applications.Q. Can resin 3D printers be used to make dental models?Ans:- Yes. Resin 3D printers can produce detailed dental, orthodontic and diagnostic models when paired with an appropriate printer, resin and workflow.Q. Is 16K better than 8K for dental 3D printing?Ans:- Not necessarily. Resolution is only one factor. Accuracy, repeatability, resin properties, calibration, layer settings and overall workflow also influence the final result.Q. Can you 3D print surgical guides?Ans:- Yes, but you must use a resin specifically intended and validated for surgical-guide applications and follow the appropriate manufacturing and post-processing workflow.
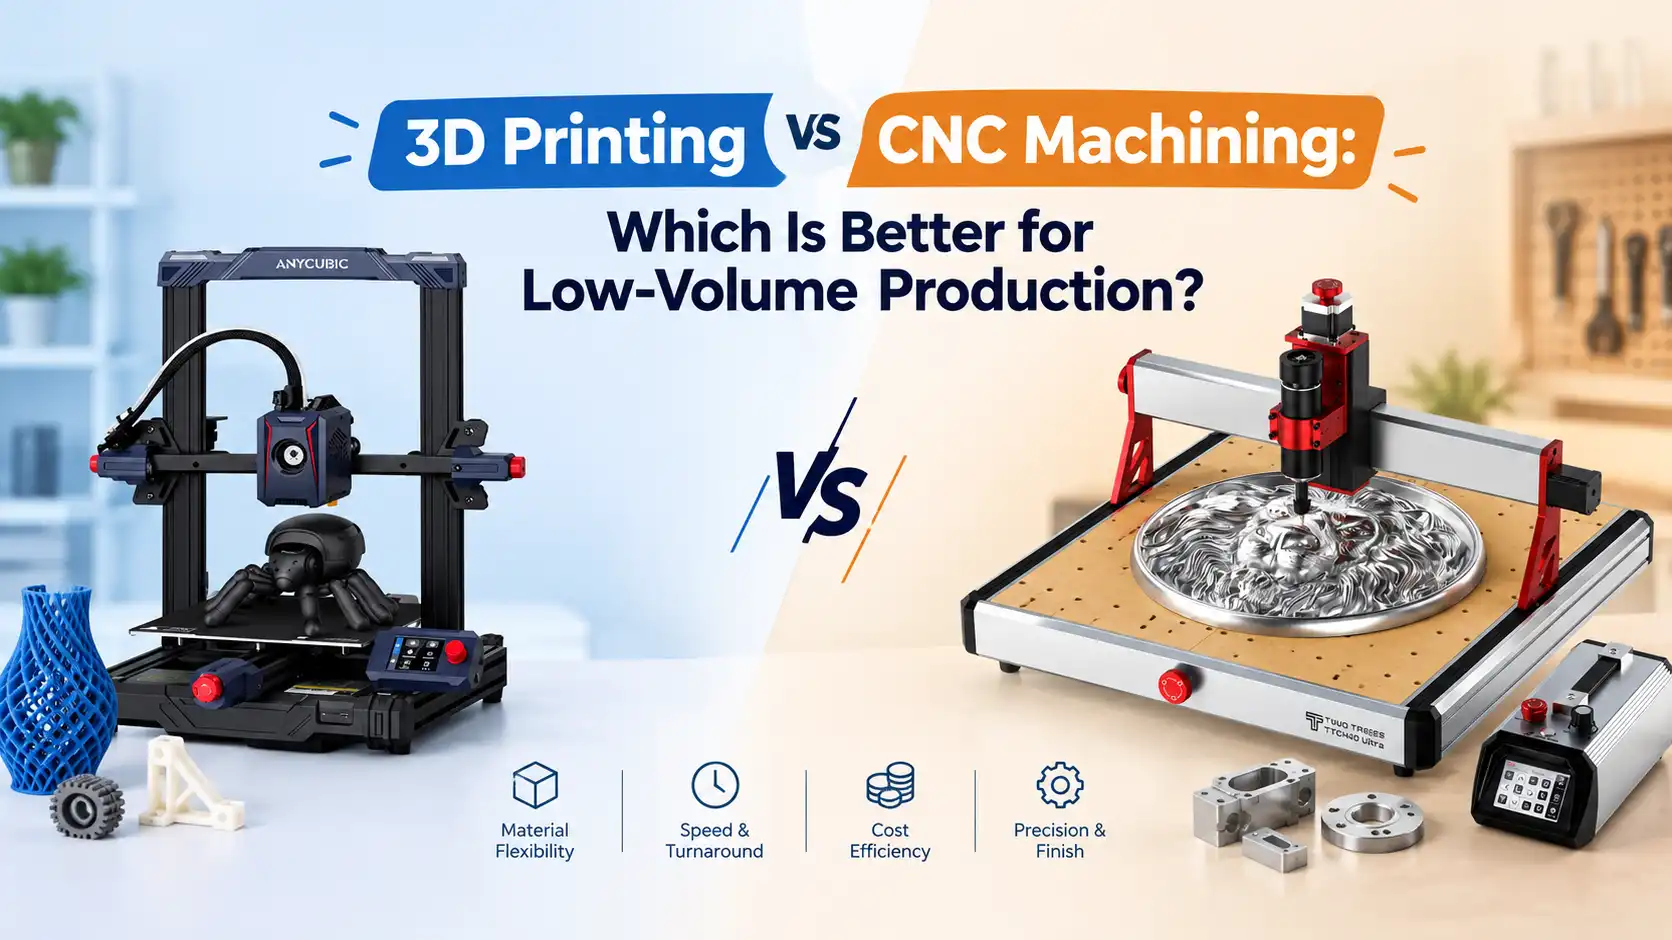
Manufacturers today face increasing pressure to deliver products faster, reduce upfront investment, and adapt quickly to changing customer demands. Whether producing prototypes, custom parts, or small production batches, selecting the right manufacturing process can significantly impact costs, lead times, and product quality.One of the most common questions businesses ask is: Should you use 3D printing or CNC machining for low-volume production?Both technologies offer distinct advantages, but the ideal choice depends on factors such as quantity, material requirements, design complexity, and performance expectations. In this guide, we'll compare 3D printing vs CNC machining across key decision-making criteria to help manufacturers choose the most suitable process.Understanding Low-Volume ProductionBefore comparing technologies, it's important to define what constitutes low volume production.In manufacturing, low-volume runs generally fall into two categories:1–100 units: Prototypes, custom products, and pilot production.100–1,000 units: Small batch manufacturing and market testing.Industries frequently using low-volume manufacturing include:AutomotiveAerospaceMedical devicesConsumer productsIndustrial equipmentElectronicsThese sectors often require rapid design changes, custom components, or limited production quantities that do not justify large-scale tooling investments.What Is 3D Printing?3D printing, also known as additive manufacturing, creates parts by building material layer by layer from a digital design.Popular technologies include:FDM (Fused Deposition Modeling): Commonly used for functional prototypes and affordable production parts.SLA (Stereolithography): Produces highly detailed parts with smooth surface finishes.SLS (Selective Laser Sintering): Ideal for durable engineering components and complex geometries.Key advantages include:No tooling requirementsFast design iterationsReduced material wasteComplex geometry capabilityOn-demand manufacturingThese benefits make additive manufacturing highly attractive for custom and short-run applications.What Is CNC Machining?CNC machining is a subtractive manufacturing process that removes material from a solid block using cutting tools.The most common CNC processes include:Milling: Rotating tools remove material to create precise shapes and features.Turning: Material rotates while cutting tools shape cylindrical components.Key advantages include:Exceptional dimensional accuracySuperior surface finishWide range of production-grade materialsConsistent repeatabilityBecause of these strengths, CNC machining remains a preferred choice for many functional and end-use applications.3D Printing vs CNC Machining ComparisonWhen evaluating 3D printing vs CNC machining, several factors influence the final decision. While both technologies deliver quality results, their strengths vary depending on production requirements.Cost Comparison for Low-Volume ProductionCost is often one of the most important considerations when evaluating manufacturing options.Tooling Costs: One of the biggest advantages of additive manufacturing is the absence of tooling. Since no molds, dies, or fixtures are required, low volume production projects can often begin immediately.Setup Costs: 3D printing typically requires minimal setup compared to machining, reducing initial project expenses.Labor Costs: Complex CNC operations often require skilled machinists and multiple setups, increasing labor costs.Material Costs: Although some 3D printing materials can be expensive, overall costs are often lower for smaller quantities due to reduced waste.For many short-run projects, 3D printing vs CNC machining comparisons reveal that additive manufacturing offers a lower total production cost.Speed ComparisonSpeed can significantly impact product development cycles and time-to-market.Design-to-Part Time: A 3D printed component can often be produced within hours of finalizing the CAD model.Rapid Prototyping: Additive manufacturing allows multiple design iterations without additional tooling or setup costs.Production Turnaround: For custom parts and small batches, 3D printing generally delivers faster turnaround times.CNC machining may require programming, fixturing, and setup procedures before production begins.As a result, many businesses choose additive manufacturing for projects requiring rapid delivery.Material and Strength ComparisonMaterial selection often plays a major role in process selection.Common 3D Printing MaterialsPLAPETGABSNylonEngineering-grade polymersCommon CNC MaterialsAluminumSteelTitaniumBrassEngineering plasticsWhile modern additive manufacturing materials continue to improve, CNC machining still offers broader access to high-performance metals and production-grade materials.For applications requiring extreme strength, heat resistance, or durability, machining often provides an advantage.When Should You Choose 3D Printing?There are several situations where additive manufacturing becomes the preferred solution.Choose 3D printing when you need:Rapid prototypingComplex geometriesCustom part manufacturingSmall batch manufacturingOn-demand productionReduced upfront costsFor businesses focused on innovation and speed, additive manufacturing provides significant flexibility.It is often considered the most efficient option for low volume production projects involving frequent design revisions.When Should You Choose CNC Machining?Despite the growth of additive manufacturing, machining remains essential for many applications.Choose CNC machining when you require:Tight engineering tolerancesPremium surface finishMetal componentsHigh-performance materialsFunctional end-use partsIn these situations, CNC machining often delivers superior consistency and mechanical performance.Real-World Use CasesStartup Product DevelopmentStartups frequently rely on 3D printing to accelerate product development while minimizing upfront investment.Recommended Method: 3D PrintingAerospace Fixture ManufacturingMany aerospace companies combine both technologies to optimize development and production.Recommended Method: Hybrid WorkflowProduction-Grade Metal ComponentsIndustries requiring high-strength metal parts often favor machining.Recommended Method: CNC MachiningThese examples demonstrate that the best manufacturing method depends on the application's specific requirements.Can 3D Printing and CNC Machining Work Together?Absolutely.Many manufacturers use a hybrid workflow that combines the strengths of both technologies.A common approach includes:Design and prototype using 3D printingValidate form, fit, and functionRefine the designProduce final components using CNC machiningThis strategy reduces development time while ensuring final production quality.Rather than viewing 3D printing vs CNC machining as competing technologies, many businesses benefit from using both throughout the product lifecycle.Final VerdictThe answer depends on your production goals, budget, and technical requirements.Choose 3D Printing If:Low quantitiesFast turnaroundComplex designsLower budgetFrequent design changesChoose CNC Machining If:Tight tolerancesPremium surface finishMetal componentsProduction-grade requirementsMaximum mechanical performanceFor most low volume production applications involving custom parts, prototypes, and short production runs, additive manufacturing often provides greater speed and cost efficiency. However, when precision, surface quality, and material performance are critical, CNC machining remains the preferred solution.ConclusionChoosing between 3D printing vs CNC machining ultimately depends on the goals of your project. Both technologies play important roles in modern manufacturing and offer unique advantages.For businesses focused on speed, customization, and cost-effective low volume production, additive manufacturing is often the preferred solution. For projects requiring premium finishes, tight tolerances, and production-grade materials, CNC machining remains an industry standard.Understanding the strengths of each process allows manufacturers to reduce costs, improve efficiency, and select the most effective production method for every application.Frequently Asked QuestionsQ. Is 3D printing cheaper than CNC machining?Ans: For small quantities and custom parts, 3D printing is often more cost-effective because it eliminates tooling and reduces setup expenses.Q. Which is faster for low-volume production?Ans: In most cases, 3D printing offers faster design-to-part turnaround, especially for prototypes and small production batches.Q. Can 3D printing replace CNC machining?Ans: Not entirely. While additive manufacturing is excellent for many applications, CNC machining remains superior for certain materials, tolerances, and surface finish requirements.Q. What is the best method for small batch manufacturing?Ans: The answer depends on part requirements, quantity, material selection, and budget. Many projects benefit from evaluating both processes.Q. Is CNC machining more accurate than 3D printing?Ans: Generally, CNC machining achieves tighter tolerances and higher dimensional accuracy than most 3D printing technologies.
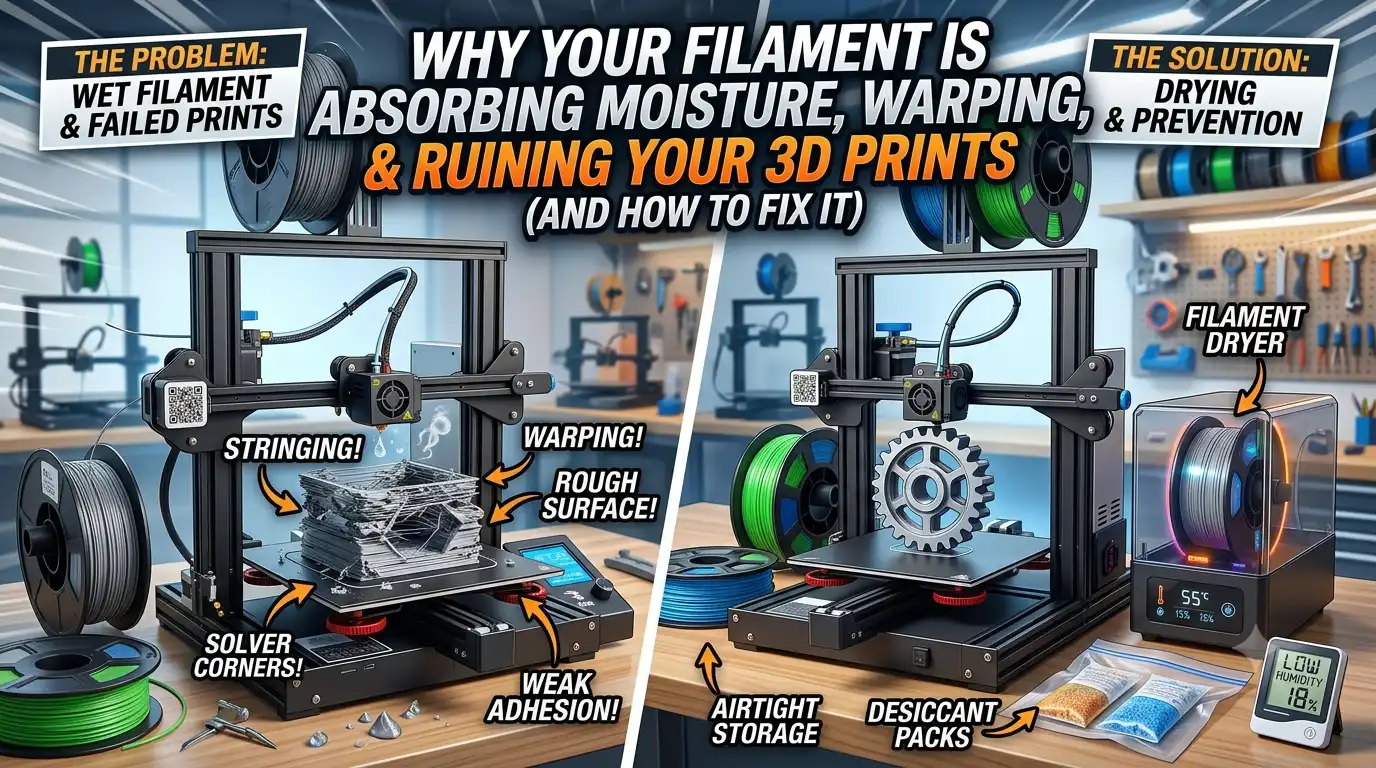
Your printer settings may be perfect, your bed levelled correctly, and your slicing profile fully optimized, but your filament could still be silently ruining every print.One of the most common yet overlooked causes of print failures is filament absorbing moisture from the surrounding air. Many 3D printing materials are hygroscopic, meaning they naturally pull water vapor from the environment. Once moisture enters the filament, it can lead to stringing, warping, rough surfaces, weak parts, and inconsistent extrusion.If you've recently experienced unexplained print quality issues, wet filament may be the hidden culprit. Understanding how moisture affects printing and learning how to prevent it can dramatically improve print quality while reducing wasted time and material.Why Does 3D Printing Filament Absorb Moisture?Most 3D printing materials are hygroscopic to varying degrees. This means they absorb humidity directly from the air, even when stored indoors.As filament absorbing moisture becomes saturated with water vapor, that moisture turns into steam when passing through the hot nozzle. The result is poor extrusion consistency and visible print defects.Different materials react differently to humidity.Filament TypeMoisture SensitivityPLAMediumPETGMedium-HighABSMediumTPUHighNylonVery HighPVAExtremely HighMaterials such as Nylon and PVA can begin absorbing moisture within hours of exposure, while PLA and PETG typically take longer but are still vulnerable.Signs Your Filament Has Absorbed MoistureRecognizing the symptoms early can help prevent failed prints and wasted material.Popping or Cracking Sounds: One of the easiest signs of wet filament is hearing popping or crackling noises during printing. This happens when trapped water rapidly converts to steam inside the nozzle.Excessive Stringing: If your prints suddenly develop fine strands between features, moisture may be affecting extrusion consistency.Many users find that wet filament is responsible for unexplained stringing despite unchanged printer settings.Rough Surface Finish: Moisture often creates uneven extrusion that leads to rough or pitted surfaces.Weak Layer Adhesion: Water contamination can reduce bonding between layers, making parts weaker and more prone to failure.Brittle Filament: Spools that snap easily during handling may have absorbed excessive moisture over time.How Moisture Affects Print QualityThe impact of moisture extends far beyond cosmetic issues.Warping: Steam expansion during extrusion can create uneven cooling and dimensional inconsistencies.Stringing: Moisture disrupts filament flow, causing unwanted strings and blobs throughout the print.Under-Extrusion: Water vapor reduces extrusion consistency, leading to gaps and missing material.Surface Defects: Rough textures, bubbles, and visible imperfections often occur when filament absorbing moisture is printed without proper drying.Reduced Mechanical Strength: Parts printed using wet filament often have weaker layer bonding and reduced structural performance.For functional components, this can lead to premature failure under load.Which Filaments Are Most Affected?PLA: Although often considered beginner-friendly, PLA still absorbs moisture and can develop stringing and brittle behavior if stored improperly.PETG: PETG moisture issues commonly appear as excessive stringing and poor surface finish.TPU: Flexible materials tend to absorb moisture rapidly and often require controlled storage conditions.Nylon: Nylon is one of the most hygroscopic materials used in 3D printing and generally requires drying before critical applications.PVA: As a water-soluble support material, PVA is extremely sensitive to humidity and must be stored carefully.How to Dry Wet Filament ProperlyIf moisture contamination has already occurred, drying the filament can often restore print quality.Method 1: Use a Filament DryerA dedicated filament dryer provides controlled temperature and airflow, making it the safest and most effective solution.This is generally the preferred method for removing moisture from wet filament.Method 2: Use a Food DehydratorMany hobbyists successfully use food dehydrators to dry filament at consistent temperatures.Method 3: Use an Oven (With Caution)A conventional oven can work, but temperature fluctuations may damage the spool or filament if not carefully monitored.Recommended Drying TemperaturesFilamentTemperaturePLA45–50°CPETG60–65°CABS70–80°CTPU45–55°CNylon70–90°CAlways follow manufacturer recommendations whenever available.Best Ways to Store FilamentPreventing moisture exposure is far easier than troubleshooting failed prints.Vacuum Storage Bags: Vacuum-sealed storage significantly reduces humidity exposure.Airtight Containers: Plastic storage boxes with secure seals provide effective protection for frequently used materials.Dry Boxes: Dry boxes allow continuous printing while maintaining low humidity levels.Silica Gel Packs: Silica gel absorbs excess moisture and helps maintain stable storage conditions.Learning how to keep filament dry is one of the simplest ways to improve long-term print consistency.Do You Need a Filament Dryer?The answer depends on how often you print and which materials you use.Hobby Users: Occasional users printing primarily with PLA may only require airtight storage and periodic drying.Professional Users: Engineers and product developers benefit from consistent drying practices, particularly when producing functional parts.Print Farms: For high-volume operations, a filament dryer is often essential. Maintaining dry material improves reliability, reduces waste, and prevents downtime caused by filament absorbing moisture.For many users, a dedicated dryer quickly pays for itself by reducing failed prints and material loss.Moisture Prevention ChecklistFollow these simple best practices:Store filament in airtight containersUse silica gel packsDry filament before critical printsAvoid leaving spools exposed for long periodsMonitor room humidity levelsUse dry boxes for moisture-sensitive materialsLabel dried spools with drying datesConsistent storage habits can dramatically reduce the likelihood of wet filament affecting future projects.ConclusionMoisture is one of the most common hidden causes of print failures in 3D printing. From stringing and warping to weak parts and rough surfaces, the effects can impact both appearance and performance.Fortunately, preventing these issues is straightforward. Proper storage, humidity control, and occasional drying can help maintain material quality and improve print reliability.Whether you're a hobbyist or a professional user, understanding the risks of filament absorbing moisture and addressing wet filament early can save time, reduce waste, and consistently deliver better 3D printing results. You can get the premium quality filaments from 3Idea.Frequently Asked QuestionsQ. How long does it take for filament to absorb moisture?Ans: The timeframe depends on the material and environmental humidity. Nylon and PVA may absorb moisture within hours, while PLA typically takes longer.Q. Can PLA absorb moisture?Ans: Yes. Although less sensitive than some engineering materials, PLA can still absorb moisture and develop print quality issues.Q. Does wet filament always cause stringing?Ans: Not always, but stringing is one of the most common symptoms associated with moisture contamination.Q. How often should I dry filament?Ans: Frequency depends on usage, climate, and storage practices. High-humidity environments may require more frequent drying.Q. Is a filament dryer worth it?Ans: For frequent users, engineering materials, and print farms, a filament dryer can significantly improve consistency and reduce failed prints.