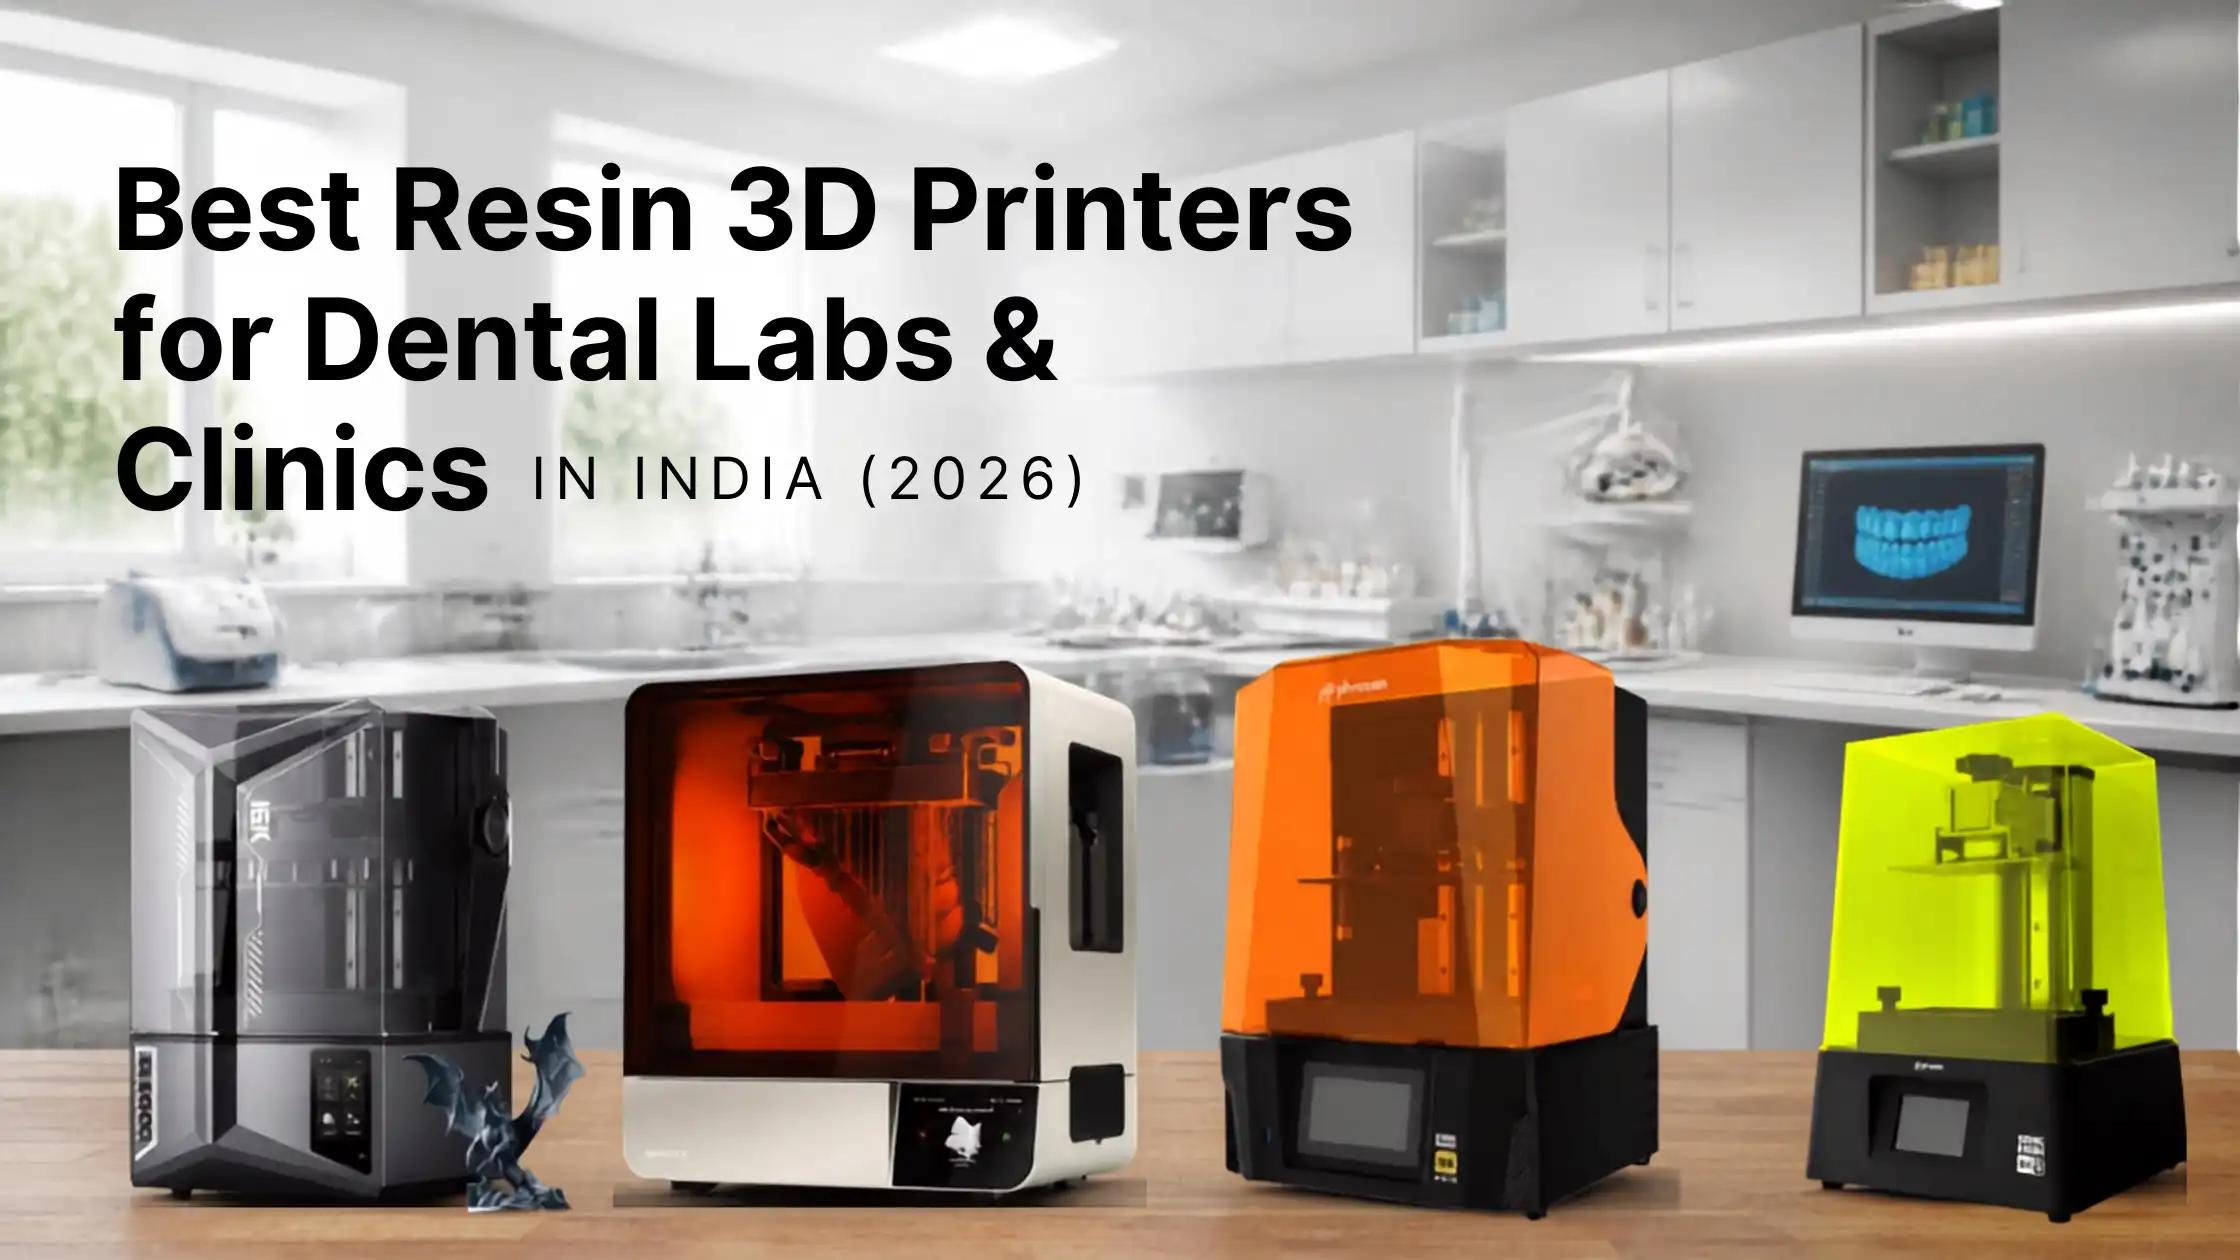
Digital dentistry has transformed how clinics and dental laboratories create models, surgical guides, splints, aligner models and other dental components. However, choosing the right dental resin 3D printer is not simply about picking the printer with the highest resolution.Instead, you need to consider accuracy, repeatability, print speed, build volume, resin compatibility, workflow and post-processing requirements. Therefore, in this guide, we compare some of the best resin 3D printers for dental labs and clinics in India in 2026 to help you choose the right option for your workflow.What Should You Look for in a Dental Resin 3D Printer?Before comparing individual printers, consider the factors that directly affect your dental workflow.Accuracy and Repeatability: Dental applications require consistent dimensions and fine details. Therefore, look for a printer that can deliver reliable results across repeated print runs, not just a good result on a single print.Resolution and Surface Detail: Higher resolution can help reproduce small details and create smoother surfaces. However, resolution alone does not determine print quality. Calibration, optics, resin and printing settings also play an important role.Build Volume and Speed: If you run a dental laboratory, build volume and throughput become especially important. A larger build area allows you to produce more models in a single batch, while faster printing can reduce turnaround times.Resin and Workflow Compatibility: Finally, check whether the printer supports the materials required for your applications. Model printing, surgical guides, splints and other dental applications may require different resins and validated workflows.Best Resin 3D Printers for Dental Labs & Clinics1. Formlabs Form 4B – Best for Dental ClinicsThe Formlabs Form 4B is designed specifically around dental workflows, making it a strong choice for clinics that want a professional, streamlined resin printing solution.It supports a broad range of dental applications, including dental models, surgical guides, clear aligner models, splints, dentures and restorative workflows. Moreover, its integrated ecosystem simplifies the process from preparing a digital file to printing and post-processing.Best for: Dental clinics and professional dental practices that prioritize workflow, reliability and application-specific materials.2. Formlabs Form 4BL – Best for High-Volume Dental LabsFor laboratories handling larger production volumes, the Formlabs Form 4BL is the stronger option. It focuses on high-throughput dental production and allows labs to produce larger batches efficiently.As a result, it makes more sense for laboratories producing numerous dental or orthodontic models throughout the day. Furthermore, its production-focused workflow can help reduce manual intervention and improve consistency.Best for: High-volume dental laboratories and production environments.3. ELEGOO Saturn 4 Ultra 16K – Best High-Resolution Value OptionThe ELEGOO Saturn 4 Ultra 16K brings extremely high-resolution MSLA printing to users who prioritize fine detail.It features a 16K monochrome LCD, 14 × 19 ?m XY resolution, auto-leveling, resin heating and a large build volume. Additionally, its tilt-release technology and AI camera features can make the overall printing process more convenient.However, dental users should always verify that the selected resin is appropriate for their intended application.Best for: Users looking for high-resolution resin printing and flexible production capabilities.4. Phrozen Sonic Mighty Revo – Best Large-Format OptionThe Phrozen Sonic Mighty Revo combines high resolution with a larger printing area. It offers 14K resolution, 16.8 × 24.8 ?m XY resolution and a 22.3 × 12.6 × 23.5 cm build volume.Consequently, it can suit users who want to produce multiple detailed models in larger batches. Its high printing speed, automatic leveling and resin heating further support production-oriented workflows.Best for: Dental labs and users who need high-resolution printing with greater production capacity.5. Phrozen Sonic Mini 8K S – Best Compact High-Resolution OptionIf workspace is limited, the Phrozen Sonic Mini 8K S provides a compact alternative. With 8K resolution and 22 ?m XY resolution, it can produce detailed prints while taking up less space.Therefore, it can be a practical option for smaller clinics, dental professionals and users who do not require a large production platform.Best for: Compact dental setups and smaller-scale high-detail printing.Dental 3D Printer ComparisonPrinterBest ForKey StrengthFormlabs Form 4BDental clinicsDental-focused workflowFormlabs Form 4BLDental laboratoriesHigh-volume productionELEGOO Saturn 4 Ultra 16KLabs & clinicsHigh-resolution printingPhrozen Sonic Mighty RevoProduction workflowsLarge-format printingPhrozen Sonic Mini 8K SCompact setupsHigh detail in a smaller footprintWhich Dental 3D Printer Is Best for Your Use Case?The right printer ultimately depends on your workflow.For dental clinics: Formlabs Form 4B is a strong choice for an integrated dental workflow.For high-volume dental labs: Formlabs Form 4BL is better suited to production-focused environments.For high-resolution printing: ELEGOO Saturn 4 Ultra 16K offers a strong combination of detail and flexibility.For larger production batches: Phrozen Sonic Mighty Revo provides a larger printing platform.For compact setups: Phrozen Sonic Mini 8K S is a practical high-resolution option.What Can You 3D Print for Dental Applications?Depending on the printer, resin and validated workflow, dental 3D printing can support applications such as:Dental and diagnostic modelsOrthodontic modelsClear aligner modelsSurgical guidesOcclusal splintsCustom impression traysDenture workflowsRestorative modelsCasting and pressing patternsImportantly, not every resin printer or resin is suitable for every clinical application. Always select materials according to their intended use and applicable requirements.How Does a Dental 3D Printing Workflow Work?A typical digital dental workflow follows these steps:Intraoral Scan ? CAD Design ? STL File ? Slicing ? Resin Printing ? Washing ? Support Removal ? Curing ? FinishingThis workflow connects digital dentistry with physical production and can significantly improve turnaround times when properly implemented.What Resin Should You Use for Dental 3D Printing?The required resin depends on the application. Model resins are commonly used for diagnostic and orthodontic models, while specialized materials may be required for surgical guides, splints, dentures or other applications.Therefore, don't choose a resin based only on printer compatibility. Instead, verify that the material is intended and validated for the specific application you plan to produce.How to Choose Between Formlabs, ELEGOO and Phrozen?Choose Formlabs if you prioritize a dental-focused ecosystem, application-specific materials and an integrated workflow.Choose ELEGOO if high resolution and an advanced MSLA platform are your primary priorities.Choose Phrozen if you want high-resolution printing with options for larger-format or compact production.Ultimately, the best dental 3D printer depends on your application, material requirements, accuracy, production volume, workflow and total cost of ownership.What is the difference between a dental 3D printer and a regular resin 3D printer?Dental 3D printing solutions can offer application-specific materials, validated workflows, specialized software and features designed around professional dental production. A general-purpose resin printer may not provide the same level of material validation or clinical workflow support.ConclusionThere is no single best dental resin 3D printer for every user. Instead, choose according to your specific requirements.Form 4B is a strong choice for clinics, while Form 4BL is better suited to high-volume dental laboratories. Meanwhile, the ELEGOO Saturn 4 Ultra 16K offers high-resolution MSLA printing, and the Phrozen Sonic Mighty Revo provides a larger production platform. For smaller setups, the Phrozen Sonic Mini 8K S offers detailed printing in a compact format.Before making your decision, evaluate the complete workflow—not just the resolution printed on the specification sheet. A printer that matches your applications, materials and production volume will deliver far more value in the long run.Frequently Asked QuestionsQ. What is the best resin 3D printer for dental labs?Ans:- For high-volume dental laboratory production, the Formlabs Form 4BL is a strong option. However, the ideal printer depends on production volume, applications, materials and workflow requirements.Q. What is the best 3D printer for a dental clinic?Ans:- The Formlabs Form 4B is a strong choice for dental clinics because it is designed around professional dental workflows and supports a broad range of applications.Q. Can resin 3D printers be used to make dental models?Ans:- Yes. Resin 3D printers can produce detailed dental, orthodontic and diagnostic models when paired with an appropriate printer, resin and workflow.Q. Is 16K better than 8K for dental 3D printing?Ans:- Not necessarily. Resolution is only one factor. Accuracy, repeatability, resin properties, calibration, layer settings and overall workflow also influence the final result.Q. Can you 3D print surgical guides?Ans:- Yes, but you must use a resin specifically intended and validated for surgical-guide applications and follow the appropriate manufacturing and post-processing workflow.
Blogs
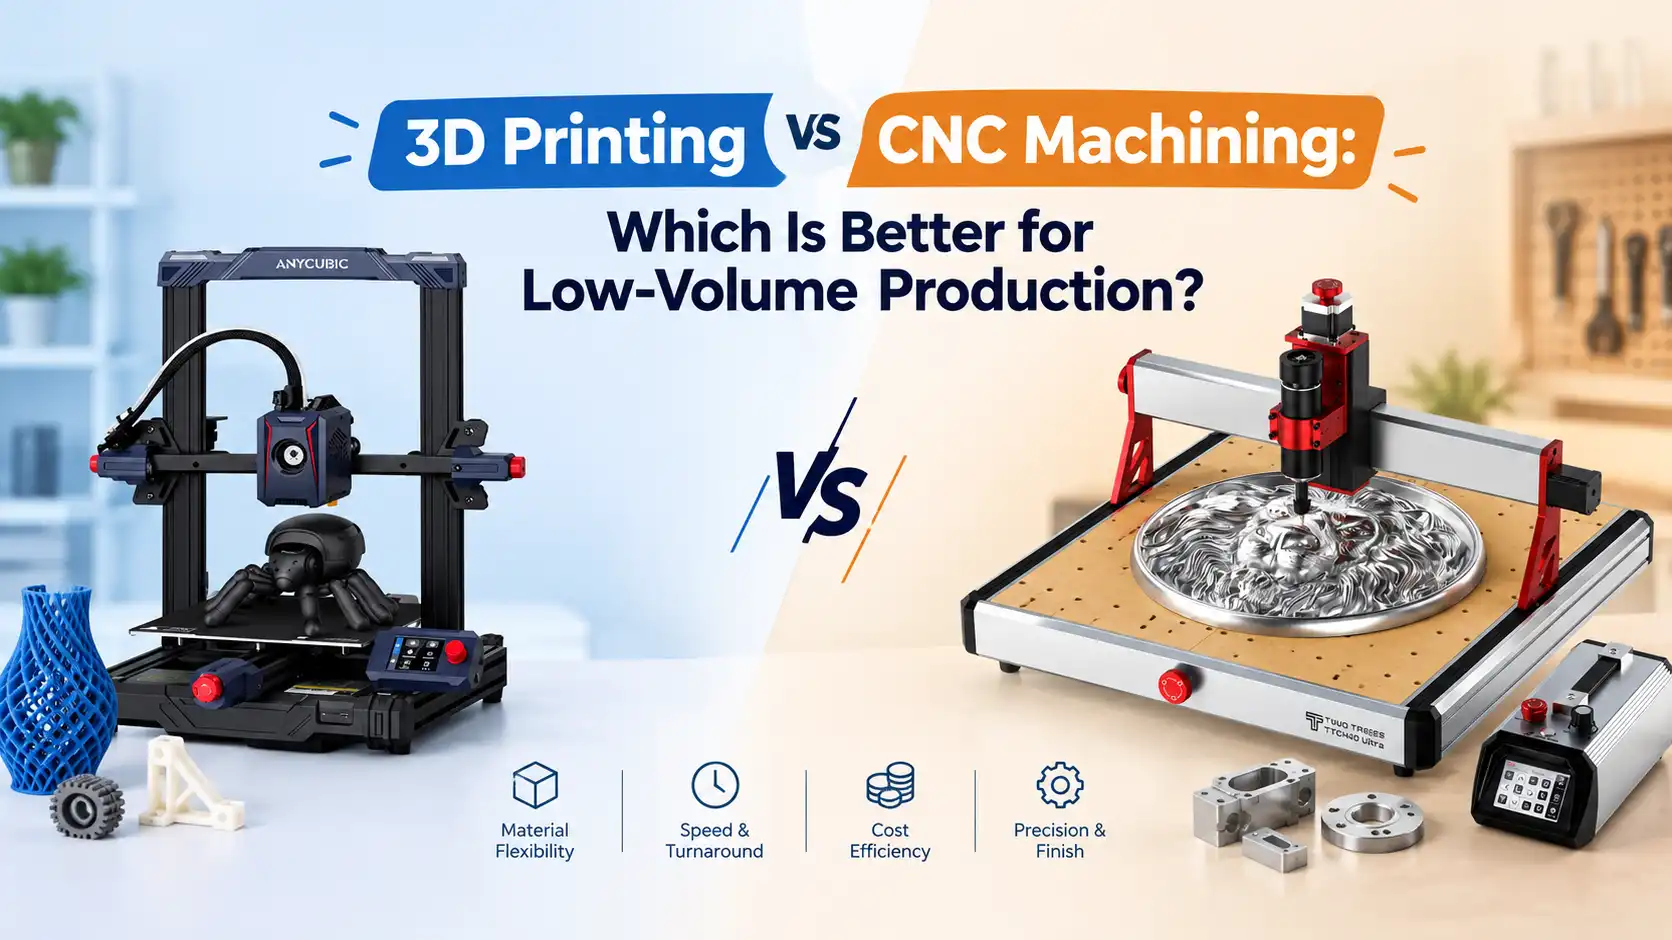
Manufacturers today face increasing pressure to deliver products faster, reduce upfront investment, and adapt quickly to changing customer demands. Whether producing prototypes, custom parts, or small production batches, selecting the right manufacturing process can significantly impact costs, lead times, and product quality.One of the most common questions businesses ask is: Should you use 3D printing or CNC machining for low-volume production?Both technologies offer distinct advantages, but the ideal choice depends on factors such as quantity, material requirements, design complexity, and performance expectations. In this guide, we'll compare 3D printing vs CNC machining across key decision-making criteria to help manufacturers choose the most suitable process.Understanding Low-Volume ProductionBefore comparing technologies, it's important to define what constitutes low volume production.In manufacturing, low-volume runs generally fall into two categories:1–100 units: Prototypes, custom products, and pilot production.100–1,000 units: Small batch manufacturing and market testing.Industries frequently using low-volume manufacturing include:AutomotiveAerospaceMedical devicesConsumer productsIndustrial equipmentElectronicsThese sectors often require rapid design changes, custom components, or limited production quantities that do not justify large-scale tooling investments.What Is 3D Printing?3D printing, also known as additive m
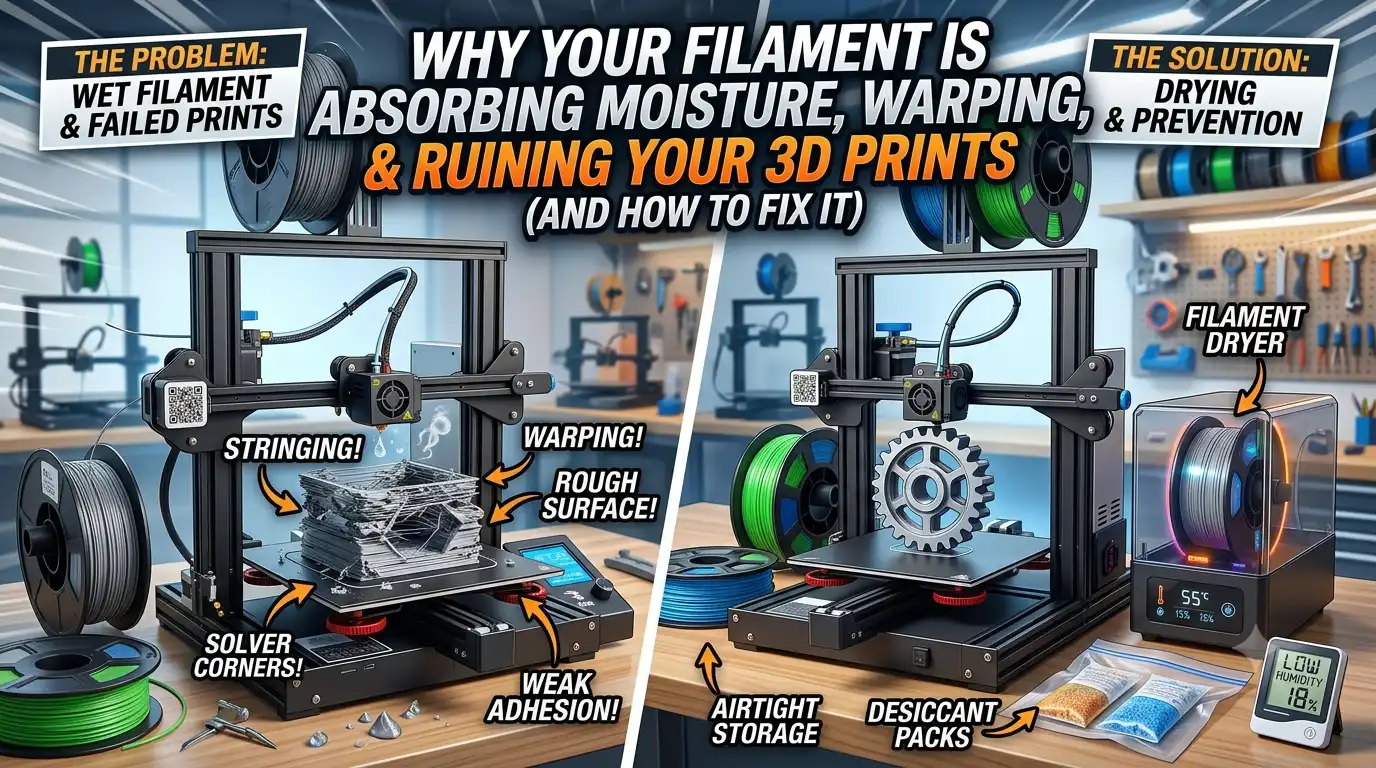
Your printer settings may be perfect, your bed levelled correctly, and your slicing profile fully optimized, but your filament could still be silently ruining every print.One of the most common yet overlooked causes of print failures is filament absorbing moisture from the surrounding air. Many 3D printing materials are hygroscopic, meaning they naturally pull water vapor from the environment. Once moisture enters the filament, it can lead to stringing, warping, rough surfaces, weak parts, and inconsistent extrusion.If you've recently experienced unexplained print quality issues, wet filament may be the hidden culprit. Understanding how moisture affects printing and learning how to prevent it can dramatically improve print quality while reducing wasted time and material.Why Does 3D Printing Filament Absorb Moisture?Most 3D printing materials are hygroscopic to varying degrees. This means they absorb humidity directly from the air, even when stored indoors.As filament absorbing moisture becomes saturated with water vapor, that moisture turns into steam when passing through the hot nozzle. The result is poor extrusion consistency and visible print defects.Different materials react differently to humidity.Filament TypeMoisture SensitivityPLAMediumPETGMedium-HighABSMediumTPUHighNylonVery HighPVAExtremely HighMaterials such as Nylon and PVA can begin absorbing moisture within hours of exposure, while PLA and PETG typically take longer but are still vulnerable.Signs Your Filament Has Absorbed MoistureRecognizing the symptoms early can help prevent failed prints and wasted material.Popping or Cracking Sounds: One of the easiest signs of wet filament is hearing popping or crackling noises during printing. This happens when trapped water rapidly converts to steam inside the nozzle.Excessive Stringing: If your prints suddenly develop fine strands between features, moisture may be affecting extrusion consistency.Many users find that wet filament is responsible for unexplained stringing despite unchanged printer settings.Rough Surface Finish: Moisture often creates uneven extrusion that leads to rough or pitted surfaces.Weak Layer Adhesion: Water contamination can reduce bonding between layers, making parts weaker and more prone to failure.Brittle Filament: Spools that snap easily during handling may have absorbed excessive moisture over time.How Moisture Affects Print QualityThe impact of moisture extends far beyond cosmetic issues.Warping: Steam expansion during extrusion can create uneven cooling and dimensional inconsistencies.Stringing: Moisture disrupts filament flow, causing unwanted strings and blobs throughout the print.Under-Extrusion: Water vapor reduces extrusion consistency, leading to gaps and missing material.Surface Defects: Rough textures, bubbles, and visible imperfections often occur when filament absorbing moisture is printed without proper drying.Reduced Mechanical Strength: Parts printed using wet filament often have weaker layer bonding and reduced structural performance.For functional components, this can lead to premature failure under load.Which Filaments Are Most Affected?PLA: Although often considered beginner-friendly, PLA still absorbs moisture and can develop stringing and brittle behavior if stored improperly.PETG: PETG moisture issues commonly appear as excessive stringing and poor surface finish.TPU: Flexible materials tend to absorb moisture rapidly and often require controlled storage conditions.Nylon: Nylon is one of the most hygroscopic materials used in 3D printing and generally requires drying before critical applications.PVA: As a water-soluble support material, PVA is extremely sensitive to humidity and must be stored carefully.How to Dry Wet Filament ProperlyIf moisture contamination has already occurred, drying the filament can often restore print quality.Method 1: Use a Filament DryerA dedicated filament dryer provides controlled temperature and airflow, making it the safest and most effective solution.This is generally the preferred method for removing moisture from wet filament.Method 2: Use a Food DehydratorMany hobbyists successfully use food dehydrators to dry filament at consistent temperatures.Method 3: Use an Oven (With Caution)A conventional oven can work, but temperature fluctuations may damage the spool or filament if not carefully monitored.Recommended Drying TemperaturesFilamentTemperaturePLA45–50°CPETG60–65°CABS70–80°CTPU45–55°CNylon70–90°CAlways follow manufacturer recommendations whenever available.Best Ways to Store FilamentPreventing moisture exposure is far easier than troubleshooting failed prints.Vacuum Storage Bags: Vacuum-sealed storage significantly reduces humidity exposure.Airtight Containers: Plastic storage boxes with secure seals provide effective protection for frequently used materials.Dry Boxes: Dry boxes allow continuous printing while maintaining low humidity levels.Silica Gel Packs: Silica gel absorbs excess moisture and helps maintain stable storage conditions.Learning how to keep filament dry is one of the simplest ways to improve long-term print consistency.Do You Need a Filament Dryer?The answer depends on how often you print and which materials you use.Hobby Users: Occasional users printing primarily with PLA may only require airtight storage and periodic drying.Professional Users: Engineers and product developers benefit from consistent drying practices, particularly when producing functional parts.Print Farms: For high-volume operations, a filament dryer is often essential. Maintaining dry material improves reliability, reduces waste, and prevents downtime caused by filament absorbing moisture.For many users, a dedicated dryer quickly pays for itself by reducing failed prints and material loss.Moisture Prevention ChecklistFollow these simple best practices:Store filament in airtight containersUse silica gel packsDry filament before critical printsAvoid leaving spools exposed for long periodsMonitor room humidity levelsUse dry boxes for moisture-sensitive materialsLabel dried spools with drying datesConsistent storage habits can dramatically reduce the likelihood of wet filament affecting future projects.ConclusionMoisture is one of the most common hidden causes of print failures in 3D printing. From stringing and warping to weak parts and rough surfaces, the effects can impact both appearance and performance.Fortunately, preventing these issues is straightforward. Proper storage, humidity control, and occasional drying can help maintain material quality and improve print reliability.Whether you're a hobbyist or a professional user, understanding the risks of filament absorbing moisture and addressing wet filament early can save time, reduce waste, and consistently deliver better 3D printing results. You can get the premium quality filaments from 3Idea.Frequently Asked QuestionsQ. How long does it take for filament to absorb moisture?Ans: The timeframe depends on the material and environmental humidity. Nylon and PVA may absorb moisture within hours, while PLA typically takes longer.Q. Can PLA absorb moisture?Ans: Yes. Although less sensitive than some engineering materials, PLA can still absorb moisture and develop print quality issues.Q. Does wet filament always cause stringing?Ans: Not always, but stringing is one of the most common symptoms associated with moisture contamination.Q. How often should I dry filament?Ans: Frequency depends on usage, climate, and storage practices. High-humidity environments may require more frequent drying.Q. Is a filament dryer worth it?Ans: For frequent users, engineering materials, and print farms, a filament dryer can significantly improve consistency and reduce failed prints.
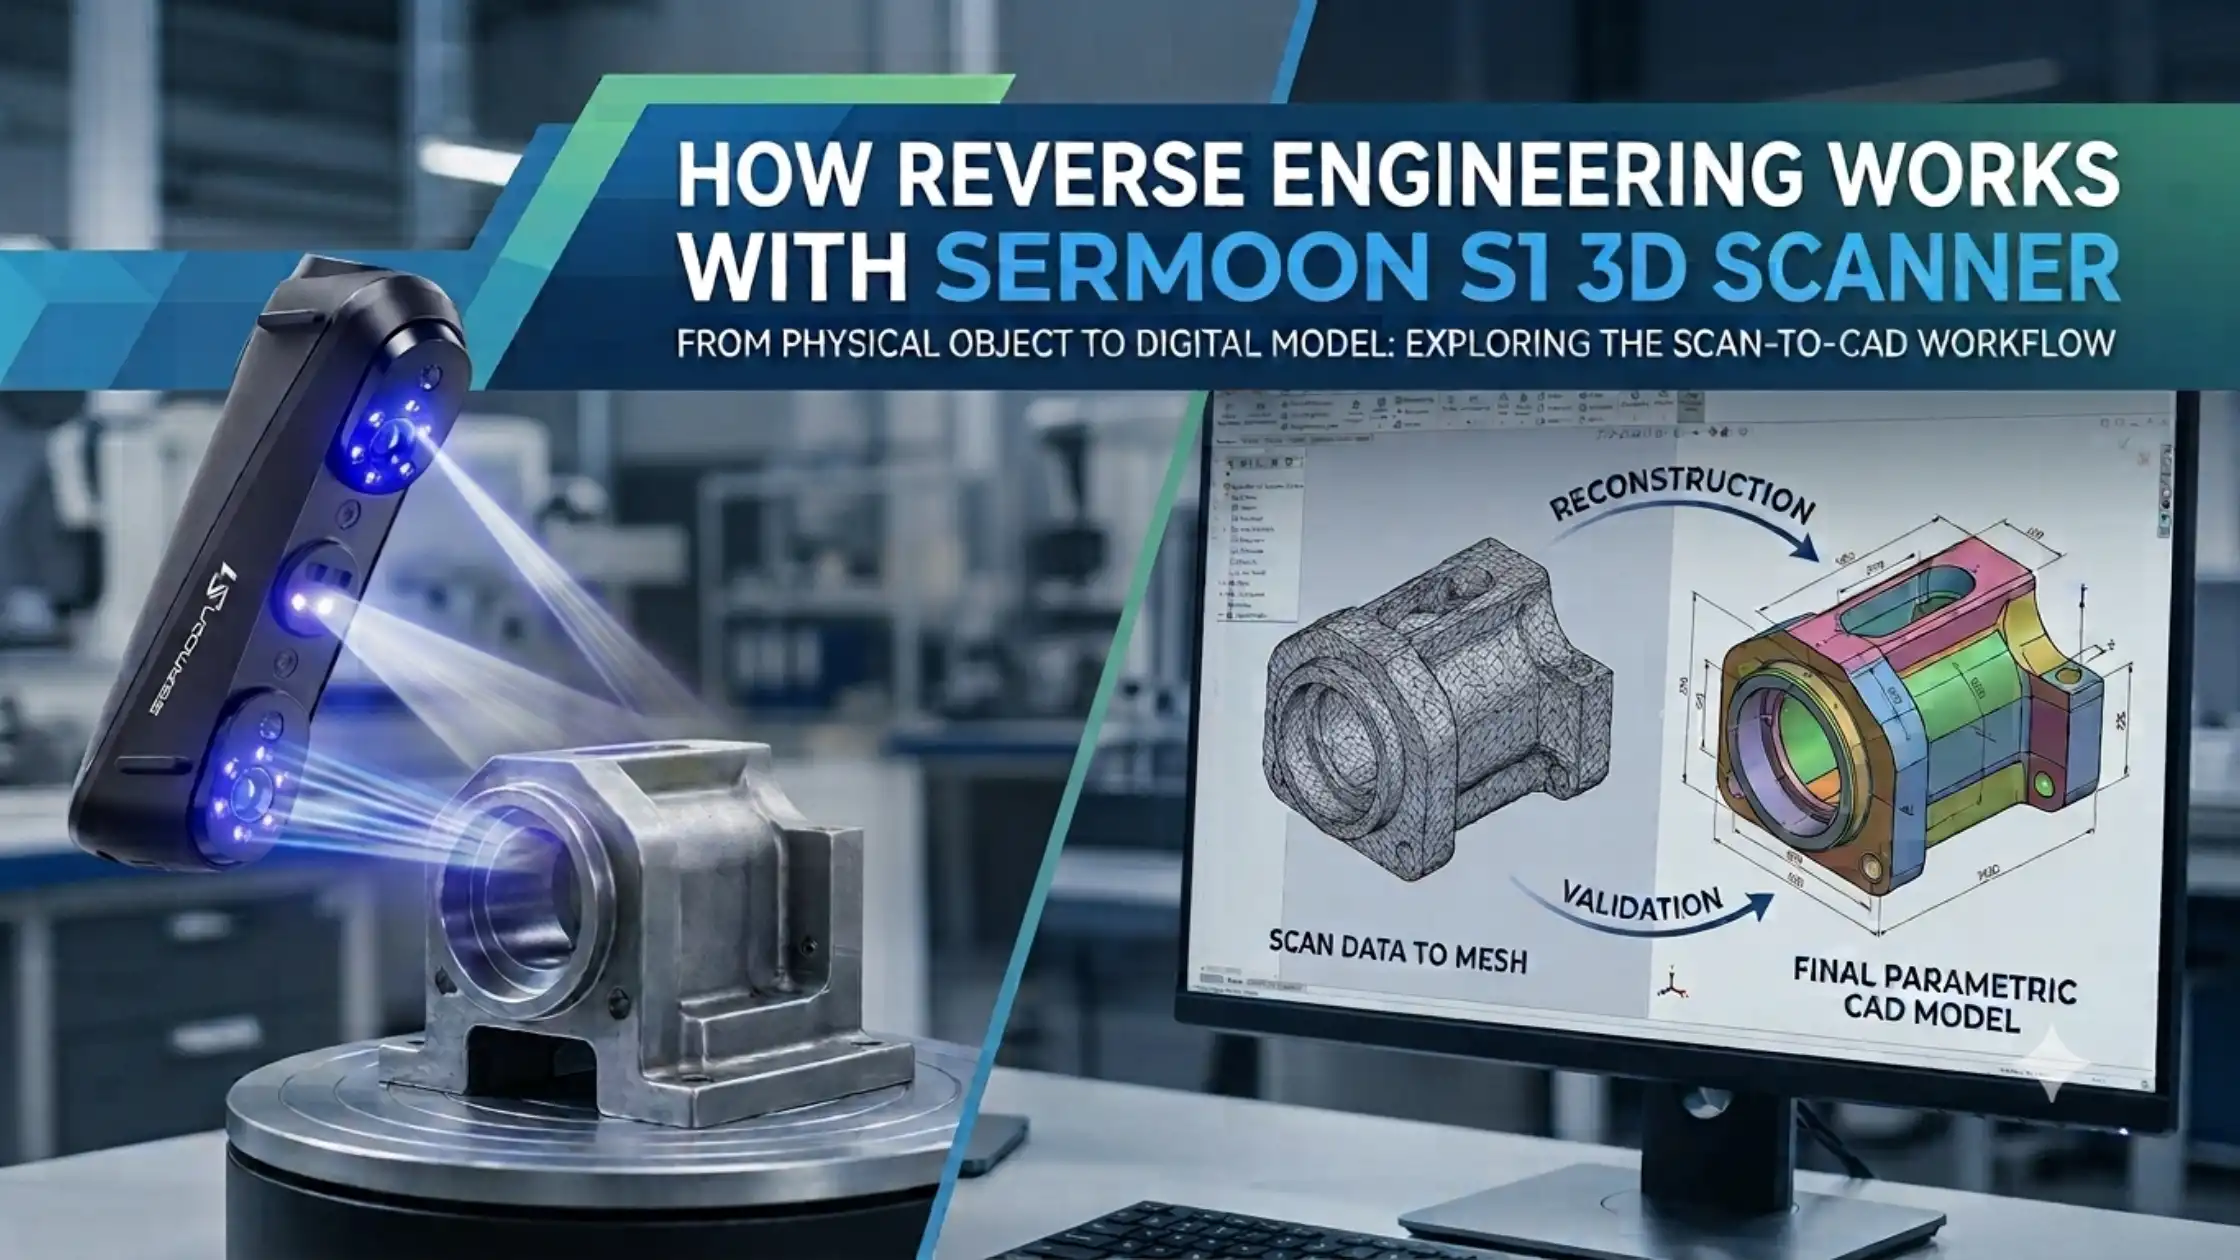
Reverse engineering has transformed the way manufacturers, engineers, and product designers recreate existing components. Instead of manually measuring complex geometries and recreating them from scratch, modern 3D scanning technology enables professionals to capture real-world objects and convert them into accurate digital models within hours.The Sermoon S1 3D Scanner is designed to streamline this process with high-precision scanning capabilities, offering up to 0.02 mm accuracy, advanced blue laser and NIR scanning modes, and compatibility with CAD reconstruction workflows. Whether you're developing replacement components, redesigning products, or digitizing legacy parts, the scanner helps accelerate the entire reverse engineering workflow.In this guide, we'll explore how reverse engineering with a 3D scanner works and how the Sermoon S1 supports the complete process from scanning to manufacturing.What Is Reverse Engineering?Reverse engineering is the process of analyzing an existing physical object to understand its design, dimensions, and functionality so that it can be recreated, modified, or improved.Traditionally, reverse engineering involved manual measurements, drawings, and extensive CAD modeling. While effective for simple components, this approach becomes time-consuming when dealing with complex geometries.Today, 3D scanning for reverse engineering allows engineers to digitally capture an object's shape and dimensions with high precision, significantly reducing development time.Common reverse engineering applications include:Reproducing discontinued spare partsProduct redesign and optimizationCompetitive product analysisLegacy component digitizationQuality inspection and validationManufacturing process improvementAs industries continue adopting digital workflows, industrial reverse engineering has become a critical part of modern product development.Why Use a 3D Scanner for Reverse Engineering?A 3D scanner captures millions of data points across an object's surface, creating a highly detailed digital representation.Compared to manual measurement methods, reverse engineering with a 3D scanner offers several advantages:Faster Data Collection: Complex parts can be scanned in minutes rather than requiring hours of manual measurement.Improved Accuracy: High-precision scanners capture intricate geometries that would be difficult to measure manually.Reduced Human Error: Automated scanning minimizes inconsistencies associated with traditional measuring tools.Better Product Development: Accurate digital models support faster redesign cycles and engineering validation.For organizations involved in manufacturing, product development, or maintenance, 3D scanning for reverse engineering improves efficiency while maintaining accuracy.How the Sermoon S1 Captures Accurate Scan DataThe Creality Sermoon S1 is built specifically for professional scanning applications where precision and reliability are essential.Key capabilities include:High-Accuracy Scanning: With accuracy up to 0.02 mm, the scanner can capture fine details required for engineering and manufacturing applications.Multiple Scanning Modes: The system utilizes advanced blue laser and NIR scanning technologies to accommodate different surface materials and object types.Efficient Data Acquisition: The scanner rapidly captures large amounts of geometric information, making it suitable for both small components and larger industrial parts.CAD-Friendly Output: Scan data can be exported in formats suitable for CAD reconstruction from scan workflows, enabling seamless integration into engineering software.These features make the Sermoon S1 3D Scanner a practical solution for companies seeking a reliable scan to CAD process.Step-by-Step Reverse Engineering WorkflowA successful reverse engineering workflow typically follows several stages.Step 1: Object PreparationBefore scanning begins, the object is inspected and positioned appropriately to maximize data capture.Depending on the component, multiple scan angles may be required to capture all surfaces.Step 2: 3D ScanningThe Sermoon S1 captures detailed surface geometry using laser and optical scanning technology.During this stage, the scanner generates:Point cloud dataSurface geometry informationDimensional measurementsThis forms the foundation for the digital model.Step 3: Scan AlignmentMultiple scans are aligned and merged to create a complete representation of the object.Accurate scan alignment ensures all captured data fits together correctly.Step 4: Mesh GenerationAfter alignment, the software converts the point cloud into a polygon mesh.This process creates a digital surface representation of the object.Step 5: Mesh Cleanup and OptimizationThe generated mesh is refined through:Hole fillingNoise reductionSurface smoothingMesh optimizationProper mesh cleanup improves the quality of downstream CAD reconstruction.Converting Scan Data into CAD ModelsOne of the most important stages of the scan to CAD process is transforming scan data into editable CAD geometry.While mesh files accurately represent surface shapes, engineering teams often require parametric CAD models for manufacturing and redesign.The workflow generally includes:Point Cloud Processing: Raw scan data is organized and filtered to remove unwanted artifacts.Surface Extraction: Critical geometric features are identified and reconstructed.CAD Reconstruction: Engineers create parametric models using the scan data as a reference. This stage is commonly referred to as point cloud to CAD conversion or CAD reconstruction from scan.Engineering Validation: The reconstructed CAD model is compared against the original scan to verify dimensional accuracy.The resulting model can then be modified, optimized, or prepared for production.Creating Replacement Parts with Sermoon S1One of the most valuable applications of 3D scanning for replacement parts is recreating components that are no longer available from the original manufacturer.This is particularly useful when:Spare parts are discontinuedOriginal CAD files are unavailableComponents have worn out or become damagedLegacy equipment requires maintenanceUsing the Sermoon S1, engineers can scan the existing part, reconstruct the geometry, and create a digital model for manufacturing.Once validated, the part can be produced through:3D printingCNC machiningInjection moldingCasting processesThis significantly reduces downtime and accelerates maintenance operations.For businesses managing aging equipment, reverse engineering old parts has become an increasingly important capability.Real Industrial Applications of Reverse EngineeringModern organizations use 3D scanning and modeling across a wide range of industries.Manufacturing: Digitizing existing components for redesign and production optimization.Automotive: Recreating obsolete parts and validating aftermarket components.Aerospace: Capturing complex geometries for maintenance and engineering analysis.Product Development: Accelerating design iterations through accurate digital models.Quality Inspection: Comparing manufactured parts against CAD specifications through dimensional inspection.These applications demonstrate how industrial reverse engineering supports innovation while reducing development timelines.Benefits of Using Sermoon S1 for Reverse EngineeringThe Sermoon S1 3D Scanner offers several advantages for engineering teams and manufacturers.Improved Accuracy: High-resolution scanning captures fine details required for professional applications.Faster Reverse Engineering: Digital workflows reduce time spent on measurement and modeling.Better Product Redesign: Accurate scan data enables more effective design modifications.Reduced Development Costs: Minimizing manual work lowers engineering effort and project timelines.Greater Manufacturing Flexibility: Digital models can be used across multiple production methods and workflows.For companies seeking a high accuracy 3D scanner capable of supporting product development, spare-part reproduction, and manufacturing workflows, the Sermoon S1 provides a practical and efficient solution.ConclusionModern 3D scanning for reverse engineering has significantly simplified the process of recreating and improving physical products. By capturing highly accurate scan data and converting it into editable CAD models, organizations can accelerate product development, reduce downtime, and improve manufacturing efficiency.The Sermoon S1 3D Scanner supports every stage of the reverse engineering workflow, from data capture and mesh processing to CAD reconstruction and final production. Whether you're creating replacement components, redesigning products, or digitizing legacy parts, the scanner provides the precision and flexibility needed for professional engineering applications.As industries continue to embrace digital manufacturing, tools like the Sermoon S1 are becoming essential for efficient and accurate reverse engineering projects.Frequently Asked QuestionsQ. What is reverse engineering with a 3D scanner?Ans: Reverse engineering with a 3D scanner involves capturing the geometry of a physical object and converting the scan data into a digital model that can be analyzed, modified, or manufactured.Q. How does the scan to CAD process work?Ans: The process includes scanning the object, generating a point cloud, creating a mesh, reconstructing CAD geometry, and validating the final model for manufacturing or design purposes.Q. Can the Sermoon S1 be used for replacement-part development?Ans: Yes. The Sermoon S1 is commonly used to digitize existing components and create accurate CAD models for replacement-part production.Q. What file formats are used in reverse engineering workflows?Ans: Most workflows use point cloud, mesh, STL, OBJ, and CAD-compatible formats depending on the reconstruction software and manufacturing requirements.Q. Why is 3D scanning important for product redesign?Ans: 3D scanning provides accurate digital representations of existing products, enabling engineers to analyze, improve, and modify designs more efficiently.
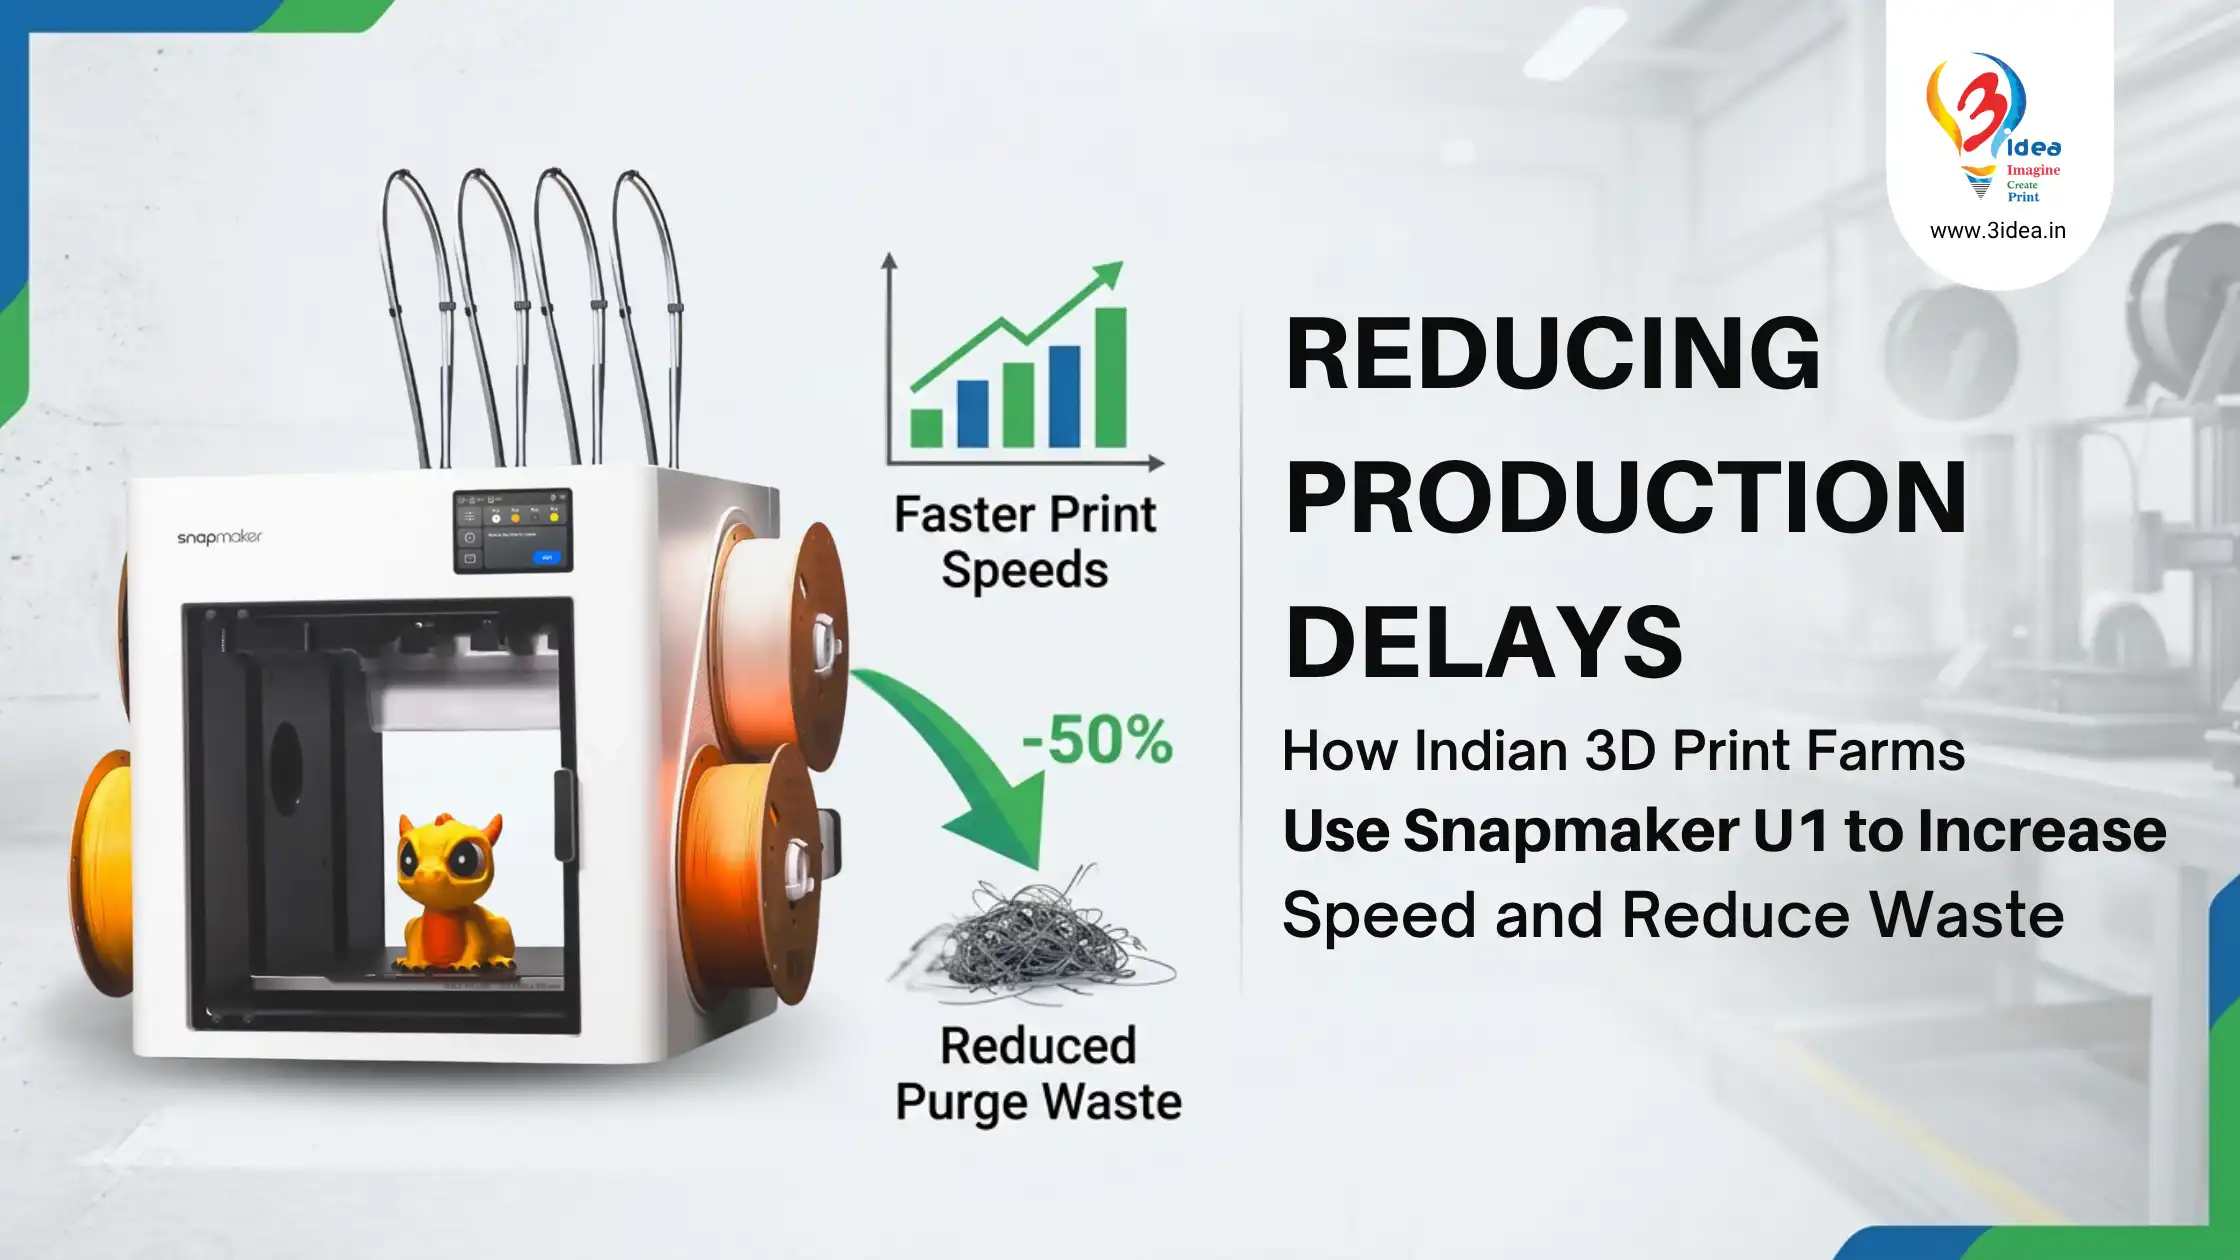
As India's additive manufacturing industry continues to grow, 3D print farms are under increasing pressure to deliver faster turnaround times while maintaining profitability. Whether producing functional prototypes, manufacturing aids, custom products, or production parts, speed and efficiency have become critical competitive advantages.However, many print farms face a common challenge: increasing production capacity without significantly increasing operating costs.Two major factors often limit scalability:Slow production cyclesExcessive purge waste during multi-material printingTo address these challenges, many Indian print farms are adopting advanced systems such as the Snapmaker U1, designed to deliver higher print speeds, smarter material management, and improved production efficiency.In this article, we'll explore how the Snapmaker U1 helps print farms increase output, reduce material wastage, and minimize production delays.Why Production Delays Are Common in Growing Print FarmsAs order volumes increase, small inefficiencies quickly become major bottlenecks.Some of the most common causes of production delays include:Long print completion timesFrequent material changesExcessive purge waste during filament switchingPrint failures caused by inconsistent material flowMachine idle time between jobsOperator dependency for routine tasksInefficient overnight production managementThese challenges not only affect delivery timelines but also increase production costs and reduce overall profitability.The Hidden Cost of Slow Printing and Purge WasteMany print farms focus only on machine count when scaling production. However, actual productivity depends on how efficiently each machine operates.Two factors have the biggest impact:Print SpeedA machine that completes jobs faster allows operators to:Produce more parts per dayAccept larger order volumesMeet urgent customer requirementsImprove machine utilizationEven a small reduction in print time can significantly increase monthly output across multiple machines.Purge WasteIn multi-material and multi-color printing environments, filament changes often generate large amounts of purge material.Excessive purge waste results in:Higher material costsIncreased environmental impactLonger print timesReduced profitabilityReducing purge waste has become a key objective for modern print farms seeking greater operational efficiency.How Snapmaker U1 Helps Print Farms Increase Print SpeedThe Snapmaker U1 is engineered for high-throughput production environments where speed and consistency are critical.Its advanced motion system and optimized printing architecture allow operators to complete jobs significantly faster than traditional desktop systems.Faster Production CyclesHigher printing speeds enable:More completed jobs per machineImproved production schedulingFaster customer deliveriesBetter return on equipment investmentFor print farms running multiple printers simultaneously, these productivity gains quickly compound into substantial output increases.Reduced Lead TimesFaster printing allows operators to:Handle urgent orders more efficientlyReduce production backlogsImprove customer satisfactionIncrease order capacity without expanding floor spaceAs demand grows, high-speed printing becomes an essential factor in maintaining competitiveness.How Snapmaker U1 Reduces Purge WasteOne of the standout advantages of the Snapmaker U1 is its intelligent approach to multi-material printing.Traditional multi-material systems often generate significant purge waste whenever materials or colors are switched.The Snapmaker U1 is designed to optimize these transitions and reduce unnecessary filament consumption.Smarter Material SwitchingEfficient filament management helps:Reduce wasted material during changesImprove overall material utilizationLower operating costsMaintain consistent print qualityBetter Cost EfficiencyFor print farms processing large production volumes, even small reductions in purge waste can generate substantial savings over time.Benefits include:Lower filament consumptionReduced production costsImproved profit marginsMore sustainable manufacturing operationsWhy Reducing Purge Waste Matters for Print FarmsMany operators underestimate how much material is lost through purging over the course of a month.When multiplied across:Multiple printersMulti-color jobsMulti-material applicationsContinuous production schedulesThe amount of wasted filament can become significant.Reducing purge waste helps print farms:Lower material expensesImprove sustainability goalsIncrease usable output per spoolEnhance production efficiencyFor businesses focused on scaling operations, material optimization is just as important as print speed.Combining Speed and Efficiency for Higher ProductivityThe real advantage of the Snapmaker U1 lies in its ability to improve both production speed and material efficiency simultaneously.Many printers can print fast.Many printers can print multi-material parts.Few systems effectively address both speed and waste reduction at the same time.This combination allows print farms to:Increase Daily Output: More jobs can be completed within the same production window.Improve Profitability: Lower material wastage means more revenue from every spool used.Maximize Machine Utilization: Printers spend more time producing parts and less time handling material-related inefficiencies.Support Business Growth: Higher productivity enables print farms to scale without proportionally increasing labor or equipment costs.Industries Benefiting from Faster and More Efficient ProductionIndian print farms serve customers across a wide range of sectors, including:ManufacturingAutomotiveProduct DesignConsumer GoodsEducationArchitectureEngineering ServicesResearch & DevelopmentAcross all these industries, customers increasingly expect:Faster deliveryConsistent qualityCompetitive pricingReliable production schedulesImproving print speed and reducing material waste directly supports these expectations.Best Practices for Maximizing Snapmaker U1 PerformanceTo achieve the best results, print farms should combine advanced equipment with optimized workflows.Optimize Print Scheduling: Group similar jobs together to maximize machine productivity.Monitor Material Consumption: Track filament usage and identify opportunities to reduce waste.Standardize Production Settings: Consistent print profiles help improve reliability and repeatability.Utilize Overnight Production: Take advantage of unattended printing to increase daily output.Maintain Equipment Regularly: Preventive maintenance minimizes downtime and ensures consistent performance.When paired with the capabilities of the Snapmaker U1, these practices can significantly improve production efficiency.The Future of High-Performance Print Farms in IndiaAs additive manufacturing adoption accelerates, print farms must focus on:Higher throughputLower operating costsMaterial optimizationScalable production workflowsThe ability to print faster while reducing waste will become a major competitive differentiator.Solutions like the Snapmaker U1 help operators meet these demands by improving productivity, reducing material consumption, and enabling more efficient production management.ConclusionFor modern Indian 3D print farms, reducing production delays requires more than simply adding more printers.The real opportunity lies in improving the efficiency of every machine through faster printing and smarter material utilization.The Snapmaker U1 addresses both challenges by helping operators increase print speed while also reducing purge waste, enabling higher productivity and lower operating costs.As customer expectations continue to rise, investing in technologies that improve output, reduce waste, and streamline production workflows will be essential for long-term growth and profitability.Frequently Asked QuestionsQ. How does the Snapmaker U1 help increase print speed?Ans: The Snapmaker U1 is designed with a high-performance printing system that enables faster production cycles, allowing print farms to complete more jobs within the same timeframe.Q. What is purge waste in 3D printing?Ans: Purge waste refers to the filament discarded during material or color changes in multi-material printing processes to ensure clean transitions between materials.Q. Why is reducing purge waste important?Ans: Reducing purge waste lowers material costs, improves sustainability, increases material efficiency, and enhances overall profitability.Q. How can print farms reduce production delays?Ans: Print farms can reduce delays by increasing print speed, automating workflows, optimizing job scheduling, minimizing material waste, and improving machine utilization.Q. Is the Snapmaker U1 suitable for high-volume print farms?Ans: Yes. Its combination of high-speed printing, intelligent material management, and production-focused design makes it well-suited for growing print farm operations.
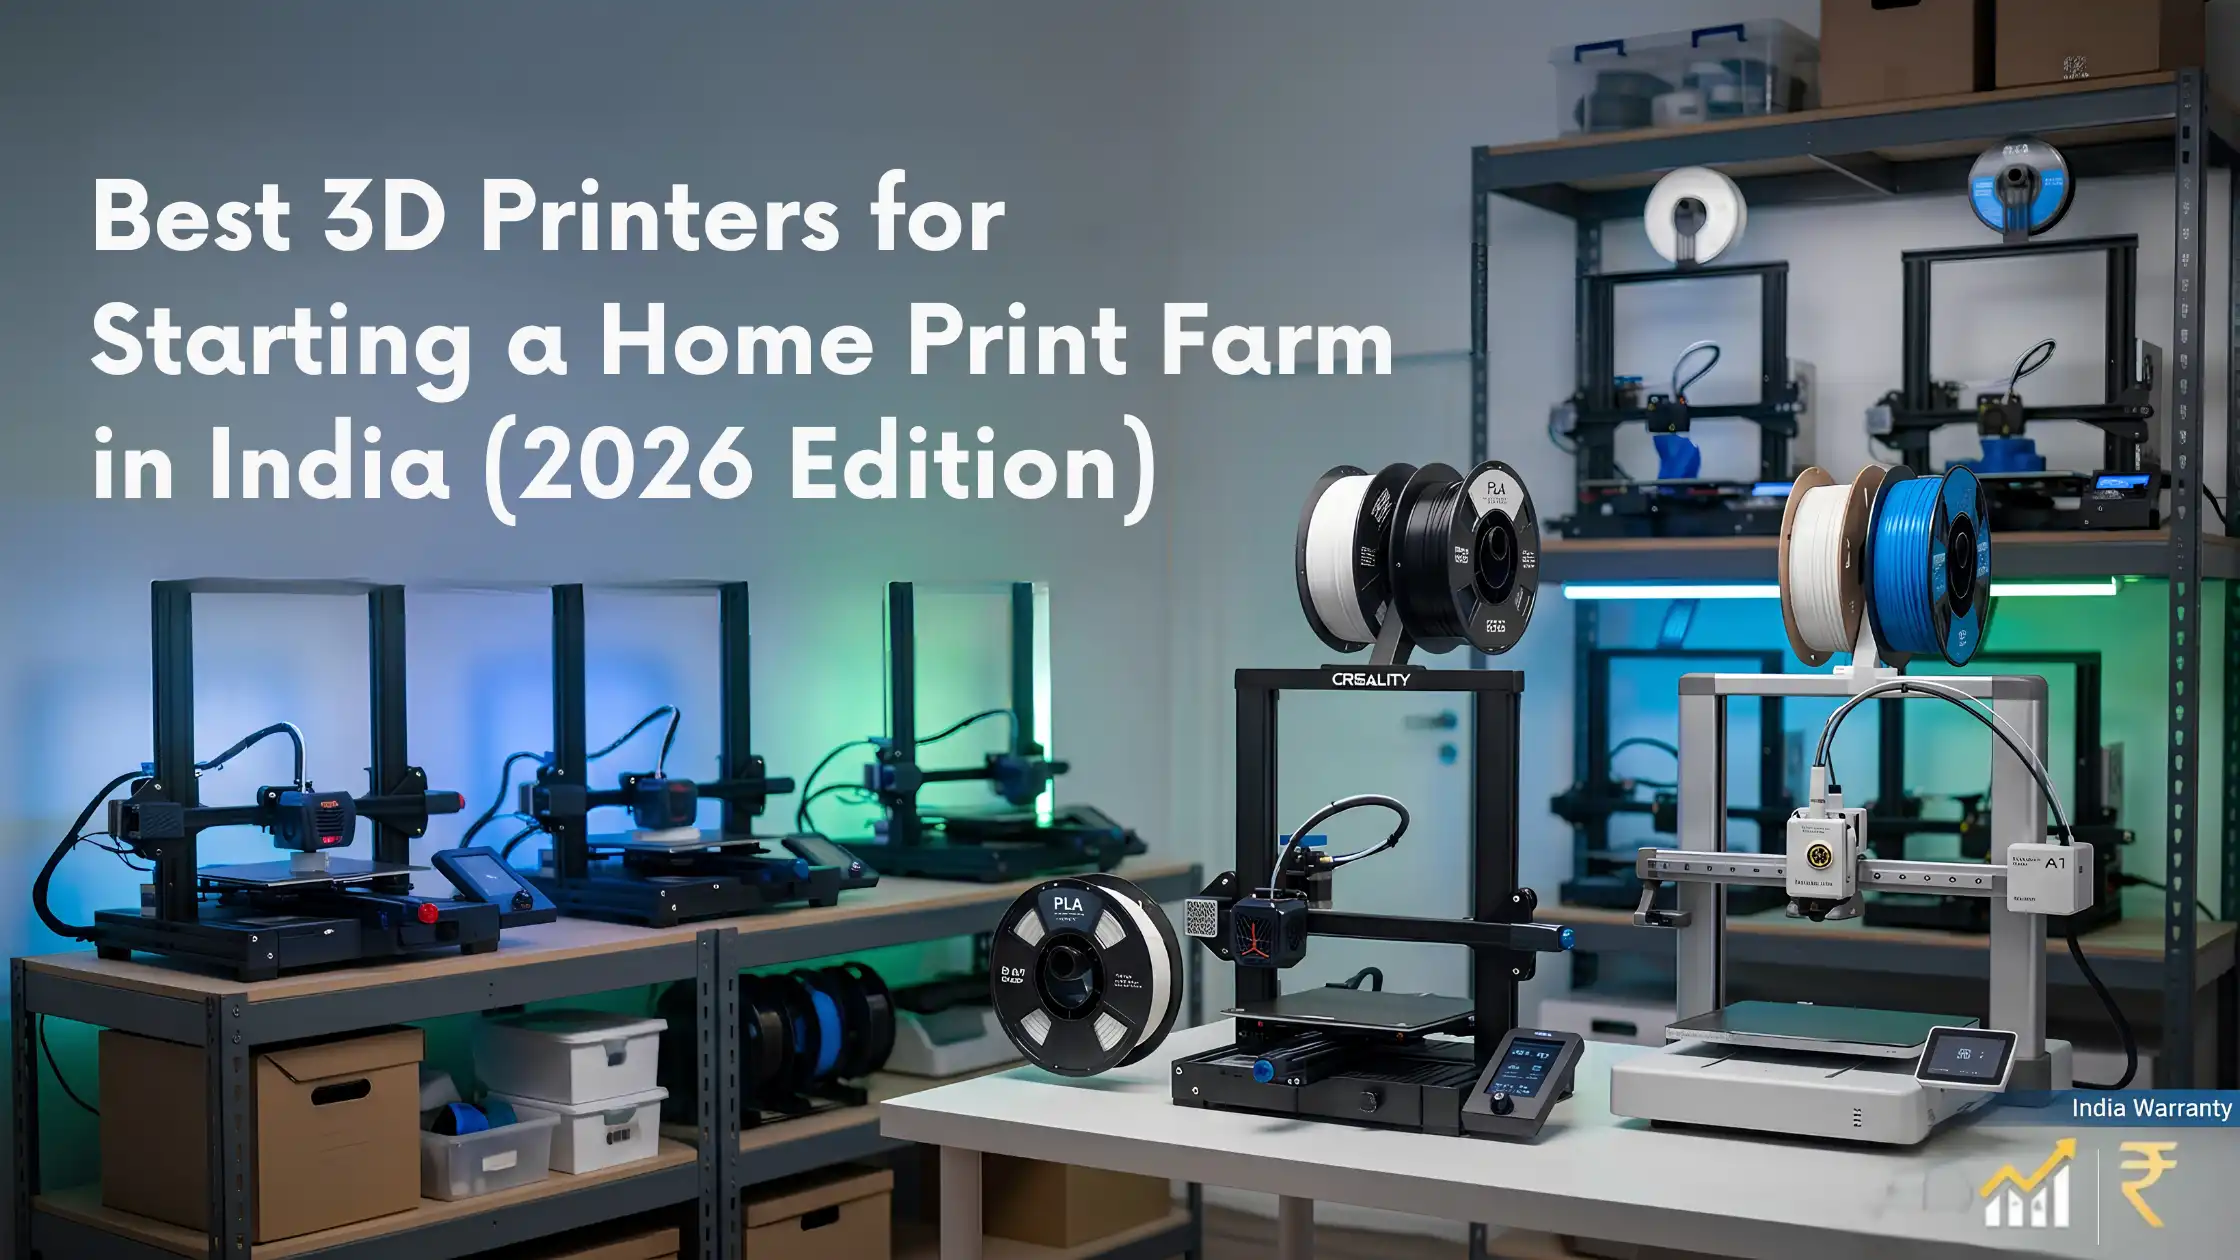
Is a home print farm in India actually profitable in 2026? It is one of the most common questions we hear at 3idea and the honest answer is: yes, if you choose the right printers, target the right niche, and run the operation with basic discipline.A well-planned home 3D printing business can generate ?50,000–?3,00,000 in monthly profit within 12–24 months. This guide explains exactly how printer selection, real Indian costs, ROI examples, and the scaling roadmap that takes you from a single machine to a profitable small-scale operation.Quick Answer: Is a Home Print Farm Profitable?Yes, a home print farm is profitable in India when three conditions are met:You choose reliable, low-downtime printersYou target a niche with consistent demand and healthy marginsYou run the operation as a business, not a hobbyOperators who get all three right routinely deliver 30–50% net margins. Operators who skip any one of them struggle.The rest of this guide walks through how to get each one right.Best 3D Printers for a Home Print Farm in India (2026)Printer choice is the single most important decision. The best machines for an Indian home print farm in 2026:1. Anycubic Kobra 2 SeriesThe Kobra 2 Neo and Kobra 3 deliver excellent value for budget print-farm setups. Auto bed levelling, beginner-friendly setup, and reliable print quality at a price point that lets you afford five or six machines for the price of one premium printer.Best for: beginners, small-batch production, budget farmsUse case: prototyping, custom keychains, hobby itemsPrice range: ?15,000–?25,0002. Creality Ender Series (Ender 3 V3 / KE)Widely used across India for reliability and community support. Easy to maintain, easy to upgrade, with one of the deepest spare-parts ecosystems anywhere. A solid workhorse for continuous production.Best for: budget setups, learning operatorsUse case: continuous production, training new operators3. Bambu Lab A1 / P1 SeriesThe Bambu Lab A1 and P1 Series are the workhorses of modern Indian print farms. High print speed, AMS multi-colour, smart cloud monitoring, and remarkable reliability. The price premium pays back in throughput and operator time saved.Best for: scaling operations, professional workflowsUse case: high-speed production, complex/multi-colour partsPrice range: ?35,000–?1,20,0004. Elegoo Neptune SeriesSolid value for money with stable performance and decent print speed. Suitable for entry-level production setups across multiple materials.Best for: cost-effective production setupsUse case: entry-level production, mixed material work5. Snapmaker Artisan / Modular SystemsSnapmaker’s modular machines combine 3D printing, laser engraving, and CNC operations in a single unit. For a multi-service business, print farm + customisation + small CNC work, they offer remarkable flexibility.Best for: multi-service businesses, premium studiosUse case: custom production, prototyping, multi-process workflowsPrice range: ?1,50,000+All available on 3idea Technology with India warranty and after-sales support. Browse the full range: https://www.3idea.in/products/3d-printers.Cost Breakdown: Print Farm Setup Cost in IndiaRealistic investment for an Indian home print farm:Beginner Setup (1–2 Printers)Printers (Anycubic Kobra 2 / Creality Ender 3 V3): ?15,000–?40,000 eachFilament starter pack: ?10,000Workspace (desk, lighting, storage): ?5,000Software (free): ?0Total: ?50,000–?1,00,000Intermediate Setup (5–10 Printers)Printers (mix of Bambu Lab P1S and Anycubic Kobra): ?1.5L–?4LRacks, power backup (UPS), ventilation: ?50,000–?1,00,000Filament stock: ?50,000Total: ?3L–?6LAdvanced Setup (20+ Printers)Industrial-grade printer fleet: ?10L+Automation systems, monitoring software: ?1L+Dedicated commercial spaceTotal: ?15L+These figures reflect 2026 Indian market pricing as available on 3idea. Choose the bracket that matches your starting capital and the demand you’ve already validated.ROI Example: 3D Printing Business Profit in IndiaA realistic income model for a single printer:Print-hours/day: 18 (with overnight runs)Days/month: 26Revenue per print-hour (custom-part work): ?70–?130Gross revenue/printer/month: ?32,000–?60,000After material (~?6,000), power (~?600), and amortised costs (~?2,000), net profit per machine typically lands at ?20,000–?40,000 per month for steady operations.For a five-printer home setup, that’s ?1L–?2L monthly net profit. Scale to 10 machines and ?2.5L–?4L is realistic. These numbers depend on niche, pricing discipline, and order flow, but they’re entirely achievable for operators who run the business well.How to Start a Print Farm at Home (Step by Step)A practical roadmap:Choose your niche. Custom keychains, miniatures, engineering prototypes, replacement parts, educational models — pick one with consistent demand in your city or online community.Buy the right printers. Start with one or two reliable machines (Anycubic Kobra 2 Neo for budget; Bambu Lab A1 for ease of use). Avoid building a multi-printer farm before proving the workflow with one.Set up the workspace. Stable single-phase power, dry filament storage, good ventilation, and an organised material flow. A spare bedroom or balcony usually works.Build the workflow. Design intake ? slicing ? printing ? post-processing ? packaging ? despatch. Document each step.Take your first orders. Friends and family for the first 5–10 prints to debug the workflow. Then launch on Instagram, marketplaces, and local channels.Reinvest profits. Add the second printer when the first one is consistently fully booked. Don’t scale on credit.The pattern is the same for every successful operator: prove the workflow first, scale capacity second.How Many 3D Printers Do You Need?Match capacity to validated demand. As a rough guide:1–2 printers: under 50 orders/month, learning phase5–10 printers: 50–500 orders/month, established small business20+ printers: 500+ orders/month, commercial operationMost home-based operations settle at 6–10 printers. Beyond that, you typically need a dedicated commercial space and at least one part-time operator.Scaling Strategy: From Home to BusinessThe three-stage progression that works:Stage 1:- Beginner (1–2 printers)Prove the niche. Take first 50–100 paid orders. Build a portfolio. Learn what consistent quality looks like.Stage 2:- Growth (5–10 printers)Move to a dedicated room in your home or rent a small workshop space. Standardise on consistent material brands. Hire first part-time helper for post-processing. Build recurring B2B clients.Stage 3:- Advanced (20+ printers)Move to commercial premises. Hire full-time operators. Implement printer-fleet monitoring software. Consider diversifying into related services — laser engraving, CNC, finishing services.Each stage funds the next. Skipping stages is the most common reason home print farms fail.Challenges in Running a 3D Print FarmReal operational challenges and the standard solutions:Machine downtime ? preventive maintenance schedule, spare nozzles and PTFE tubes always in stock, daily printer-status checkMaterial cost creep ? bulk filament purchase agreements, consider 3idea’s in-house filament range for stable supplyOrder management complexity ? use a simple Trello board or spreadsheet system early; graduate to dedicated software at 50+ orders/monthQuality drift across machines ? standardise on identical printer models where possible, run weekly calibration print across all machinesCash flow ? take partial advance payments on custom orders; avoid extending credit to new B2B clients until trust is establishedNone of these are deal-breakers. They’re the normal mechanics of running a small production business.How to Increase Profit in a 3D Printing BusinessProfit grows from two levers: better margins and higher volume. The highest-leverage moves:Choose high-margin niches. Custom gifts and personalised products consistently deliver better margins than commodity prototyping.Optimise print settings for time/cost. A part that prints in 2 hours instead of 3 directly improves machine ROI.Bulk-buy filament. The 3idea bulk filament programme cuts material cost by 15–25%.Focus on repeat clients. B2B clients who reorder monthly are worth far more than one-off retail customers.Add complementary services. Laser engraving, finishing, packaging — bundled services lift average order value.A 5% improvement in any one of these areas, applied consistently, transforms profitability over a year.How to Get Orders for Your 3D Printing BusinessThe channels that work for Indian home print farms:Instagram:- visual content, behind-the-scenes reels, and customer testimonials drive both B2C and B2B leadsMarketplaces:- JustDial, IndiaMART for B2B; Etsy, Amazon Custom for B2CLocal industrial outreach:- direct contact with local manufacturers, engineering firms, and design housesRepeat clients:- the biggest single profit driver. One reliable B2B account often delivers more revenue than 50 retail customersWord of mouth:- quality and delivery reliability are the strongest marketing channels long-termConsistency wins. A modest output of high-quality reels and posts every week beats sporadic bursts.Common Mistakes in Starting a Print FarmThe mistakes that hurt operators most:Buying too many printers too soon. Validate demand first; scale capacity second.Ignoring maintenance. A neglected printer becomes a non-printing printer fast.Skipping workflow planning. Improvised processes don’t scale; documented ones do.Underpricing. Underpricing wins orders but burns through cash.Spreading too thin across niches. Specialisation drives margin; generalists struggle.Avoiding these five mistakes is the single biggest improvement most new operators can make.Conclusion: Start Small, Scale ProfitablyA home 3D printing business in India can be highly profitable in 2026 — but only with disciplined execution. The technology, the market, and the supply chain are all in place. What separates successful operators from struggling ones is workflow discipline, niche focus, and patient capital reinvestment.Start with one or two printers from a reliable brand. Prove the niche. Build the workflow. Then scale gradually as demand justifies it.Explore the best 3D printers for print farm setups on 3idea Technology: https://www.3idea.in/products/3d-printersWithin 18–24 months, a focused home print farm can become a meaningful small business — generating consistent monthly profit while leaving room to grow.FAQsQ. Is a 3D print farm profitable in India?Ans:- Yes, with the right niche, reliable printers, and consistent operations, Indian print farms regularly deliver 30–50% net margins.Q. How much investment is needed to start a home print farm?Ans:- A serious starter setup costs ?50,000–?1,00,000. A small farm (5–10 printers) typically costs ?3–6 lakh.Q. What is a 3D print farm?Ans:- A 3D print farm is a setup of multiple 3D printers running in parallel to produce parts at production volume. Typical home farms range from 5 to 20 printers.Q. How long does it take to recover the investment?Ans:- Most well-planned home farms break even in 8–18 months, depending on niche, pricing, and operating discipline.Q. Which 3D printer is best for a beginner print farm in India?Ans:- The Anycubic Kobra 2 Neo for budget setups and the Bambu Lab A1 for premium starting points. Both are available on 3idea with India warranty.
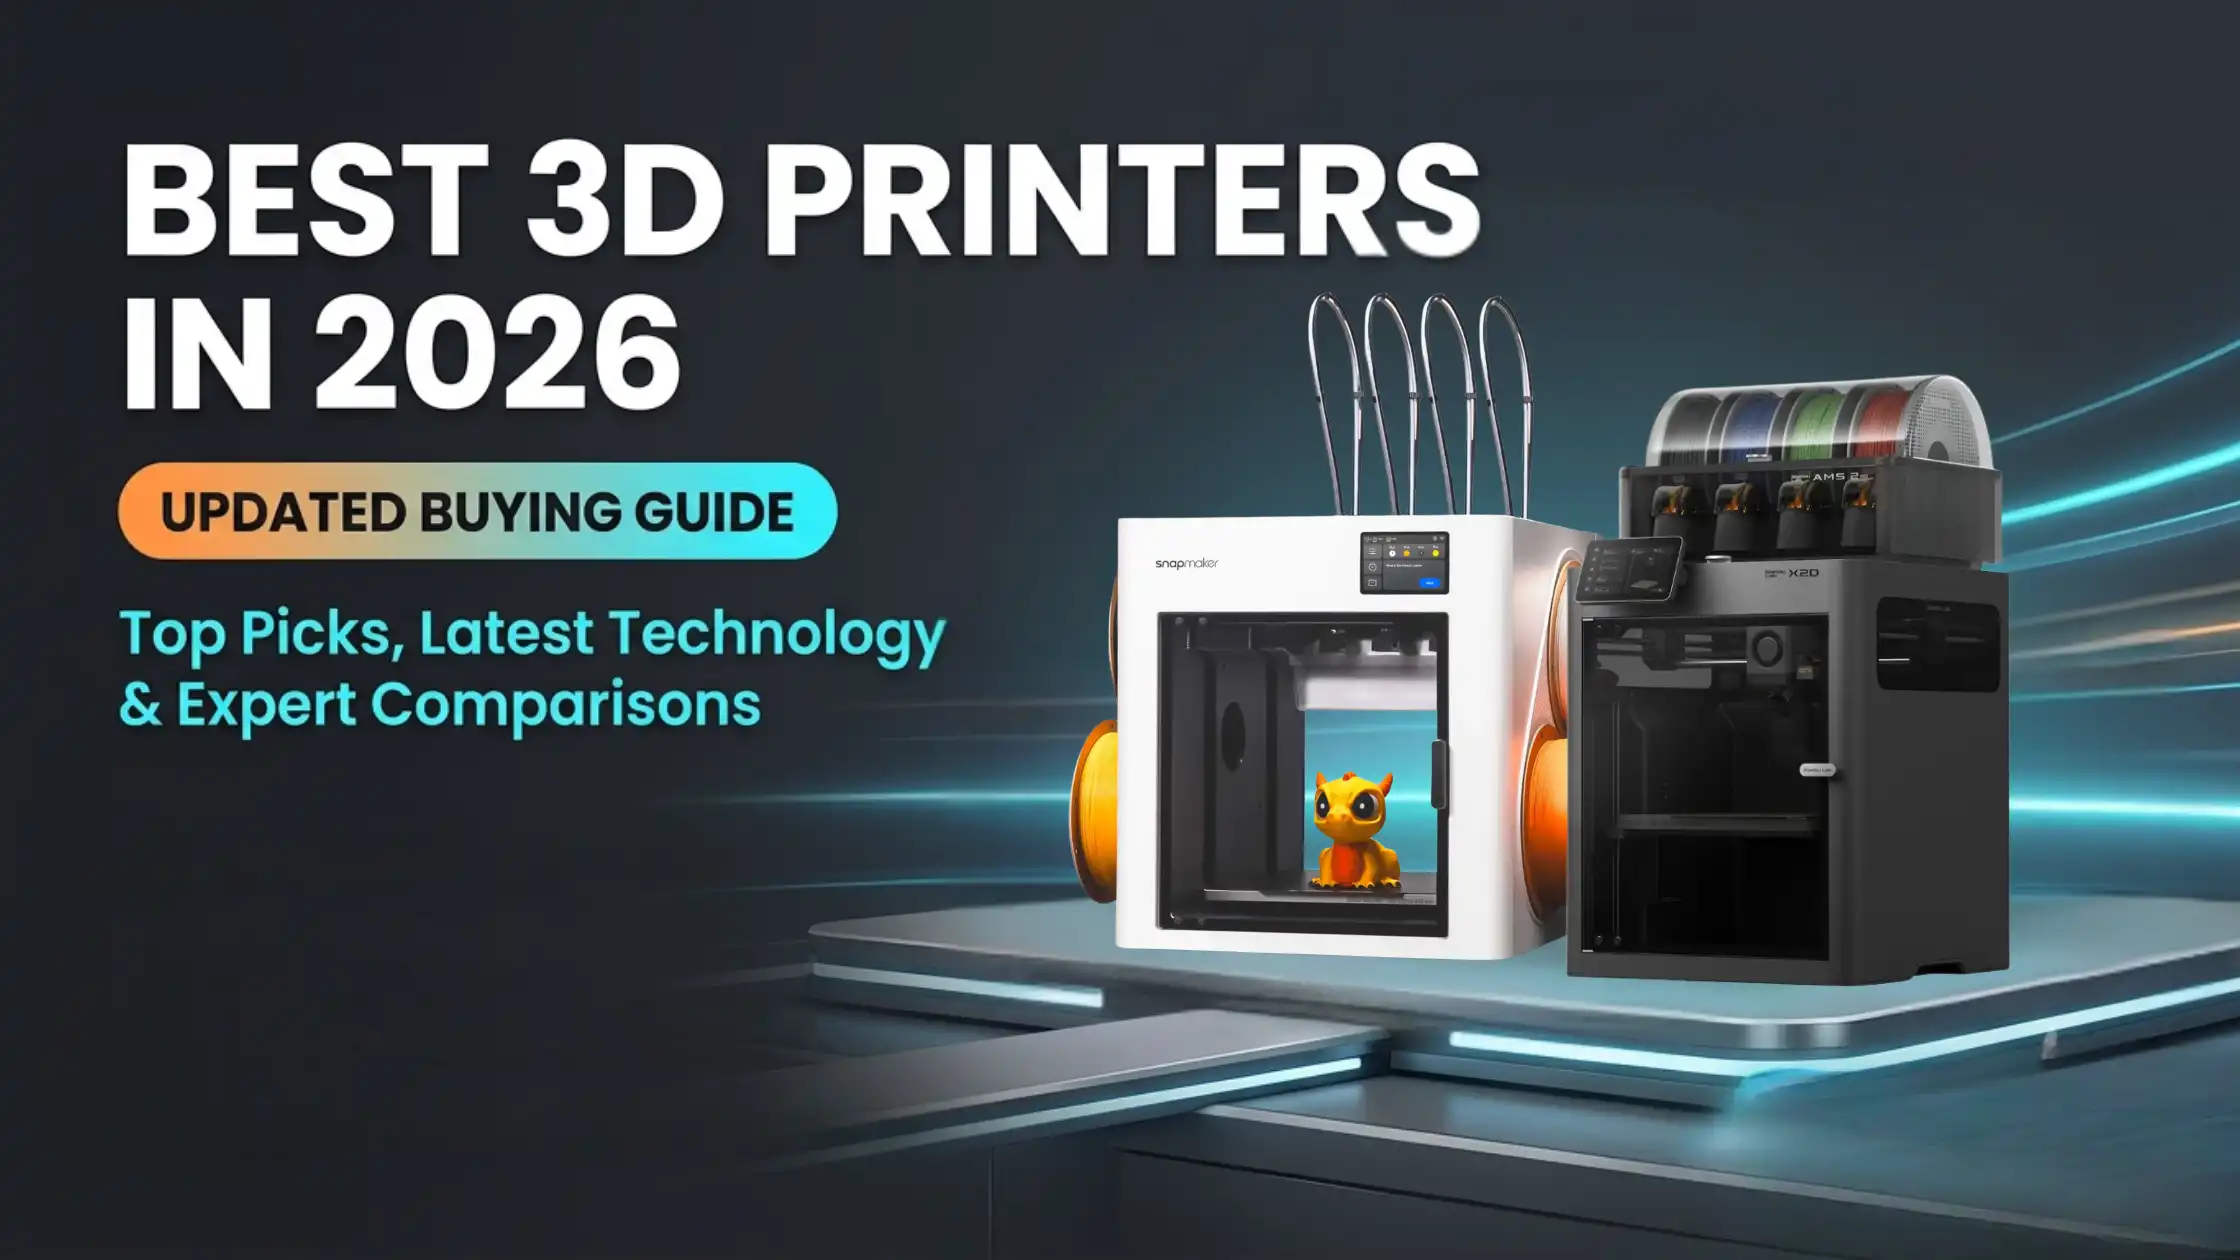
3D printing is moving faster than at any point in its history. The 2026 generation of printers brings genuine breakthroughs: CoreXY speed paired with reliability, multi-colour AMS systems that work out of the box, AI-driven print monitoring, and smart cloud ecosystems that let you manage a workshop from your phone. Choosing the best 3D printer in 2026 demands updated knowledge — last year’s “best” already isn’t.This guide compares the top picks across FDM, resin, CoreXY, and hybrid manufacturing systems, explains the latest technology trends, and helps you find the right machine for your specific budget and use case.Quick Picks: Best 3D Printers in 2026CategoryRecommended ProductBest ForBest OverallBambu Lab X1 Carbon ComboHigh-speed professional printingBest Budget PrinterAnycubic Kobra 3 ComboAffordable multi-colour printingBest for BeginnersBambu Lab A1 Mini ComboEasy setup with smart featuresBest Resin PrinterElegoo Saturn 4 UltraHigh-detail resin printsBest for BusinessSnapmaker U1Multi-functional production workflowsBest Laser + Maker SystemCreality Falcon2 Laser EngraverEngraving and cutting workflowsThese represent the top 3D printers in 2026 based on speed, reliability, print quality, ecosystem maturity, and ease of use. All are stocked on 3idea Technology with India warranty.Top 3D Printers of 2025–20261. High-Speed CoreXY 3D PrintersCoreXY-architecture printers dominate the premium FDM segment in 2026. Their motion system delivers significantly higher speeds and acceleration than traditional Cartesian designs, with better surface quality at speed.Recommended products:Bambu Lab P2S Combo — slightly more affordable but still high-speed. Enclosed chamber, AMS support, and the same Bambu reliability. Excellent for small businesses growing into production work.Best for: small businesses and prosumer usersUse case: functional parts, everyday productionBambu Lab A1 Combo — the friendliest entry into the Bambu ecosystem. Automatic flow calibration, multi-colour AMS Lite, quiet operation, and an intuitive interface. Excellent for home users who want professional-grade results.Best for: beginners and home usersUse case: everyday printing, hobby projects, creative work2. Multi-Colour Smart 3D PrintersMulti-colour and multi-material printing has gone mainstream. Automatic filament switching systems — Bambu’s AMS, Anycubic’s ACE Pro, Creality’s CFS — turn what was an expert workflow into a one-click operation.Recommended products:Anycubic Kobra 3 Combo — among the best budget-friendly multi-colour systems in 2026. Multi-colour printing, high-speed performance, automatic levelling, and a beginner-friendly setup. Ideal for budget-conscious creators wanting to explore multi-colour work.Best for: budget-conscious creatorsUse case: colourful models, hobby projects, gift itemsBambu Lab A1 Mini Combo — compact, smart, and beginner-friendly. Small footprint, multi-colour AMS Lite support, mobile-app integration, and automatic flow calibration. One of the easiest first printers to recommend.Best for: new users, students, and small home setupsUse case: education, creative printing, small-batch custom itemsThese systems are reshaping consumer 3D printing. Manual filament swaps are no longer a normal part of the workflow.3. Resin (SLA / MSLA) 3D PrintersResin printers deliver detail and surface finish that FDM cannot match. They’re essential for miniatures, dental, jewellery, and high-precision prototyping.Recommended products:Elegoo Saturn 4 Ultra — a powerful large-format resin printer with high-speed tilt-release technology and excellent print quality. The benchmark for serious resin work.Best for: professionals and serious creatorsUse case: miniatures, dental models, jewellery prototypes, detailed engineering partsElegoo Mars Series — affordable, reliable resin printing for hobbyists and beginners. Compact, beginner-friendly, and an excellent way to enter resin printing without major capital.Best for: hobbyists, miniature painters, beginnersUse case: detail-focused prints, miniatures, jewelleryFor high-detail work and small-batch production, resin remains the technology to choose.4. Entry-Level FDM 3D PrintersAffordable FDM remains the best entry point into 3D printing — and 2026’s entry-level machines are dramatically more capable than the entry-level of even two years ago.Recommended products:Anycubic Kobra Series (Kobra 2 Neo / Kobra 3) — reliable, affordable, beginner-friendly printers with auto bed levelling, easy assembly, and good print quality. Strong India service presence through 3idea.Best for: beginners and studentsUse case: learning, DIY projects, hobby workBambu Lab A1 Mini — one of the easiest plug-and-play printers available. Smart calibration, compact design, high reliability, and a polished software experience.Best for: first-time usersUse case: home projects, educational printingFor new buyers in India with a budget under ?30,000, the Anycubic Kobra and Bambu Lab A1 Mini are the two safest choices.5. Industrial Desktop 3D PrintersFor startups, design studios, and engineering teams, industrial desktop machines balance speed, reliability, and material flexibility.Recommended products:Snapmaker U1 — a premium all-in-one manufacturing system. Modular workflow, smart touchscreen ecosystem, multi-material support, and industrial-grade stability. Ideal for studios and small manufacturers needing flexibility.Best for: startups, design studios, small manufacturersUse case: product development, multi-process workflowsBambu Lab H2 Series — high-performance industrial 3D printing engineered for demanding engineering-grade materials. Dual-extrusion CoreXY architecture, high-temperature active chamber heating, automated nozzle alignment, multi-material AMS integration, and advanced thermal management. Built for enterprise environments requiring continuous production with peak material stability.Best for: industrial designers, R&D labs, and engineering teamsUse case: high-temp end-use parts, multi-material prototypes, functional testingThese machines bridge the gap between consumer and industrial systems — desktop footprint with production-grade capability.6. Laser Engraving and Hybrid Manufacturing SystemsLaser engraving has become integral to maker workflows. Many creators now combine 3D printing with engraving and cutting for end-to-end production capability.Recommended products:Creality Falcon2 Laser Engraver — a high-performance laser engraver from Creality. High engraving precision, fast cutting performance, material versatility, and safety-focused design.Best for: makers and small businessesUse case: engraving, cutting, customisation workSnapmaker Multi-Function Systems — modular machines that combine 3D printing, laser engraving, and CNC carving in one device.Best for: workshops and creators needing multi-process flexibilityUse case: complete maker production workflowsFor a studio or small workshop that needs both additive and subtractive capability, these multi-process machines deliver remarkable value.Comparison Table: Best 3D Printer 2026TypeSpeedQualityPriceBest Use CaseCoreXY FDMVery HighHighPremiumProduction, prototypingResin (MSLA)MediumVery HighMediumDetail work, miniaturesEntry-level FDMMediumMediumBudgetBeginners, learningIndustrial DesktopHighHighHighBusiness, engineeringLaser EngraverHighPrecision EngravingMedium–HighCustomisation workThis best 3D printer comparison 2026 highlights the key trade-offs between technologies and use cases. Match the technology to your application, not the other way round.Latest 3D Printing Technology in 2026Four trends are reshaping the industry.AI-Powered 3D PrintingModern printers now use AI for:Real-time error detection (spaghetti, lifted layers, missing prints)Print optimisation based on geometry analysisPredictive failure preventionAutomatic calibrationThe biggest practical impact: print success rates climb from 70–80% to 95%+ for users who let the AI do its job.High-Speed Printing SystemsThe combination of CoreXY motion, input shaping, high-flow hotends, and modern firmware has pushed practical print speeds 4–8× faster than just a few years ago. A part that took 12 hours on an Ender 3 in 2022 takes 2 hours on a Bambu Lab P1S in 2026 — at equal or better quality.Smart EcosystemsCloud printing, mobile-app control, remote monitoring, and automatic firmware updates have moved 3D printing from “operating a machine” to “managing a workflow”. The best 2026 printers are as much software products as hardware.Multi-Material and Multi-Colour SystemsAutomatic filament switching is now mainstream. The current generation handles soluble supports, advanced material combinations, and full-colour models that previously required industrial-class systems.These four trends are shaping the future of latest 3D printer technology workflows.FDM vs Resin 3D Printer (2026)A clear comparison for buyers choosing between the two technologies.FDM PrintersStrengths:More affordable across the rangeEasier maintenance and handlingLarger build volumes availableBetter for functional parts and engineering materialsWider material rangeBest for: home use, prototyping, functional mechanical parts, large printsResin PrintersStrengths:Extremely high detail and surface finishSmooth, almost moulded-looking outputSuperior dimensional precision for small partsBest for: jewellery, dental, miniatures, high-detail prototypes, jewellery casting mastersIn the FDM vs resin comparison, FDM wins on versatility, resin wins on detail and finish. Most professional users now have both.How to Choose the Best 3D PrinterBuyers in 2026 should evaluate four dimensions before deciding.1. BudgetSet a realistic total budget — printer plus filament, slicer software (if paid), accessories, and a contingency for spare parts. Avoid pushing the entire budget into the printer and leaving nothing for materials.2. Use CaseDecide whether your primary focus is hobby printing, business production, professional prototyping, or educational use. Each has different priorities — ease of use vs uptime vs raw quality.3. Skill LevelBeginners should prioritise printers with auto-levelling, smart calibration, and plug-and-play setup. Bambu Lab A1 Mini and Anycubic Kobra 2 lead this category.4. Material CompatibilityCheck support for the materials you actually plan to use:PLA — basic, every printer supports itPETG — most printers handle it wellABS / ASA — need an enclosed chamberNylon / PA-CF / PETG-CF — need high-temp hotend and an enclosureTPU — direct-drive extruder preferredMatch the printer to the materials, not the materials to the printer.Beginner Mistakes When Buying 3D PrintersThe most common (and most expensive) buying mistakes:Buying purely on price. A ?15,000 printer with no India service costs more than a ?35,000 printer with strong service over three years of use.Ignoring spare-parts availability. Imported-only spares add weeks of downtime.Choosing unsupported brands. Quirky brands look attractive but lack community and slicer support.Overlooking print speed. Slow printers waste hours of operator time daily.Ignoring the software ecosystem. A great printer with a bad slicer is a daily frustration.A little research upfront prevents months of regret.Best 3D Printer for Different Use CasesUse CaseRecommended TypeTop ChoicesHome useEntry-level FDMAnycubic Kobra series, Bambu Lab A1 MiniSmall businessIndustrial DesktopBambu Lab H2 Series, Snapmaker U1High detailResin PrinterElegoo Saturn 4 Ultra 16KFast productionCoreXY FDMBambu Lab P2SMulti-colour printingSmart FDM with AMSBambu Lab A1 Combo, Anycubic Kobra 3 ComboLaser engravingLaser SystemsCreality Falcon2, Snapmaker laser modulesUse this as your starting point. Each row reflects the strongest current pick in its category.ConclusionThe best 3D printer in 2026 depends entirely on your specific workflow, budget, and goals. The good news: the technology has matured to the point that almost every category has a clear best-in-class machine.The latest generation offers:Significantly faster print speeds via CoreXY and input shapingAI-powered print monitoring that catches failures in real timeSmart cloud ecosystems for remote managementMulti-colour support that works out of the boxBetter overall reliability than any previous generationBambu Lab leads the premium high-speed category. Anycubic continues to dominate the budget-friendly segment. Elegoo remains the strongest in resin. Creality and Snapmaker are expanding the hybrid manufacturing landscape. All are stocked on 3idea Technology with India warranty, technical support, and spare-part availability.Explore the full range on 3idea: https://www.3idea.in/products/3d-printersChoose the right machine, and 3D printing unlocks powerful opportunities for creativity, business, and production.FAQsQ. Which is the best 3D printer in 2026?Ans: High-speed CoreXY printers like the Bambu Lab H2 Series are currently the best overall option. For budget-conscious buyers, the Anycubic Kobra 3 Combo offers excellent value.Q. What is the latest 3D printing technology?Ans: AI-powered print monitoring, smart cloud ecosystems, multi-material AMS-style systems, and high-speed CoreXY motion are the dominant 2026 trends.Q. Which 3D printer should I buy?Ans: Choose based on your budget, primary use case, skill level, and the materials you plan to use. For most beginners in India, the Bambu Lab A1 Mini or Anycubic Kobra 2 Neo are the safest first choices.Q. Is resin printing better than FDM?Ans: Resin printing offers better detail and surface finish; FDM is more affordable, easier to maintain, and better for functional parts. Most professional users now have both technologies.Q. Which printer is best for beginners?Ans: The Bambu Lab A1 Mini and Anycubic Kobra 2 Neo are the two best beginner-friendly options in 2026.
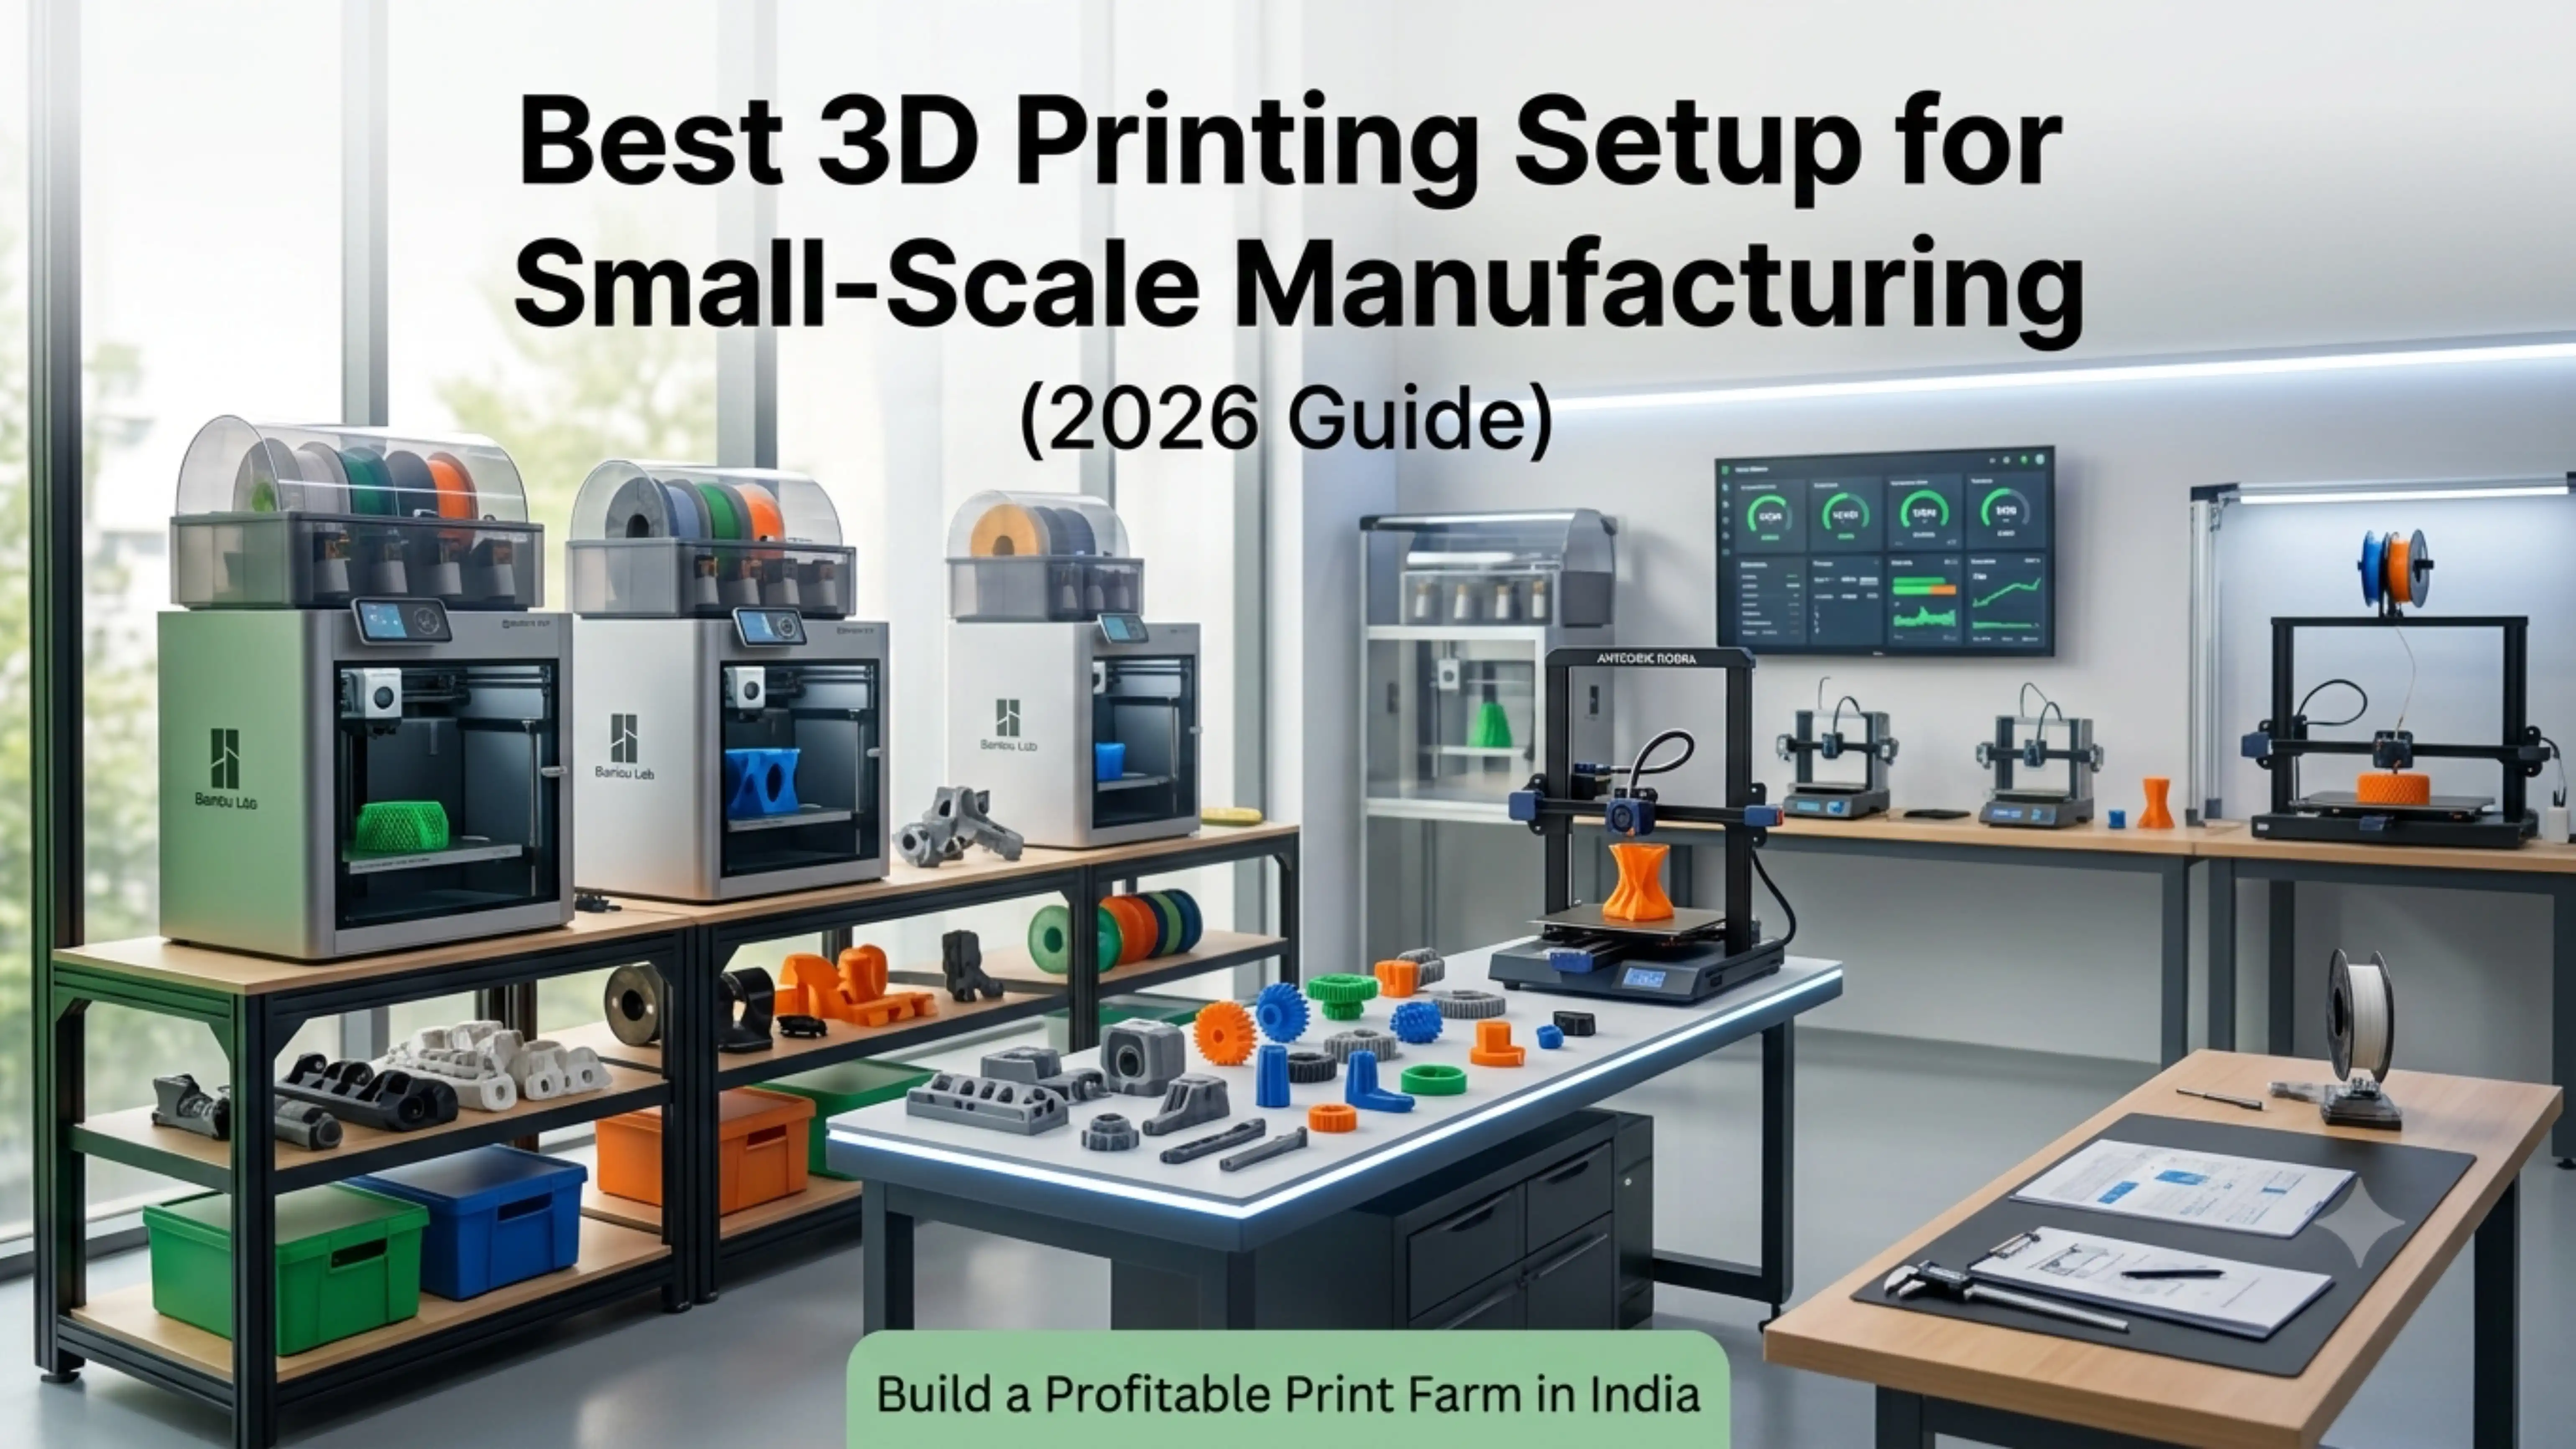
Small-scale manufacturing has changed permanently. Where once it required tooling investment, dedicated machinery, and minimum order quantities, today a well-designed 3D printing business setup lets entrepreneurs serve real production demand from a single room — and scale from there into a multi-machine print farm without massive capex.This guide explains how to build that setup, what machines to choose, how much it really costs, and how to run a production workflow that delivers consistent quality and meaningful profit.What Is a 3D Printing Business Setup?A 3D printing business setup combines machines, materials, software, and workflow systems to produce parts using additive manufacturing — at production volume, not as a hobby.The setup covers:Printers chosen for uptime, throughput, and material supportMaterials with consistent quality and reliable supplySoftware for design, slicing, and production managementWorkflow that handles design intake, printing, post-processing, QC, and despatchPhysical space with proper power, ventilation, and organisationTreat the setup as a single integrated system. Buying just the printers and improvising the rest is the most common reason new print farms underperform.Why Choose 3D Printing for Small-Scale Manufacturing?Conventional manufacturing requires significant upfront capital and locks you into specific products. Tooling for injection moulding costs lakhs and only makes sense for thousands of identical parts.3D printing inverts every one of those constraints:No tooling cost. Print the first part for the same per-part cost as the thousandth.Fast iteration. Design changes go from CAD to production in hours, not weeks.Low capital entry. A serious small-business setup starts at ?2–4 lakh.Customisation profitability. Each part can be unique without raising cost.Inventory reduction. Print on demand instead of holding warehouse stock.For Indian small manufacturers and entrepreneurs, the model fits brilliantly: low risk to start, fast path to revenue, and a scaling path that doesn’t require massive reinvestment.Cost Breakdown: 3D Print Farm Setup Cost in IndiaRealistic investment brackets:Beginner Setup (1–2 Printers)Printers: ?15,000–?40,000 each (Anycubic Kobra, Creality Ender 3 V3)Filament and starter materials: ?10,000Workspace setup (table, lighting, storage): ?5,000Software: free (PrusaSlicer, OrcaSlicer, Cura)Total: ?50,000–?1,00,000Intermediate Setup (5–10 Printers)Printers: ?1.5L–?4L (mix of Bambu Lab P1S and Anycubic Kobra)Material stock: ?50,000–?1,00,000Workspace organisation, racks, ventilation: ?50,000Power backup (UPS or inverter): ?40,000–?80,000Software (LightBurn, professional CAD): ?20,000–?50,000Total: ?3L–?7LAdvanced Setup (20+ Printers, Automation)Industrial-grade printers (Bambu Lab X1E, Snapmaker U1): ?10L+Material handling, drying, and storage systems: ?2L+Print farm management software / MES integrationDedicated workspace with proper electrical and ventilationTotal: ?15L–?50L depending on automationThese ranges assume Indian market pricing as available on 3idea Technology. Explore production-grade 3D printers from leading brands: https://www.3idea.in/products/3d-printers.Step-by-Step: How to Build a Print FarmA practical roadmap:Choose the right printers. Start with reliable, similar machines — running five identical Bambu Lab P1S units is operationally far simpler than running five different printers. Reliability and uptime matter more than top speed.Set up a production-grade workspace. Stable power, adequate ventilation, dust-free storage for filament, organised material flow.Plan the production workflow. Design intake ? slicing ? printer assignment ? printing ? post-processing ? QC ? despatch. Document each step.Manage materials carefully. Filament drying, consistent brands, batch tracking — these decide whether your output is consistent at scale.Start small and scale. Begin with one or two machines, prove the workflow, and add capacity only after demand justifies it.This is the standard playbook for every successful print farm we see.How Many 3D Printers Do You Need?The answer depends on production volume and average print time.A rough rule of thumb:1–2 printers: prototyping service, occasional custom orders (under 50 prints/month)5–10 printers: small business with consistent orders (50–500 prints/month)20–50 printers: commercial print farm (500–2000+ prints/month)100+ printers: industrial-scale operationMost small businesses settle around 8–15 printers — enough to deliver consistent capacity without crossing into operational complexity that demands dedicated farm management software.Best 3D Printers for Small Manufacturing BusinessThe qualities that matter most for production work:High uptime — minimum 95% reliability across long print sessionsConsistent dimensional accuracy — parts must be interchangeable between machinesStrong material support — at least PLA, PETG, ABS, plus engineering filamentsNetworked operation — Wi-Fi or LAN for remote monitoringStrong service ecosystem — India-stocked spare parts and warranty supportTop picks for Indian print farms in 2026:Bambu Lab P1S — the workhorse of modern print farms. High speed, AMS multi-colour, enclosed chamber, strong reliability.Bambu Lab A1 Mini Combo — budget-friendly farm-builder. Great for small-part production.Anycubic Kobra 2 / Kobra 3 Combo — strong value for budget setupsSnapmaker U1 — premium all-in-one for multi-process workshopsCreality K1 / K1C — high-speed CoreXY at competitive priceAll available on 3idea Technology with India warranty and technical support.Production Workflow for EfficiencyA streamlined workflow is what separates a print farm that runs itself from one that consumes all your time.Five workflow elements to invest in:Standardised slicer profiles — one profile per printer-material combination, version controlledPrint queue management — physical or software queue showing which printer is running which jobMaterial tracking — log every spool’s brand, batch, drying statusQC checkpoint — physical inspection station with calibrated callipers and a defect logDespatch process — sealed packaging, labelling, courier handoverEach element looks small. Together they compress operating time by 30–50% and make scaling possible.Scaling Roadmap: From Home to FactoryThe typical scaling stages for a successful print farm:Stage 1: Home Setup (1–2 printers)Prove the workflow. Take first paid orders. Build a portfolio. Reinvest profit into the second machine.Stage 2: Small Print Farm (5–10 printers)Move to a dedicated room or small workshop. Standardise materials. Hire first part-time helper for post-processing. Establish recurring B2B clients.Stage 3: Production Print Farm (20+ printers)Move to commercial premises. Hire full-time operators. Implement print farm management software. Diversify into multiple product lines or services.The progression is gradual. Each stage funds the next.ROI Example: 3D Printing Business ProfitA simple illustrative example for a 5-printer setup:Capacity: 5 printers × 18 hours/day × 26 days = 2,340 print-hours/monthAverage revenue per print-hour: ?150–?250 (typical for small custom-part work)Gross monthly revenue: ?3.5L–?5.8LMaterial costs: ?50,000–?80,000Power, rent, consumables: ?30,000–?50,000Net monthly profit: ?2.5L–?4LAdjust for your niche. Customisation businesses (custom keychains, gifts) typically run at the lower end; engineering prototypes and short-run manufacturing run at the higher end.Common Challenges and SolutionsPredictable challenges and how operators solve them:High production cost ? bulk filament purchases, switch to in-house 3idea filaments, optimise infill and wall countsMachine downtime ? preventive maintenance schedule, spare parts inventory, redundant capacityQuality drift ? regular calibration, batch tracking, QC checkpointsClient acquisition ? strong online portfolio, B2B partnerships, repeat-customer focusEach is solvable with discipline. Most don’t require additional capital — just better process.How to Increase Efficiency in a Print FarmOperational efficiency wins where production margins are tight:Automate where possible — auto bed levelling, networked monitoring, batch slicingTrack every machine’s uptime — fix the worst-performing machines firstPlan jobs intelligently — group similar materials, schedule long prints overnightOptimise print settings for time/quality balance — not every part needs production-grade surface finishBuild a settings library — never re-tune the same filament twiceA well-run print farm spends most operator time on design and customer service, not on babysitting machines.3D Printing Business IdeasThe most profitable categories for small print farms in India 2026:Custom gifts and personalised products — high margin, strong online demandEngineering prototypes for local industry — B2B, predictable ordersSpare parts for machinery, appliances, vehicles — recurring revenueEducational models and kits — sold to schools and edtech companiesArchitectural models — for real estate developers and architectsCosplay and miniatures — strong niche communitiesMatch the niche to your local market and skill base. Specialisation drives margin; generalists struggle.How to Get Clients for Your 3D Printing BusinessThe channels that work best for Indian print farms:Instagram and Pinterest — visual platforms ideal for showcasing print qualityLinkedIn — for B2B prototyping and engineering servicesLocal industrial partnerships — direct outreach to manufacturers needing prototypesOnline marketplaces — JustDial, IndiaMART for B2B; Etsy and Amazon Custom for B2CRepeat clients — the single largest profit driver. Quality + reliability + delivery = sustained businessConsistent quality and reliable delivery build the reputation that drives long-term growth.ConclusionA 3D printing business setup is one of the most accessible, scalable, and profitable production models available to Indian entrepreneurs in 2026. The capital required is modest, the technology is mature, and the path from a single printer to a meaningful business is well-trodden.Start small, build the workflow first, and scale only after operations are stable. Within 18–24 months a disciplined operator can build a small print farm that delivers ?3–5 lakh in monthly profit.Explore 3D printers, filaments, and production-grade equipment on 3idea Technology: https://www.3idea.in/products/3d-printersFAQsQ. Is the 3D printing business profitable in India?Ans: Yes, with disciplined planning, niche focus, and operational consistency, 3D printing businesses regularly deliver 30–50% net margins.Q. How much investment is needed to start?Ans: A serious starter setup costs ?50,000–?1,00,000. A small print farm (5–10 printers) costs ?3–7 lakh.Q. What is a 3D print farm?Ans: A 3D print farm is a setup of multiple 3D printers running in parallel to produce parts at production volume. Typical print farms range from 5 to 100+ machines.Q. How long does it take to recover the investment?Ans: Most well-planned setups break even in 6–18 months, depending on niche and operating discipline.
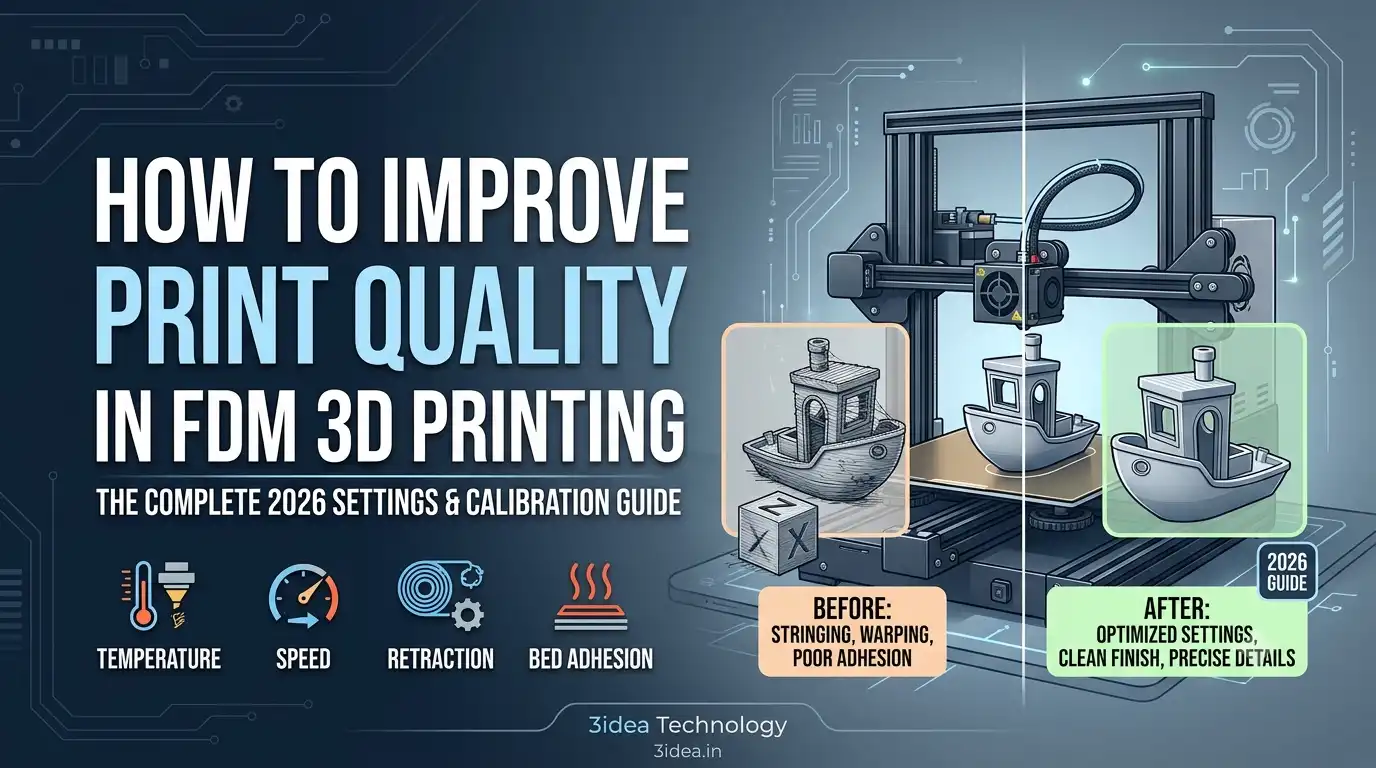
Every FDM user eventually hits the same wall: prints come off the bed looking rougher, stringier, or less accurate than they should. The hardware is capable; the slicer is full of settings; the filament is good — but the results are inconsistent. The gap between mediocre and excellent print quality is almost entirely about systematically dialling in the right settings.This complete FDM 3D printing settings guide walks through the changes that deliver the biggest improvements, with practical values to start from and the calibration sequences that lock in consistent quality.Quick Wins: Top 5 Settings to Instantly Improve Print QualityIf you only have an hour to spend on improving prints, start here:Reduce layer height to 0.12 mm for high-detail prints (from a default of 0.2 mm)Re-level the bed and calibrate the first layer carefullyTune nozzle temperature with a temperature tower for your specific filamentAdjust retraction settings to eliminate stringingSlow down print speed to 40–60 mm/s for visible exterior surfacesThese five adjustments deliver the bulk of the visible quality improvement. Everything else is refinement.Layer Height and ResolutionLayer height is the single biggest knob for surface finish. Lower values produce smoother surfaces with finer detail; higher values print faster but show more visible layer lines.Recommended starting points:0.08–0.12 mm: high-detail work — miniatures, jewellery prototypes, fine-feature parts0.16–0.20 mm: general-purpose printing — the most common range0.24–0.32 mm: fast prototyping where surface finish is less criticalMatch layer height to the smallest critical detail on your model. For everyday prints, 0.16 mm is an excellent balance of speed and quality.Temperature SettingsIncorrect nozzle and bed temperatures cause weak layers, stringing, and poor adhesion in roughly equal measure.Recommended starting ranges:PLA: 200–215 °C nozzle, 60 °C bedPETG: 230–245 °C nozzle, 80 °C bedABS: 230–250 °C nozzle, 100–110 °C bed (enclosure required)TPU: 220–235 °C nozzle, 50 °C bedPLA+ / PLA Pro: 210–225 °C nozzle, 60 °C bedPrint a temperature tower — a structured calibration print that tests multiple temperatures in one job — to find the exact sweet spot for your specific filament and machine.Print Speed OptimisationSpeed and quality trade off directly. Higher speeds reduce accuracy and surface finish; slower speeds improve both at the cost of print time.Practical speed guidance:Outer walls (visible surface): 30–50 mm/sInner walls and infill: 60–80 mm/sTravel moves: 150–200 mm/sFirst layer: 20–30 mm/s regardless of overall speedModern high-speed printers (Bambu Lab X1, Anycubic Kobra 3, Creality K1) handle much higher speeds with input shaping and pressure advance, but the principle holds: slower exterior walls = better surface finish.Retraction SettingsRetraction prevents oozing and stringing during travel moves. Bad retraction settings are the single biggest cause of stringy, blobby prints.Starting values:Bowden extruders: 5–6 mm retraction distance, 40–60 mm/s speedDirect drive extruders: 0.8–2 mm retraction distance, 30–40 mm/s speedPETG: start with 5 mm and tune carefully (PETG strings more than PLA)TPU: minimal retraction — flexible filament resists clean retractsPrint a retraction tower to dial in the exact value for your filament-printer combination. Once tuned, retraction settings are stable for the life of that filament type.Bed AdhesionA reliable first layer is the foundation of every successful print. Bad bed adhesion ruins prints before they begin.Steps to lock in great adhesion:Clean the bed with 91%+ isopropyl alcohol before every important printRun a proper bed-level routine (auto or manual mesh)Tune Z-offset until first-layer extrusion is slightly squished — wider than the nozzle widthSlow first-layer speed to 20–30 mm/sFor tall or narrow parts, add a brim (5–8 mm)For ABS / nylon / PETG, use a heated bed and consider an enclosureBed adhesion is a one-time investment in setup, not a daily struggle.Settings Cheat Sheet (Quick Reference)SettingRecommended RangePrimary ImpactLayer height0.12–0.20 mmSurface quality, detailNozzle temp200–215 °C (PLA)Layer bondingPrint speed40–60 mm/sAccuracy, surfaceRetraction4–6 mm (Bowden)Stringing controlBed temp50–60 °C (PLA)AdhesionCooling fan100% from layer 3Overhang qualityUse this as a starting point. The values above are deliberately conservative — they almost never fail. Tune from there for your specific filament and use case.Step-by-Step Calibration GuideA complete one-time calibration sequence that locks in quality for months:Bed levelling. Auto-level mesh or manual paper test.Z-offset / first layer. Print a one-layer calibration square and tune until extrusion looks slightly squished.E-steps calibration. Confirm 100 mm commanded extrusion actually delivers 100 mm of filament.Flow rate. Print a single-wall calibration cube and measure wall thickness; adjust flow accordingly.Temperature tower. Find the cleanest temperature for your filament.Retraction tower. Find the cleanest retraction for your printer-filament combination.Acceleration / pressure-advance tuning (advanced).Run this sequence once per filament change or every few months. It is the single highest-leverage time investment a 3D printing user can make.Common Problems and FixesStringingCause: temperature too high, retraction insufficientFix: drop nozzle temp 5–10 °C, increase retraction distance/speedWarpingCause: uneven cooling, especially with ABS or large PLA printsFix: heated bed at correct temperature, enclosure for ABS, brim for gripLayer LinesCause: layer height too high, inconsistent extrusionFix: reduce layer height, calibrate flow rate, check belt tensionUnder-ExtrusionCause: clogged nozzle, low flow rate, moist filamentFix: clean nozzle (cold pull), increase flow, dry filament if neededOver-ExtrusionCause: flow rate too high, e-steps miscalibratedFix: calibrate e-steps, reduce flow rate by 2–5%Filament Quality MattersEven perfect settings cannot rescue bad filament. The qualities that affect printability:Tight diameter tolerance (±0.02 mm or better)Consistent colouring and roundnessProperly sealed and dry packagingLow moisture contentStick with trusted brands — Bambu Lab, eSUN, 3idea’s in-house filament range, and Polymaker for premium work. Store filament in airtight containers with desiccant; moist filament is the single biggest cause of inconsistent quality. Browse premium FDM filaments on 3idea: https://www.3idea.in/products/filaments.Slicer Settings OptimisationModern slicers — Cura, PrusaSlicer, OrcaSlicer, Bambu Studio — offer an enormous tuning surface. The settings worth focusing on first:Wall count (3+ for strong parts, 2 for fast prototypes)Top/bottom layers (5+ for clean top surfaces)Infill pattern (gyroid for strength, lines for speed)Infill density (15–25% for visual parts, 40%+ for functional)Combing (reduces travel, reduces stringing)Coasting (for very stringy filaments)Pressure advance / linear advance (sharper corners, advanced)A well-tuned slicer profile, paired with a calibrated printer, produces consistently excellent prints with almost no babysitting.Pro Tips for Better ResultsHard-earned habits from experienced users:Use a smaller nozzle (0.2 mm) for ultra-fine detail; a larger nozzle (0.6 or 0.8 mm) for fast prototypingKeep ambient temperature stable — drafts cause uneven cooling on large printsLubricate linear rails and lead screws every few monthsReplace nozzles routinely — they wear faster than most users expectUse mesh bed levelling if the bed is even slightly warpedThese are the small habits that compound into long-term reliability.Before vs After: The Visible ImprovementA printer dialled in by this guide vs an out-of-the-box default setup will produce:30–50% better surface finish on visible walls70%+ reduction in stringingNear-zero first-layer failuresPrint-to-print consistency that lets you treat the printer as a production toolThe improvement is dramatic. The settings to get there are well-understood.ConclusionImproving FDM print quality isn’t magic — it’s a disciplined sequence of calibration steps and informed settings choices. Run the full calibration sequence once, build a settings library for the filaments you actually use, and treat your printer as a production tool rather than a hobby project.The result is consistently excellent prints, fewer failed jobs, and far less wasted filament.Browse FDM 3D printers, premium filaments, and upgrade accessories on 3idea Technology: https://www.3idea.in/products/3d-printers